50
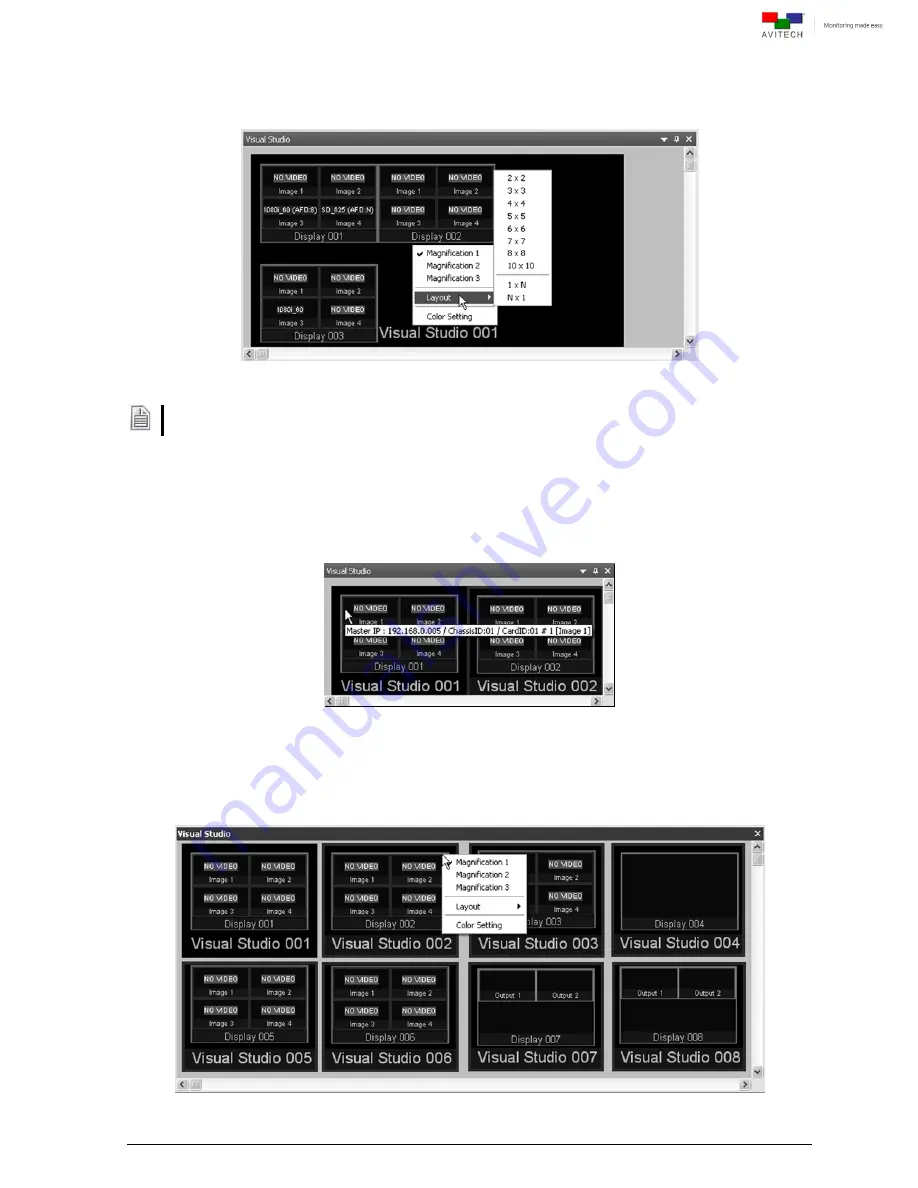
Step 3. On the Visual Studio tab select the desired layout by right-clicking anywhere and clicking
“Layout.” Select from 2×2 up to 10×10 as possible grid positions, as well as specify a fixed 1
row by “N” columns or “N” rows by 1 column
Figure 4-26
Visual Studio: Select the “Layout”
If more than one card ID was assigned to a Visual Studio group, initially the card IDs appearing on the
Visual Studio tab may be stacked on top of each other. Assign the “Layout” to display the other card ID.
Quick Information
Positioning the cursor on top of a window will provide a quick information of the window. As
well as the prompt “Double-click
Æ
(window label)” to allow you to quickly bring up the
particular group’s layout view in the main window of Phoenix-Q.
Figure 4-27
Visual Studio: Window Quick Information
Magnification
Right-click anywhere on a window to select from the 3 available magnifications.
Figure 4-28
Visual Studio: Select the Magnification
Содержание Titan 9000 series
Страница 1: ...User Manual Titan 9000 Multiviewing experience taken to the next level Revision 1 0 0 May 2014 ...
Страница 103: ...97 Image Layout and Alarm Trigger Change Audio meter scale ...
Страница 117: ...111 Figure A 4 LCD Panel Menu Tree ...
Страница 134: ...128 Step 5 Manually re size and rearrange the 5 windows to obtain the below example display ...
Страница 145: ...139 Sample illustration 3 Figure C 3 Audio Output From Chassis ID 2 Card ID 4 Image 3 Plus Chassis ID 1 Headset ...


