120
For a 2
×
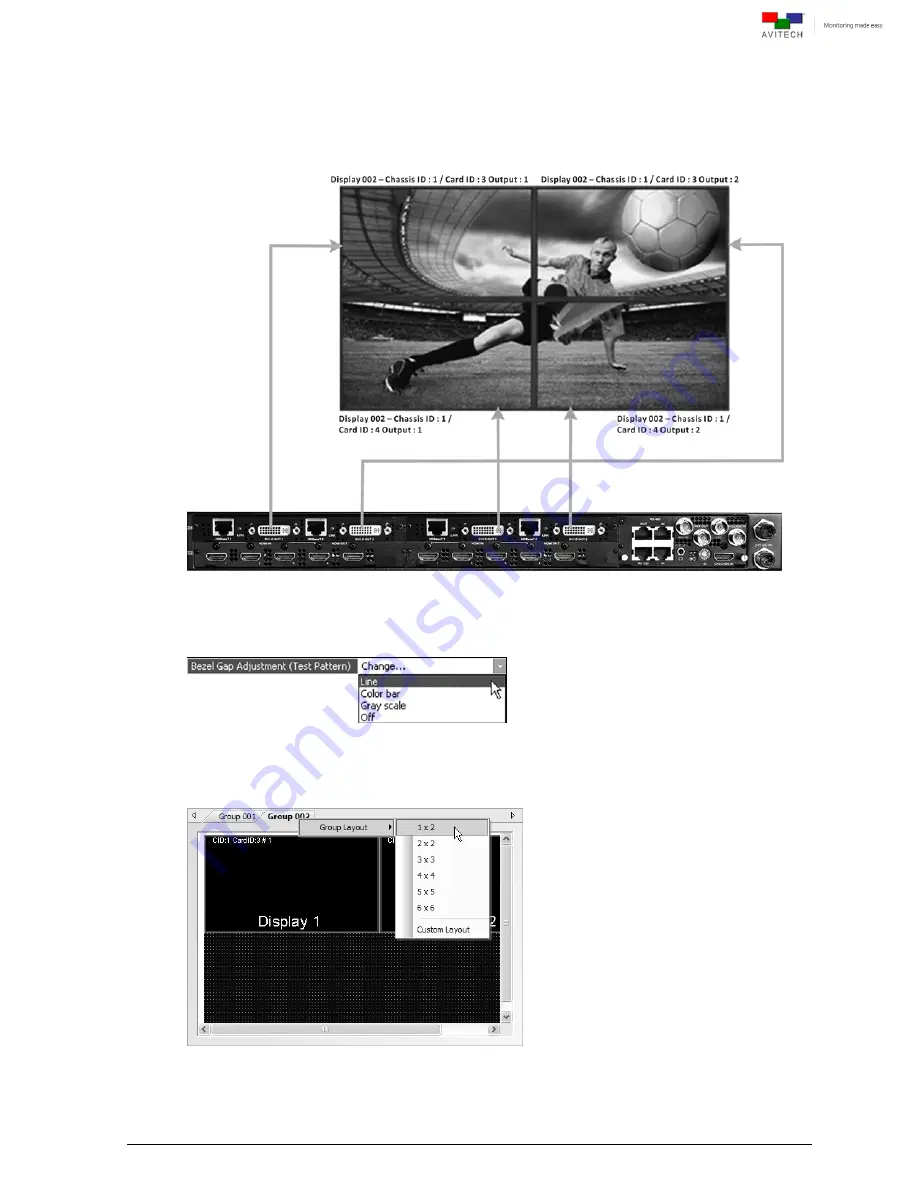
2 wall display configuration, with 4 monitors (identical model and size of monitors)
placed together on a wall –
connect the first monitor to Card ID 3 DVI-D OUT 1 port,
second monitor to Card ID 3 DVI-D OUT 2 port,
third monitor to Card ID 4 DVI-D OUT 1 port,
and fourth monitor to Card ID 4 DVI-D OUT 2 port.
Step 2. Enable the “Line” test pattern to align the 2 monitor display for a 1
×
2 wall display configuration.
Or align the 4 monitor display for a 2
×
2 wall display configuration.
Step 3. For 1
×
2 wall display configuration only
Select the 1
×
2 “Group Layout” display configuration.
Step 4. Perform “Bezel Gap Adjustment” in Phoenix-Q.
Содержание Titan 9000 series
Страница 1: ...User Manual Titan 9000 Multiviewing experience taken to the next level Revision 1 0 0 May 2014 ...
Страница 103: ...97 Image Layout and Alarm Trigger Change Audio meter scale ...
Страница 117: ...111 Figure A 4 LCD Panel Menu Tree ...
Страница 134: ...128 Step 5 Manually re size and rearrange the 5 windows to obtain the below example display ...
Страница 145: ...139 Sample illustration 3 Figure C 3 Audio Output From Chassis ID 2 Card ID 4 Image 3 Plus Chassis ID 1 Headset ...


