3
Remote Control
Name
Function
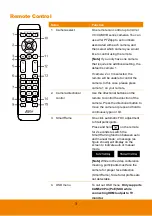
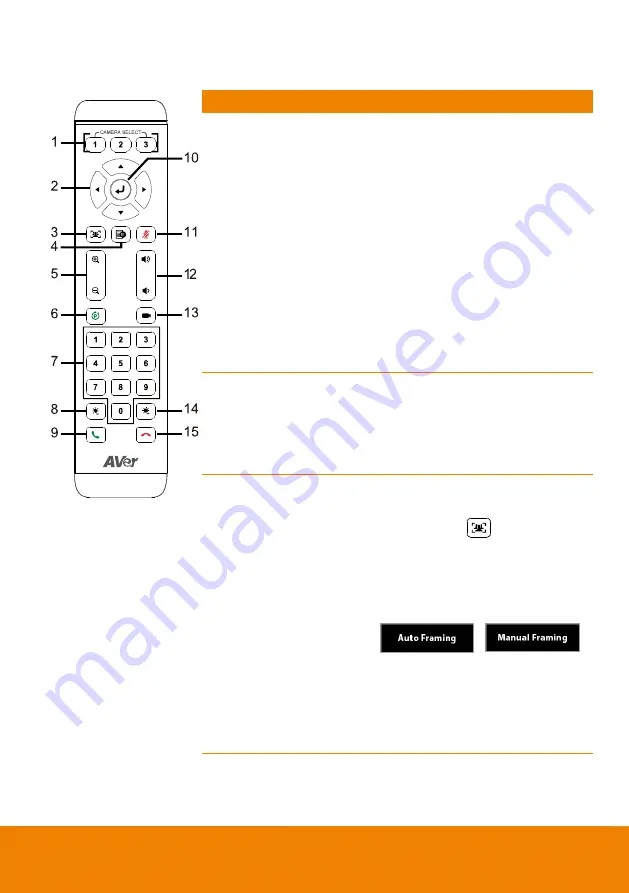
1. Camera select
One remote can control up to 3 AVer
VC/CAM/VB series cameras. You can
use AVer PTZApp to set numbers
associated with each camera, and
then select which camera you would
like to control using the remote.
[Note]
If you only have one camera
that requires no additional setting, the
default is camera 1.
If camera 2 or 3 is selected, the
remote will be unable to control the
camera. In this case, please press
camera 1 on your remote.
2. Camera directional
control
Use the directional buttons on the
remote to control the direction of the
camera. Press the directional button to
move the camera or press and hold to
continuously pan or tilt.
3. SmartFrame
One-click automatic FOV adjustment
to fit all participants.
Press and hold
on the remote
for 2 seconds to switch the
SmartFraming function between auto
and manual mode; a message (as
figure shown) will display on the
screen to indicate auto or manual
mode.
[Note]
While in the video conference
meeting, participants must face the
camera for proper face detection
(SmartFrame). Side facial profiles are
not detectable.
4. OSD menu
To call out OSD menu.
Only supports
CAM520 Pro(PoE) SKU while
connecting HDMI output to TV
monitor.
Содержание CAM520 Pro
Страница 1: ...CAM520 Pro User Manual ...
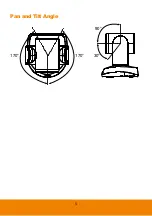
Страница 14: ...5 Pan and Tilt Angle 170 170 90 30 ...
Страница 58: ...49 Time Format Select the time format In live screen view select System Time Format 24 Hour or 12 Hour ...
Страница 69: ...60 Reset Password Set Web access password back to default The default password is aver4321 ...
Страница 75: ...66 Allow Remote Access Set the Web access authority Select Camera Allow remote access YES or NO ...


