


Job Aid: Replacing the hard drive on the Avaya S8510 server
38 Job Aids for Field Replacements (FRUs) for the Avaya S8510 Server
Note:
Note:
Only the two-color
drive status
LED provides fault condition information; the
single-color drive activity LED does not.
3. Determine which slot number holds the defective hard drive and proceed with
defective hard drive from the S8510 server
Remove the defective hard drive from the S8510 server
!
WARNING:
WARNING:
Do NOT remove the healthy, active hard drive. If you inadvertently remove the
active hard drive, you
cannot
plug it back in. You must:
- Contact the customer and arrange for a maintenance window.
- When the maintenance window starts, cleanly power down the server.
- Re-insert the active hard drive in its original slot.
- If still installed, remove the drive from the other slot, mark it “bad,” and set it aside.
- Power-up the server with only the healthy drive present and confirm normal
operation when the server comes up.
- Proceed with replacing the defective hard drive.
To remove the defective hard drive from the S8510 server:
1. Pinch the two tabs of the drive carrier release handle together (Note 1 in
replace the hard drive on the S8510 server (bay 1 shown)
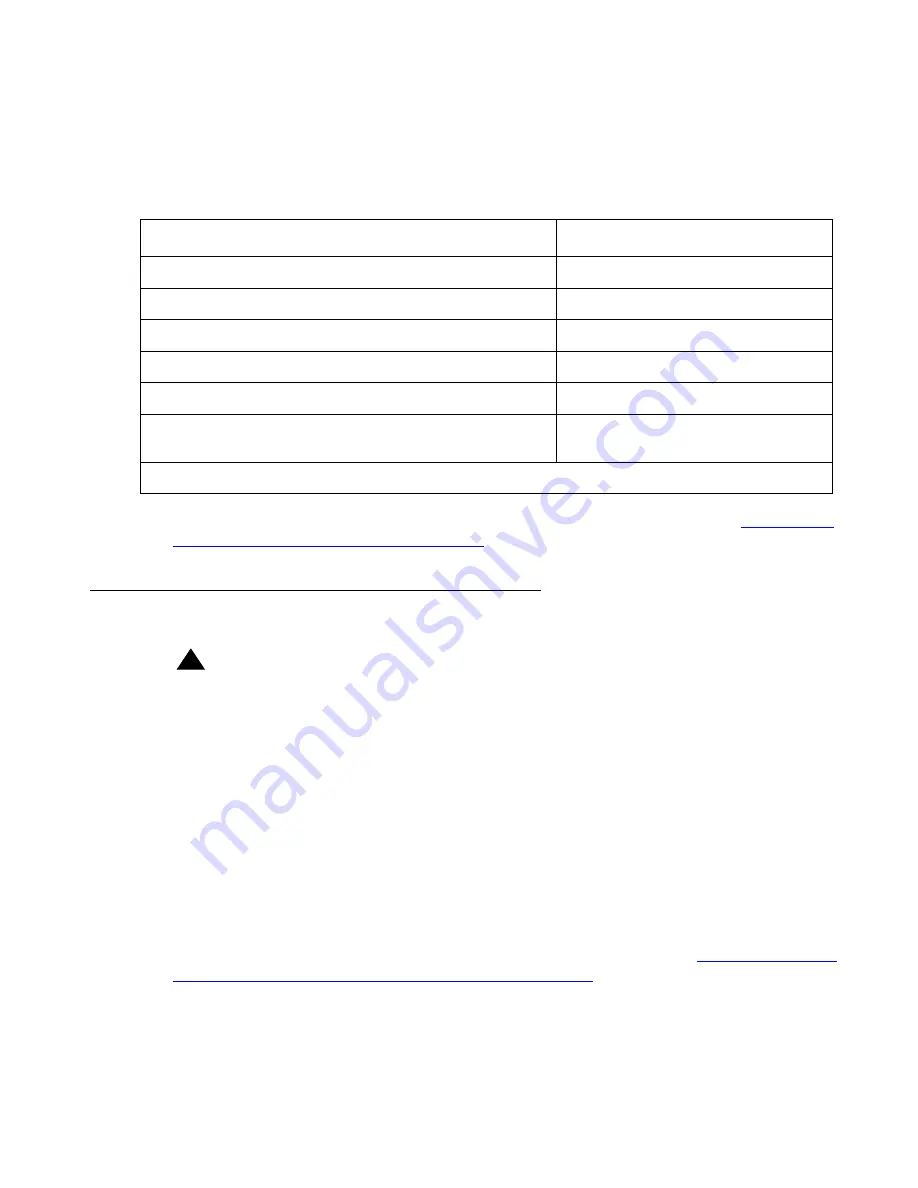
Table 1: S8510 drive status indicators
Drive status LED pattern
Description
Off
Drive ready for insertion or removal
Flashes green, amber, and off
Drive predicted failure
Flashes amber four times per second
Drive failed
Flashes green slowly
Drive rebuilding
Steady green
Drive online
Flashes green three seconds, amber three seconds,
and off six seconds
Rebuild aborted