


64
|
Tutorial 2 — Create a Birdhouse Drawing
Add Dimensions to the Back
In this exercise, you learn to
❒
Add horizontal and vertical dimensions.
❒
Move a dimension closer to its entity.
❒
Add an angular dimension.
❒
Select multiple entities using the SHIFT key.
❒
Place dimensions on the Dimensions layer.
In an earlier exercise in this tutorial, you learned how to create dimensions
and add them to the Dimensions layer. Now, in addition to horizontal and
vertical dimensions, you create an angular dimension for the birdhouse roof.
To add dimensions to the back
1
On the All-In-One toolbar, click and hold the Dimension button.
2
On the toolset, drag the pointer to select Horizontal Dimension.
3
Click the lower-left corner of the entity.
4
Press and hold the CTRL key, and then move the pointer until it snaps to
the lower-right corner.
5
Right-click to end the command.
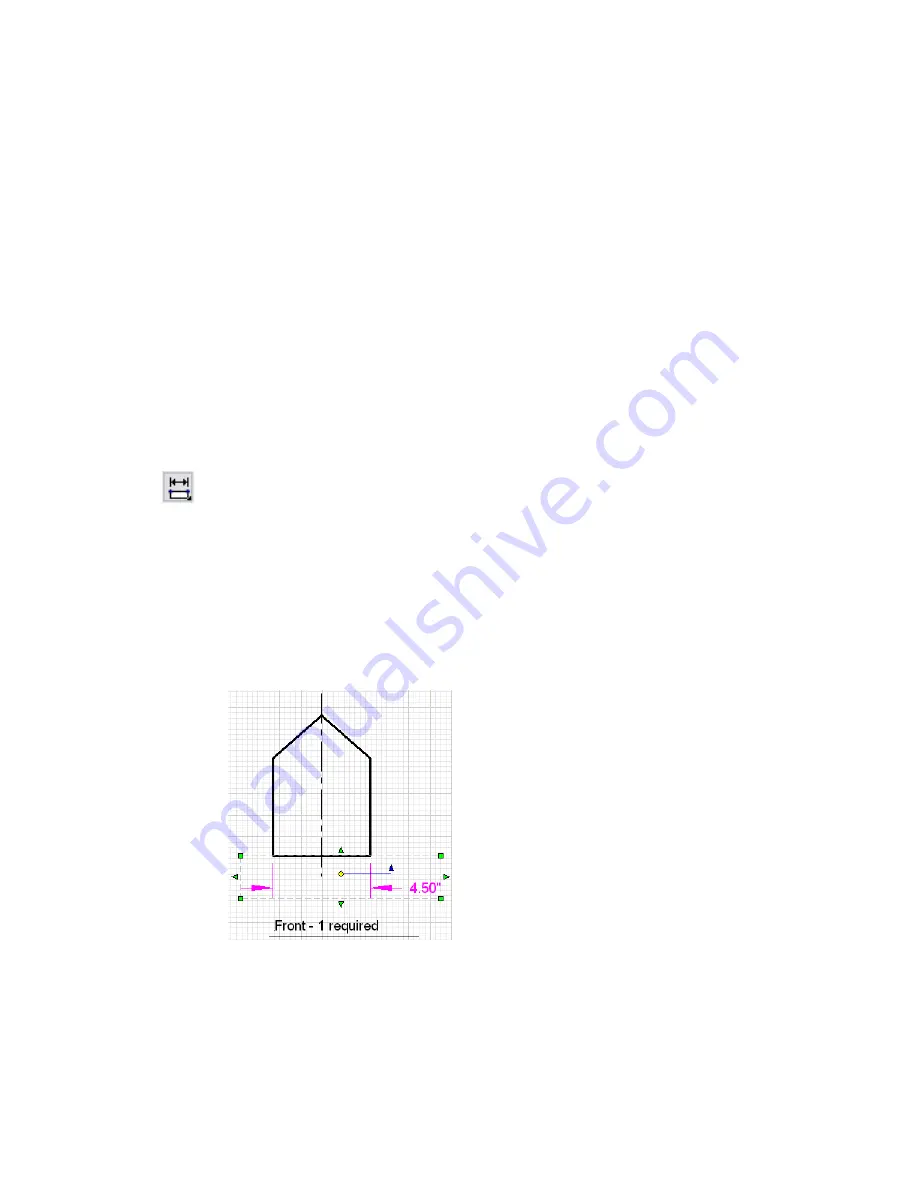
6
Click the horizontal dimension you just created. Then, click the green
downward-pointing arrow at the bottom of the dimension, and drag the
dimension up until it is close to the bottom of the entity.
Your drawing should look similar to the following illustration.
Next, create the vertical dimension.
7
On the All-In-One toolbar, click and hold the Dimension button.
Содержание 003A1-121111-1001 - AutoSketch v.9.0
Страница 1: ...AutoSketch Getting Started 9 June 2004 ...
Страница 6: ...vi ...
Страница 12: ...6 ...
Страница 22: ...16 ...
Страница 76: ...70 ...
Страница 98: ...92 ...
Страница 116: ...Office created using the Office Layout wizard ...
Страница 117: ...Jig created using the Mechanical Part wizard ...
Страница 118: ...Test Site created using the Diagram wizard ...
Страница 119: ...Tuner Diagram created using the Diagram wizard ...
Страница 120: ...Utopia Created using the Building wizard ...
Страница 121: ...Birdhouse created using the Workbench wizard ...
Страница 122: ......


