


Installing the Pipeline
Identifying the different units
Pipeline Start Here Guide
Preliminary January 30, 1998
2-3
Pipeline 85
The Pipeline 85 functions identically to the Pipeline 75. All features of the Pipe-
line 75 apply to the Pipeline 85. Using the Pipeline 85 hub does not require set-
ting any software parameters in the Pipeline configuration.
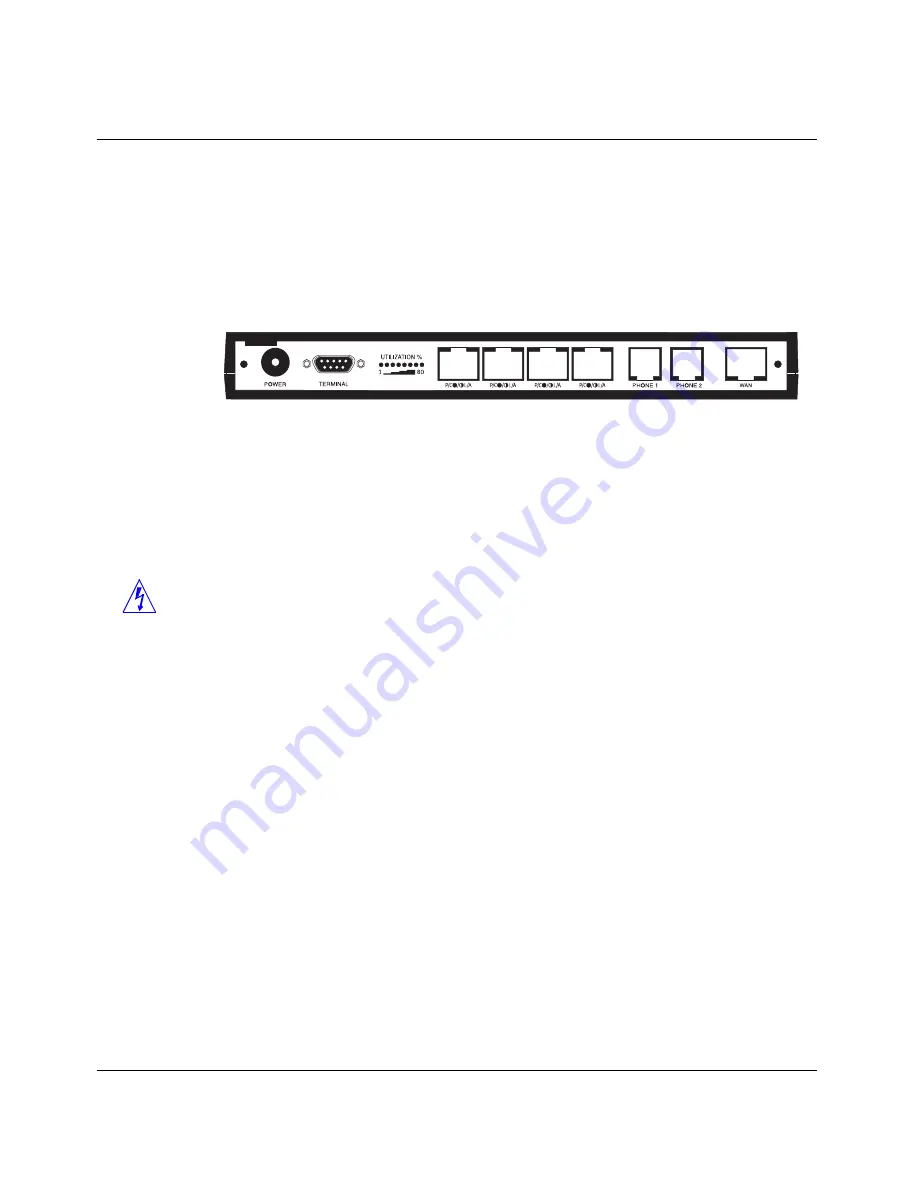
Before installing the Pipeline 85, familiarize yourself with the unit’s back panel.
Figure 2-3. Pipeline 85 back panel
The ports and other elements on the back of the unit are, starting at the left:
•
Power. Use the provided power supply to connect the unit to the power
outlet. Always plug the cable into the Pipeline before connecting the other
end into the outlet.
Warning:
Plugging the power supply into the wall socket before plugging
the power cable into the Pipeline can create sparks, cause an electrical fire,
or destroy the Pipeline.
Because the Pipeline has no power switch, plugging in the power supply
turns the unit on. After you plug in the Pipeline, it become ready to use in
about a minute.
•
Terminal (serial) port. You can create a serial connection between your
computer and the Pipeline by connecting a serial cable between a COM port
on your computer and the terminal port on the Pipeline.
•
Utilization percent lights. These indicate the percentage of LAN utilization
on the Pipeline hub (between hosts on the local network). The percentage
does not have anything to do with the traffic over the WAN connection.
•
Four 10Base-T Ethernet ports. A straight-through cable from any host on the
local network to the Pipeline connects the host to the Pipeline hub, thus
expanding the network. You can connect the Pipeline hub to another hub on
your LAN to make the Pipeline available to a greater number of users.
The notations under the 10Base-T ports have the following meaning:
–
P/C means Partition/Collision


