


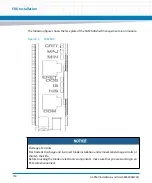

AXP640 Shelf Installation
AXP640 Installation and Use (6806800M24F)
135
# scp acctname@fileserver_ip:dirname/sentry.shmm1500.* /tmp
where:
acctname is the login account for the user on the (linux) file server
fileserver_ip is the IP address of the file server
dirname is the relative directory name (from the login home) for the location of the
images
Verify that the files were copied to
/tmp
.
2. Execute the command to program these images into flash and then reset to execute the
new images:
# rupgrade_tool -s -v -d -a [--hook=erase]
The “—-hook=erase” argument is optional, and is normally not used. This directs the
upgrade procedure to avoid preserving the customer-specific configuration files,
/etc/shelfman.conf and /etc/shelfman.conf.sam1500. Normally, these files should be
preserved across an upgrade, but on occasion, when Artesyn makes a change to the
format of the configuration options, you may be instructed to use this option. In this case,
you need to re-enter the configuration by editing these files, following the upgrade.
3. The files are copied to flash memory and the system should reboot in a couple of minutes.
When the system is restarted, the bootup logic automatically determines if the SAM1500
FPGA needs to be loaded to a new firmware revision. If so, an additional upgrade and
reboot takes place and takes an additional 5-8 minutes. The SAM should now be running
the new firmware.
The process can now be repeated with the other Shelf Manager.
Содержание AXP640
Страница 1: ...AXP640 Installation and Use P N 6806800M24F May 2014 ...
Страница 8: ...AXP640 Installation and Use 6806800M24F Contents 8 Contents Contents ...
Страница 10: ...AXP640 Installation and Use 6806800M24F 10 List of Tables ...
Страница 50: ...Platform Architecture AXP640 Installation and Use 6806800M24F 50 ...
Страница 53: ...AXP640 Shelf Description AXP640 Installation and Use 6806800M24F 53 Figure 2 2 DC Rear Shelf View ...
Страница 69: ...AXP640 Shelf Description AXP640 Installation and Use 6806800M24F 69 Figure 2 13 AC Inlet Markings 110V ...
Страница 70: ...AXP640 Shelf Description AXP640 Installation and Use 6806800M24F 70 Figure 2 14 AC Inlet 220V ...
Страница 77: ...AXP640 Shelf Description AXP640 Installation and Use 6806800M24F 77 Figure 2 18 DC Rating Label ...
Страница 78: ...AXP640 Shelf Description AXP640 Installation and Use 6806800M24F 78 Figure 2 19 AC Rating Label ...
Страница 90: ...Site Preparation AXP640 Installation and Use 6806800M24F 90 Figure 3 2 ETSI Frame Mount Rear View ...
Страница 91: ...Site Preparation AXP640 Installation and Use 6806800M24F 91 Figure 3 3 ETSI Frame Mount Side View ...
Страница 92: ...Site Preparation AXP640 Installation and Use 6806800M24F 92 Figure 3 4 19 inch Frame Front Mount Front View ...
Страница 93: ...Site Preparation AXP640 Installation and Use 6806800M24F 93 Figure 3 5 19 inch Frame Mid mount Front View ...
Страница 94: ...Site Preparation AXP640 Installation and Use 6806800M24F 94 Figure 3 6 19 23 inch Frame Mid mount Side View ...
Страница 95: ...Site Preparation AXP640 Installation and Use 6806800M24F 95 Figure 3 7 23 inch Frame Front Mount Front View ...
Страница 101: ...Site Preparation AXP640 Installation and Use 6806800M24F 101 Figure 3 13 Planning Checklist 2 ...
Страница 102: ...Site Preparation AXP640 Installation and Use 6806800M24F 102 ...
Страница 112: ...AXP640 Operations AXP640 Installation and Use 6806800M24F 112 ...
Страница 136: ...AXP640 Shelf Installation AXP640 Installation and Use 6806800M24F 136 ...
Страница 164: ...FRU Installation AXP640 Installation and Use 6806800M24F 164 ...
Страница 186: ...Shelf Management Alarm Module AXP640 Installation and Use 6806800M24F 186 ...
Страница 189: ......


