75
75
Repeat & Shuf
fl
e
Normal
Plays your songs one after the other and then stops after the last song.
Repeat
Continuously plays through the current set of songs (Artist, Album, folder, or Playlist).
Shuf
fl
e
Randomly play through the current set of songs (Artist, Album, folder, or Playlist) .
Intro duration
From 10 to 90 seconds. This is the time for which each song will be played when selecting
Scan
for
Playmode
settings.
20.3 Clock Settings
20.3 Clock
Settings
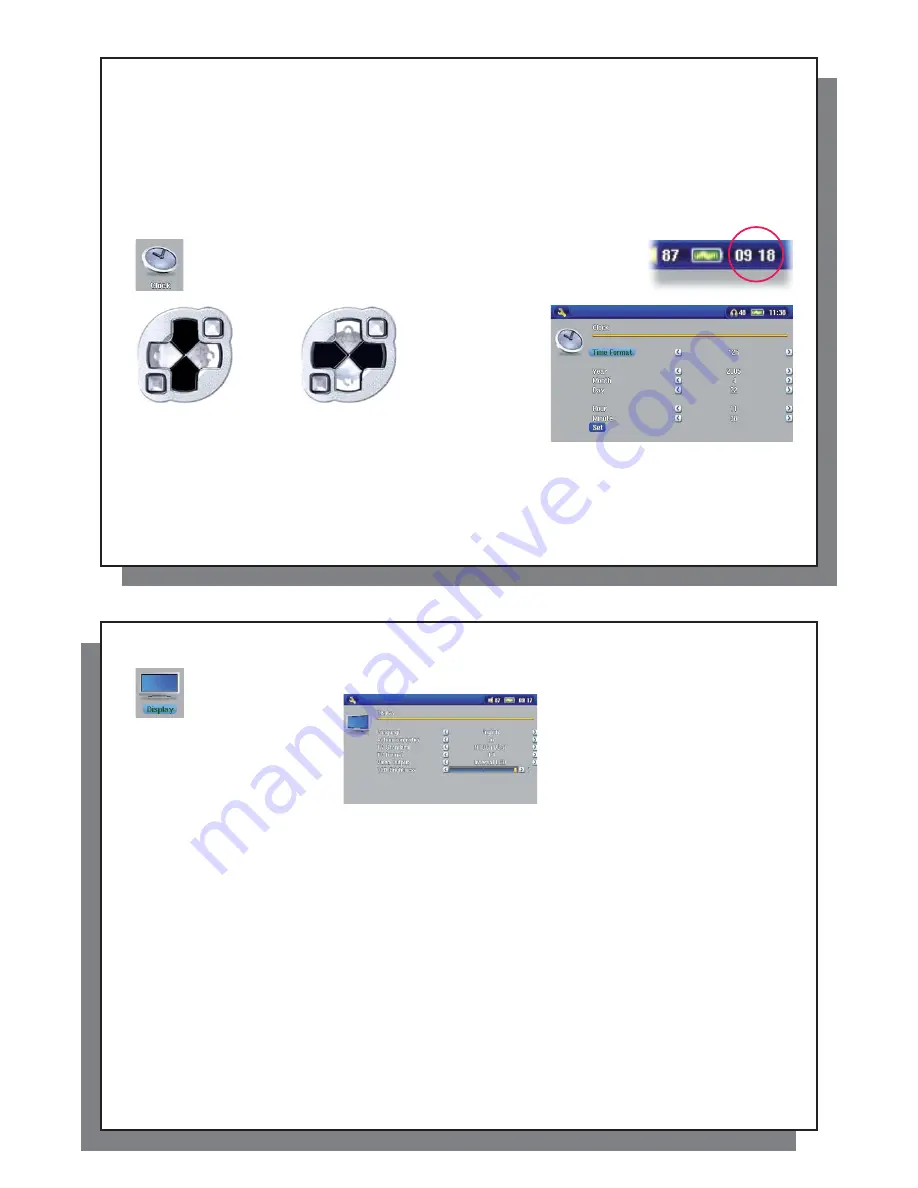
The AV 700 has an internal real time clock. The time of day is shown on the
top right of the screen in either 24 hour or 12 hour display mode. To set it,
select the
Settings
action icon then select
Clock
.
Choose parameter
Choose value for
highlighted
parameter
When
fi
nished setting the parameters, move down to the
Set
button, then click on the ENTER button. The clock
time and date are now set. Click on the STOP/ESC button to go back to the main settings menu.
76
76
20.4 Display Settings
20.4 Display
Settings
These settings regulate the interface language and the presentation of the screen.
Setting
Description
Setting
Description
Language
The AV 700 can be set to English (default), French, German, Spanish, or Russian.
Action icon help
Displays the explanation or name of the action icons when moving up and down through the menu. If set to On, the
fi
rst click on the SELECT action button will show the names of the icons. The second click will select the icon.
TV Standard
NTSC (USA), PAL (Europe)
. In order to view images or videos on an external television, select one option to send
the video signal compatible with your country’s television system. Countries other than European or American will
use one of these two systems.
TV format
4:3 or 16:9 – the ratio at which images are displayed on your television set.
Video Output
Internal LCD
or External TV. To display via the built-in LCD screen or to view the display via an external television.
Holding the LCD/TV button for two seconds will also alternate between these two options. Be sure your television is
selecting the correct external input.
LCD Brightness
0, 1, 2
. The 3 brightness levels for the built-in LCD screen. Setting to a lower value will give you a longer battery
autonomy.
LCD Stability
Use this to reduce any screen LCD screen
fl
icker you might have. Move the setting to the left and right to get the
clearest image.
When accessing the Display settings while playing a video you have an additional display option:
Video OSD
Time for which the video On Screen Display information will be shown when the video starts playing.


