


39
<File> Page
TIP
The file under using cannot be deleted.
7.6
Access External Media
In order to make it convenient to transfer data among instruments, users can store files into
external disk.
Steps of saving file into internal disk
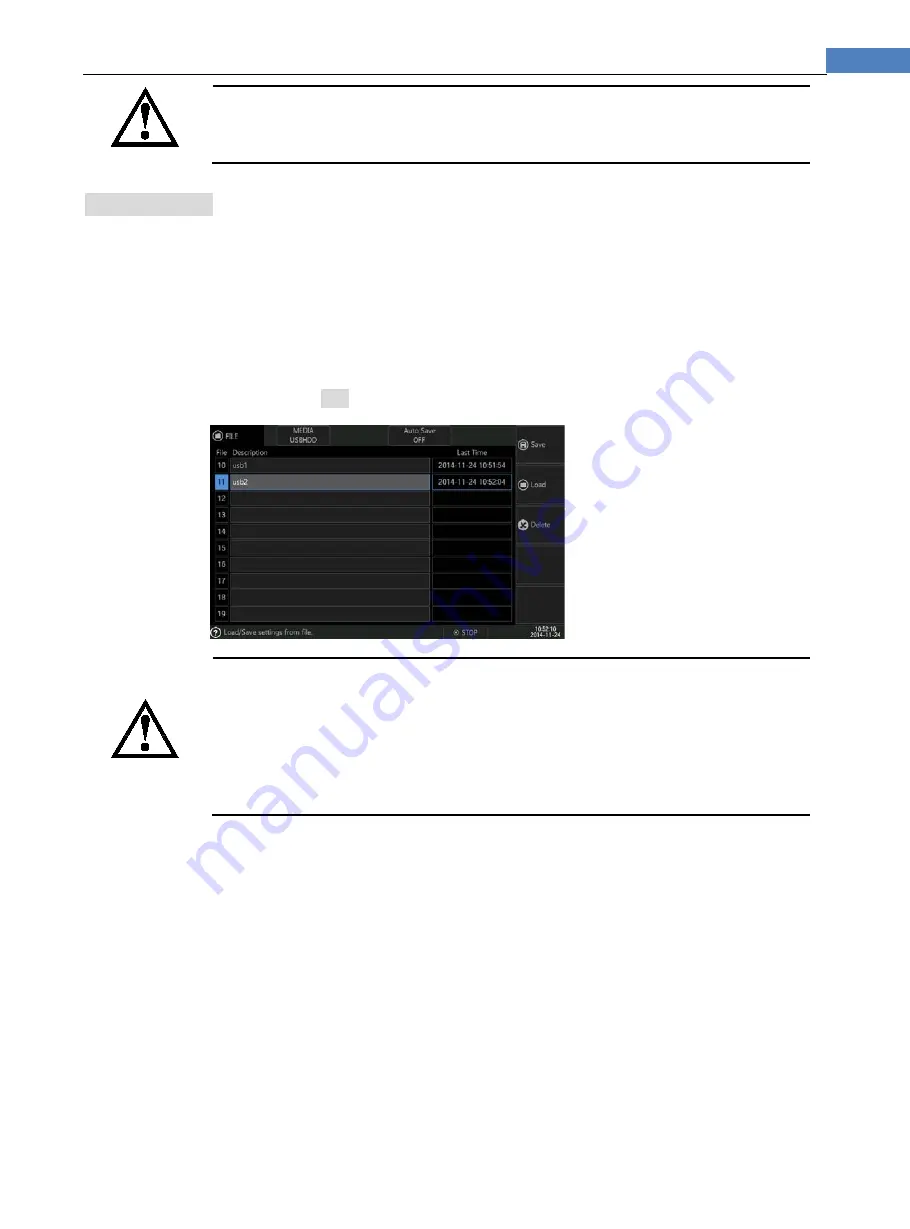
Step 1
Enter <File> page, and select [MEDIA] as [USBHDD#]
Step 2
Touch screen & click or use cursor to select file required to save at [Description] field.
For example: file 11
Step 3
Click & select [Save], input file description in the popup input window.
For example: input usb2
Step 4
Press [ENTER] key, data will be saved into file 11, and file 11 is set as current file:
Tip
If users remove the under using USBHDD1, disk and file list will AUTO return to internal disk, file 11 is
still current file, but, when [Auto Save] option is [current file], instrument will not detect current disk
recovery when power off, data will be saved into internal disk file 0, the original data in file 0 will be
covered, file 0 will also be set as current file.
Instrument supports four USBHDD, due to limitation of instrument hardware, system will assign name
according to the order of checking disk, for example: the first inserted disk name is [USBHDD] allocated
file number is 10~19, then the inserted disk is [USBHDD1] allocated file number is 20~29. After disk is all
removed, and insert them again, the order may be changed, and lead to file number allocation
malposition, and save file into an incorrect disk, then original data will be covered. So please insert one
USBHDD only to avoid writing in incorrectly.
Operating of reading and deleting external disk is the same as that of internal disk, please refer
to the previous chapter.


