Step 5: Adding the MAX-AOM to the Server
25
MAX HT Four-Zone System Setup Guide
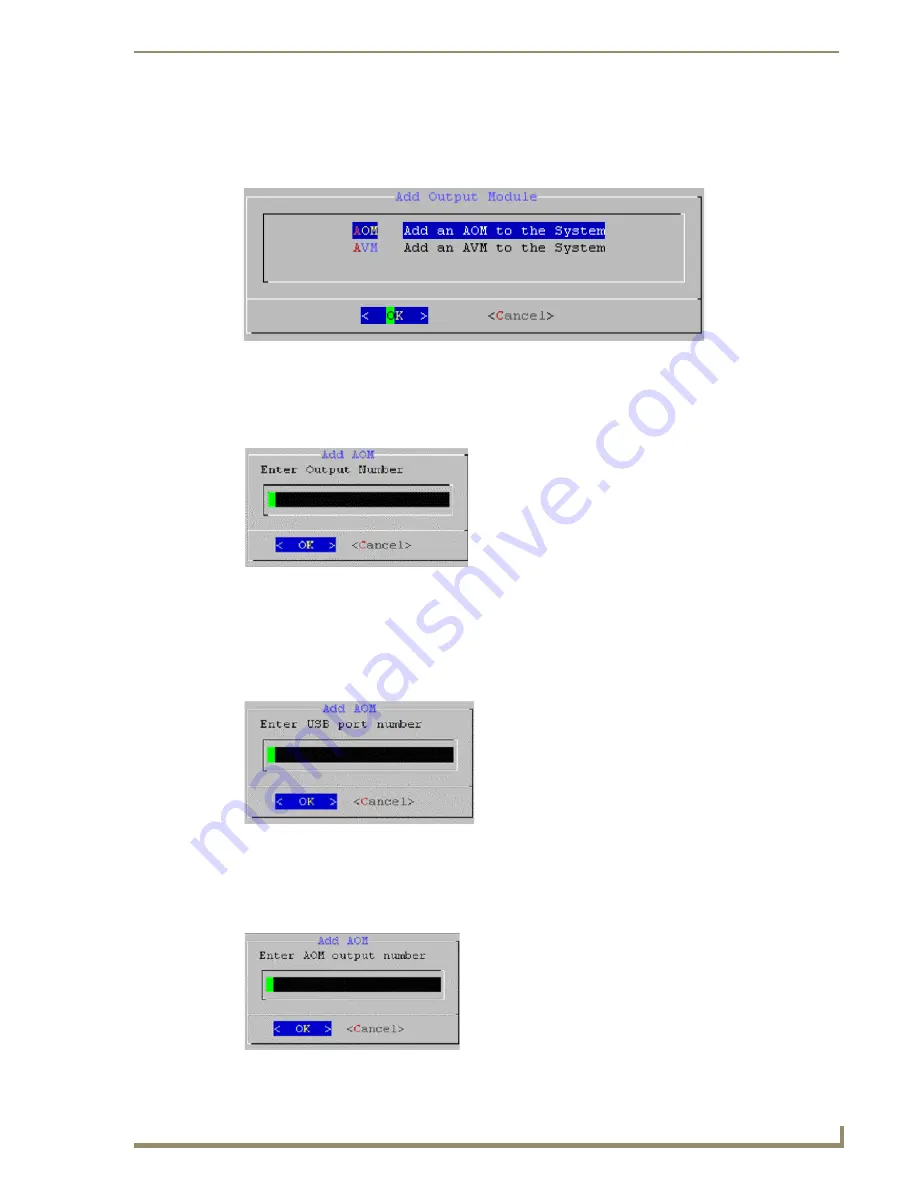
Adding the AOM to Server Output #7, USB #1, AOM Audio Output #3
1.
Press Enter to return to the Add Output Module dialog, so that you can define the next server output
to be used by the AOM, and its associated audio output.
2.
Select
AOM
and press Enter to access the Add AOM - ENTER OUTPUT NUMBER dialog
3.
Enter "
7
" (FIG. 47).
4.
Press Enter to proceed to the ENTER USB PORT NUMBER dialog.
Since we are defining outputs for the same AOM, still using USB port #1, enter "
1
" in the
ENTER USB PORT NUMBER field (FIG. 48).
5.
Press Enter to proceed to the ENTER AOM OUTPUT NUMBER dialog.
6.
Enter a "
3
" here and press Enter (FIG. 49).
FIG. 46
Add Output Module dialog
FIG. 47
Add AOM dialog - ENTER OUTPUT NUMBER
FIG. 48
Add AOM dialog - ENTER USB PORT NUMBER
FIG. 49
Add AOM dialog - ENTER AOM OUTPUT NUMBER
7
1
3
Содержание MAX-AOM
Страница 4: ......
Страница 12: ...Introduction MAX HT System Setup 6 MAX HT Four Zone System Setup Guide ...
Страница 18: ...Step 2 Setting Up The 2 Ethernet Switches 12 MAX HT Four Zone System Setup Guide ...
Страница 20: ...Step 3 Power Up The HT Server 14 MAX HT Four Zone System Setup Guide ...
Страница 40: ...Step 7 Connecting the MAX AVPs 34 MAX HT Four Zone System Setup Guide ...
Страница 48: ...Testing the MAX Setup 42 MAX HT Four Zone System Setup Guide ...
Страница 49: ...Testing the MAX Setup 43 MAX HT Four Zone System Setup Guide ...


