


98
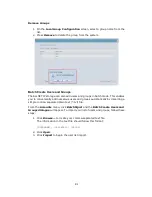
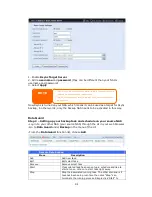
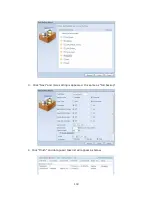
1. Enable Rsync Target Server
2. Add a username and password (they can be different than your NAS’s
username and password)
3. Select Apply
Now Rsync is turned on your NAS, which means it can be used as a target for Rsync
backup, in other words, only the backup NAS needs to be activated in this way.
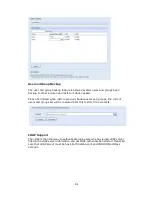
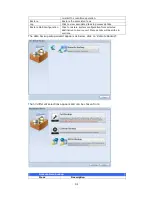
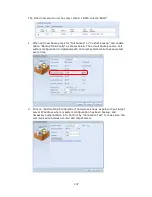
Data Guard
Step 2 – Setting up your backup task and schedule on your source NAS
-Log in to your other NAS (your source NAS) through the UI in your web browser
-Go to Data Guard under Backup in the menu of the UI
-From the Data Guard function list, choose Add
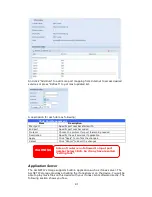
Remote Data backup
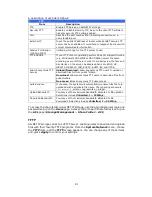
Item
Description
Add
Add new task.
Edit
Edit select task.
Remove
Remove select task
Start
If associated task has been setup in schedule and like to
start at once, click on to start task right away.
Stop
Stop the associated running task. The other scenario is if
task has been setup real-time then click “Stop” can
terminate the running process. Simple click ‘Start” to
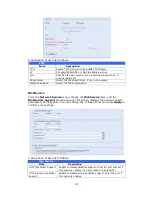
NOTE
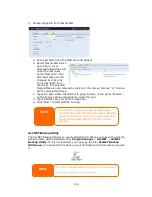
• You will need this user name and password while the data is going to
remotely backup to this rsync target server.
• The Rsync target server is only allowed 3 rsync host to connect and
backup from.
Содержание ALL-NAS1000
Страница 1: ...ALL NAS1000 User s Manual ...
Страница 13: ...13 3 Press the power button on the Front Panel to boot up the ALLNET IP storage ALL NAS1000 power button ...
Страница 52: ...52 WARNING Remove RAID destroys all data in the current RAID volume The data is unrecoverable ...
Страница 137: ......