


113
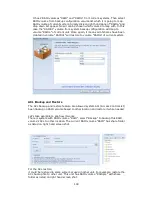
3.
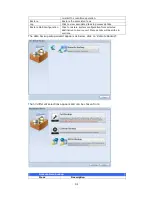
Create image file from files/folders
a.
Click Add button and the NAS share list appear
b.
Select files/folders which
like to burn. All of
selected folders/files will
under the disc label
name “New Disc”. The
disc label name can be
changed by click on it
and press “Edit” from
menu bar. The selected
folders/files also can remove by click on it then press “remove” or “remove
all” for all selected items.
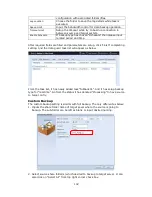
c.
Input the path where the ISO file is going to store, it can press “Browse”
button to have share list appear to guide through.
d.
Input ISO file name for burned image file.
e.
Click “Burn” to start ISO file burning.
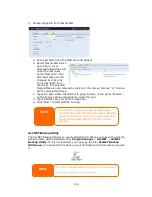
ALLNET Backup Utility
The ALLNET Backup Utility is on your Installation CD. When you click on the CD, the
Backup Utility will be installed under Program Groups > ALLNET > ALLNET
Backup Utility. If it is not installed, you can copy the file (ALLNET Backup
Utility.exe) to a convenient location on your hard disk and double click to execute
it.
NOTE
If you can not find ALLNET Backup Utility on your CD, please download it
from the ALLNET website (http://www.allnet.de).
NOTE
•
The data burn does not support rewriteable
media if it has been burned data inside with left
space. On the other hand, the used rewriteable
media will be erased first then carry on with
burning.
Содержание ALL-NAS1000
Страница 1: ...ALL NAS1000 User s Manual ...
Страница 13: ...13 3 Press the power button on the Front Panel to boot up the ALLNET IP storage ALL NAS1000 power button ...
Страница 52: ...52 WARNING Remove RAID destroys all data in the current RAID volume The data is unrecoverable ...
Страница 137: ......