


81
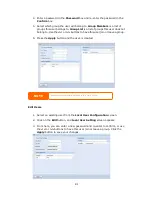
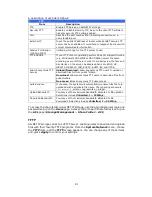
4.
Enter a password in the Password box and re-enter the password in the
Confirm box.
5.
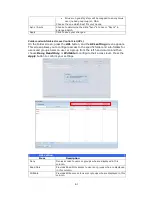
Select which group the user will belong to. Group Members is a list of
groups this user belongs to. Group List is a list of groups this user does not
belong to. Use the << or >> buttons to have this user join or leave a group.
6.
Press the Apply button and the user is created.
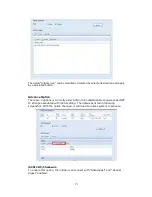
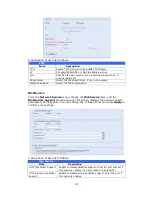
Edit Users
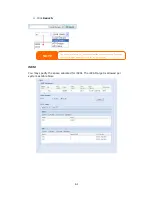
1.
Select an existing user from the Local User Configuration screen.
2.
Click on the Edit button, and Local User Setting screen appears.
3.
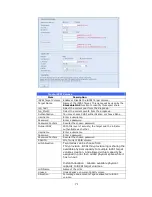
From here, you can enter a new password and re-enter to confirm, or use
the << or >> buttons to have this user join or leave a group. Click the
Apply button to save your changes.
NOTE
All users are automatically assigned to the ‘users’ group.
Содержание ALL-NAS1000
Страница 1: ...ALL NAS1000 User s Manual ...
Страница 13: ...13 3 Press the power button on the Front Panel to boot up the ALLNET IP storage ALL NAS1000 power button ...
Страница 52: ...52 WARNING Remove RAID destroys all data in the current RAID volume The data is unrecoverable ...
Страница 137: ......