


63
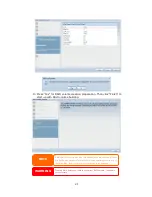
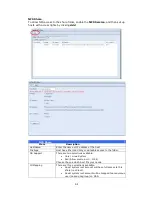
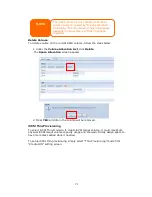
Or without “Mount as” ISO file export name input, system will automatic to give the
export name by ISO file name.
If left “Mount as:” blink then system will create mount point by ISO file name.
After you have completed to add ISO then the page will displayed all mounted ISO
files,
You could click “Unmount” to eliminate mounted ISO file.
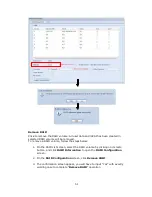
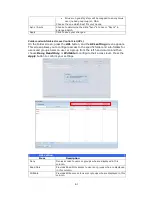
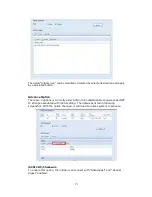
B. Using ISO
The mounted ISO file will be located same share folder with name giving. Please
refer the screen shot below.
ISO file “image” has mounted as folder “Image” you could see. The ISO file
“ALLNET 01” without assign mounting name, system automatically has folder
“ALLNET 01” created.
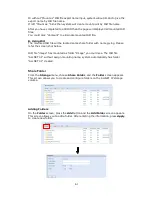
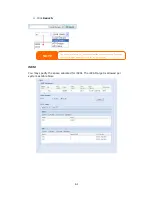
Share Folder
From the Storage menu, choose Share Folder, and the Folder screen appears.
This screen allows you to create and configure folders on the ALLNET IP storage
volume.
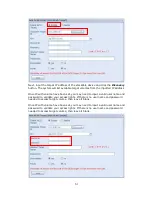
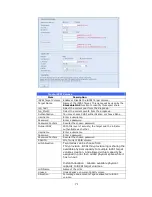
Adding Folders
On the Folder screen, press the Add button and the Add Folder screen appears.
This screen allows you to add a folder. After entering the information, press Apply
to create new folder.
Содержание ALL-NAS1000
Страница 1: ...ALL NAS1000 User s Manual ...
Страница 13: ...13 3 Press the power button on the Front Panel to boot up the ALLNET IP storage ALL NAS1000 power button ...
Страница 52: ...52 WARNING Remove RAID destroys all data in the current RAID volume The data is unrecoverable ...
Страница 137: ......