2. Installing the WFP-151U
AirLive WFP-151U User’s Manual
6
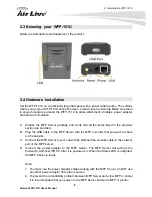
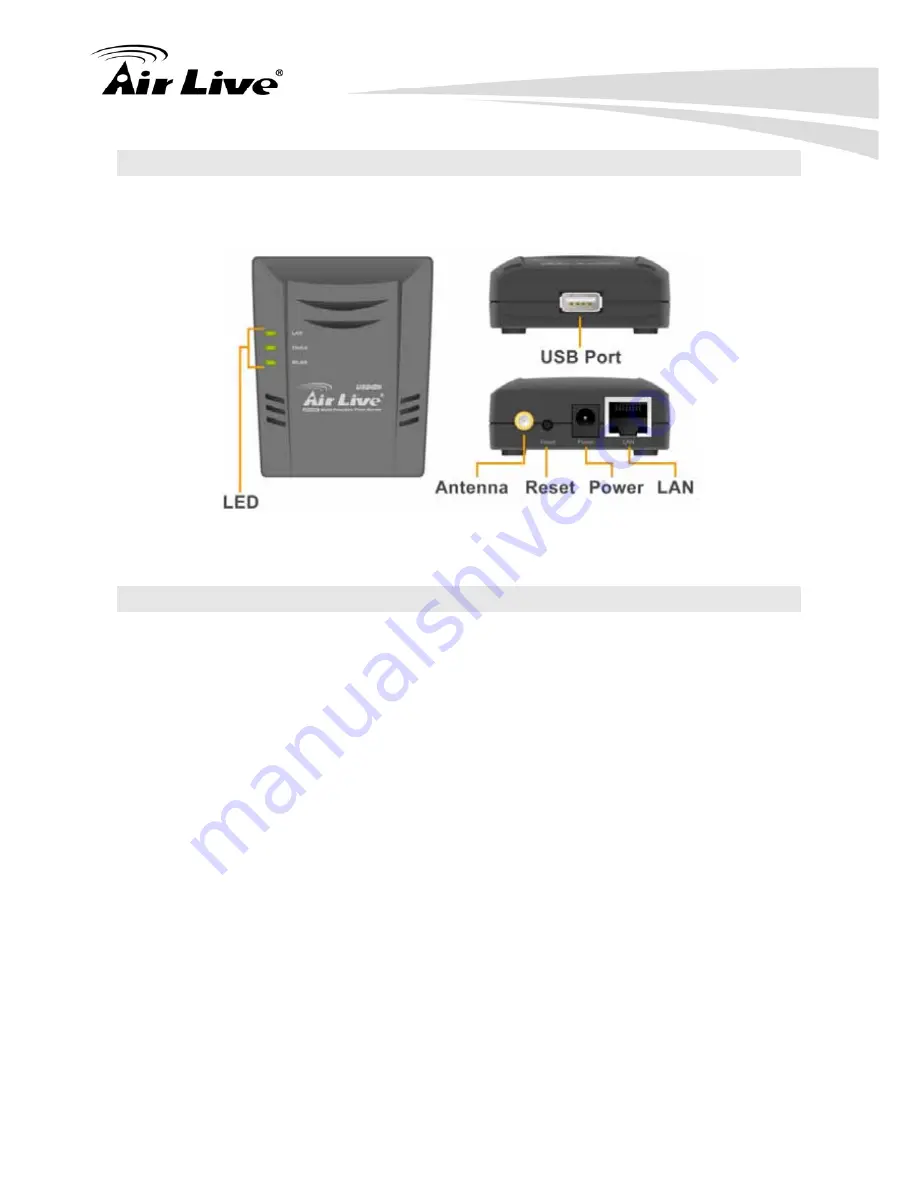
2.3 Knowing your WFP-151U
Below are descriptions and diagrams of the product:
2.4 Hardware Installation
Set the WFP-151U on a sufficiently large flat space with a power outlet nearby. The surface
where you put your WFP-151U should be clean, smooth, level and sturdy. Make sure there
is enough clearance around the WFP-151U to allow attachment of cables, power adapter
and allow air circulation.
A. Unpack the MFP Server package and verify that all the items listed in the previous
section are provided.
B. Plug the USB cable to the MFP Server with the MFP or printer that you want to share
on the network.
C. Connect the MFP Server to your network by attached the network cable to the network
port of the MFP server.
D. Connect the power adapter to the MFP Server. The MFP Server will perform the
Power-On-Self-Test (POST) after it is powered on. When the Status LED is unlighted,
the MFP Server is ready.
Note:
1. You must use the power adapter shipped along with the MFP Server, do NOT use
any other power adapter from other sources.
2. To prevent the compatibility problem between MFP Server and a few MFP or printer,
it is recommended that you power on the MFP Server before the MFP or printer
.
Содержание WFP-151U
Страница 1: ...WFP 151U 11n Wireless Multi function Print Server User s Manual ...
Страница 30: ...3 Using the WFP 151U 25 AirLive WFP 151U User s Manual ...
Страница 81: ...7 Printing Protocols AirLive WFP 151U User s Manual 76 10 Click Finish ...
Страница 87: ...7 Printing Protocols AirLive WFP 151U User s Manual 82 ...
Страница 103: ...8 MFP Server Installation in Win98SE ME NT AirLive WFP 151U User s Manual 98 ...
Страница 117: ...10 MFP Server Installation in MAC OS AirLive WFP 151U User s Manual 112 ...
Страница 121: ...11 Troubleshooting AirLive WFP 151U User s Manual 116 your dealer ...


