background image

- Page 13 -

- Page 15 -

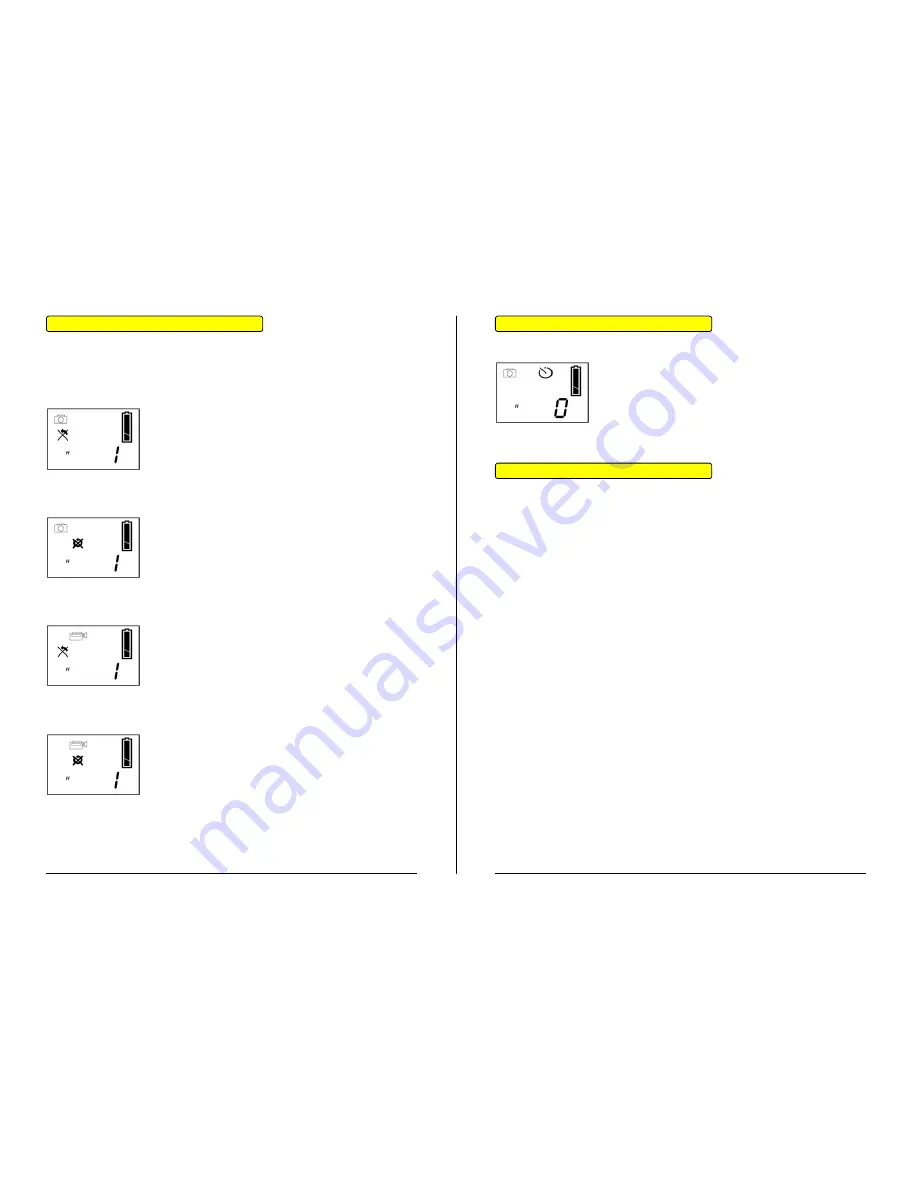
Erasing Pictures and Recordings

Deleting one picture at a time:

Press the mode button until the picture, as shown at
the left, appears in the display.
Then press the capture button. The display will blink.
Press the capture button again and the last picture will
be erased.
Repeat this process as necessary.

The camera offers to methods to erase pictures or recordings: either one at a
time (the last picture taken) or all at once.

Deleting all pictures at once:

Press the mode button until the picture, as shown at
the left, appears in the display.
Then press the capture button. The display will blink.
Press the capture button again and all pictures will be
erased.

Erasing one video at a time:

Press the mode button until the picture, as shown at
the left, appears in the display.
Then press the capture button. The display will blink.
Press the capture button again and the last video will
be erased.
Repeat this process as necessary

Erasing all videos at once:

Press the mode button until the picture, as shown at
the left, appears in the display.
Then press the capture button. The display will blink.
Press the capture button again and all videos will be
erased.

Timer

Tips for Taking Good Pictures

Press the mode button until the timer symbol appears
in the display. Then press the capture button and
approx. 10 seconds later the picture will be captured.
An acoustic signal will be heard while waiting.

¾

  Place your motive in the middle of the eyepiece and insure that the light

source is behind the camera.

¾

  Adjust the sharpness ring (flower or mountain) depending on the

distance to the motive.

¾

  Hold the camera steady and press the capture button. Due to the

sensitivity of the sensors, moving could cause the picture to become
blurred.

¾

  Do not cover the lens with your hand or finger.

¾

  Keep the lens clean and free of dust and water. Use a clean dry cloth to

clean the lens.

Содержание MINI PENCAM PLUS

Страница 1: ...illich Germany Tel 49 0 2154 9235 50 Fax 49 0 2154 9235 68 Email info aiptek de Our technical hotline can assist you with your questions problems and comments and can be reached Monday Friday from 09...

Страница 2: ...talling the Mega Cam Manager 15 Installing the Camera under Windows 98SE ME 17 Additional Installation Information using Windows 98SE ME 18 Installing the Camera under Windows 2000 XP 19 Additional In...

Страница 3: ...midity ranges between 20 and 80 When the camera is not in operation it may be stored in places where the temperature ranges between 4 F 20 C 158 F 70 C and the humidity ranges from 20 90 To prevent da...

Страница 4: ...CD ROM Drive 1 free USB Port Windows 98SE ME 2000 XP Sensor Type CMOS Color sensor 1280x1024 Pixel 16 8M Colors 24Bit Resolution SXGA 1248x960 dpi VGA 640x480 dpi Memory capability 128MBit SDRAM for V...

Страница 5: ...moved Therefore it is recommended to download and save the videos to the computer before removing the batteries When the camera is connected to the USB Cable it draws power from the USB Port The batte...

Страница 6: ...s can be taken Low resolution 640x480 dpi Using this resolution approx 160 pictures can be taken Note The pictures will be internally compressed when saved The degree of compression and memory space m...

Страница 7: ...camera is in the camera mode the amount of pictures taken will appear When the camera is switched to the video mode the amount of videos taken will appear The counter functions as a seconds counter wh...

Страница 8: ...r of captures saved When no more memory space is available the counter will blink and the capture button will not function For the saving of pictures the camera is equipped with an internal 128Mbit Fl...

Страница 9: ...blink Press the capture button again and the last video will be erased Repeat this process as necessary Erasing all videos at once Press the mode button until the picture as shown at the left appears...

Страница 10: ...ending on your system configuration the following message may appear Click on continue anyway to continue the installation Place the Mega Camera CD into the CDROM drive the CD should start automatical...

Страница 11: ...en all three driver components have been properly installed The camera can now be used Additional Installation Information using Windows 98SE ME After proper installation of the drivers the three comp...

Страница 12: ...he option Install the software automatically and click on next Once the driver components have been completely installed the message New Hardware the newly installed hardware can now be used will appe...

Страница 13: ...he camera a yellow circle with an or will appear before the device entry In this case the missing components will have to be manually installed Click on the entry in which the drivers are to be instal...

Страница 14: ...tions and comments concerning these programs For major problems please contact the manufacturer directly Refer to page 49 for contact addresses Place the CD labeled Mega Camera into your CD ROM drive...

Страница 15: ...ive Mail offers a variety of possibilities to attach pictures and videos to Emails Short films with or without tone an external microphone is necessary can be created direct from this program To regis...

Страница 16: ...deo sequence Pictures and Videos that have been stored to my album can automatically be attached to outgoing emails Closing or minimizing the program Click on the left symbol to minimize the program C...

Страница 17: ...on the desired pictures Click this symbol to delete selected pictures from work area Click on this symbol to start downloading pictures and videos from the camera Number of captured frames Snapshot P...

Страница 18: ...nd videos will be saved to the album HINWEIS Once the selected pictures and videos have been saved to the album they will be permanently saved to the hard drive To view an enlarged picture double clic...

Страница 19: ...MG File Format Only JPEG Format AVI Video file WAV Audio file Click on the button new to create a new album Name the new album and select a path to where you want to save your album Note There can onl...

Страница 20: ...ge the order of the frame sequence Click on this button to start creating your video Click on this button to cancel Activate this box if you choose to compress the video data Compressed video data wil...

Страница 21: ...h the pictures will be shown Click on this symbol to close the slide show and return to the preview window Click on this symbol to close the preview PC Camera Mode While in the PC Camera Mode you can...

Страница 22: ...le 640x480 Pixel 320x240 Pixel 320x240 Pixel default There are two compression rate settings available I420 High compression RGB 24 low compression Name of the Video File Frequency setting Recording t...

Страница 23: ...Cam as data source Click on FILE CHOOSE SCANNER and choose from the list Mega Cam Data Source and confirm To start the Twain Manager click on FILE NEW SCAN DSC Mode PC Camera Mode Load all frames Save...

Страница 24: ...be affected During the installation I receive the message did not pass the Windows Logo test When installing the Mega Cam Manager and drivers under Windows XP you will probably receive a message that...

Страница 25: ...nnect the camera from the USB Cable You should hear a short beep and the camera should turn on automatically If the camera remains off then the camera is most likely defect or the USB Port is not supp...

Страница 26: ...the corners or borders of the picture may be slightly blurred or stretched This is due to the strong contour of the lens and the small size of the aperture Problems may occur when taking pictures of o...

Страница 27: ...the value and the performance capability of the device by defects caused by chemical and electrochemical influence by water as well as generally abnormal conditions 2 The guaranty obligation is fulfi...

Страница 28: ...h the period of warranty for the complete appliance 5 Further reaching and other claims particularly such claims for compensation of damage caused outside the appliance are excluded unless a liability...

Отзывы: