23
agrimac
TW12
TW16
DESPUES DE LAS PRIMERAS 100 HORAS DE TRABAJO
1) Realizar el mantenimiento del motor de acuerdo con su manual
de mantenimiento.
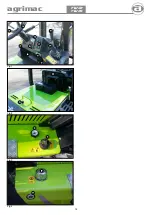
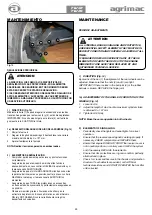
2) Limpiar el filtro del aire (Fig. 8) presionar la válvula para sacar el
polvo acumulado. Desmontar la tapa y sacar los filtros y limpiarlos
con aire a presión (Fig. 9). limpiar el interior del cuerpo del filtro y
todo el exterior.
Cada 5 limpiezas SUSTITUIR los elementos filtrantes.
Al realizar el montaje asegurarse del correcto encaje de la tapa.
3) Comprobar el nivel del líquido de frenos.
4) Comprobar el nivel del aceite hidráulico mediante el visor de nivel.
5) TW16: Sustituir el cartucho filtrante del aceite hidráulico (fig. 11).
Soltar el cartucho, limpiar la cara del asiento de soporte del
cartucho y lubricarlo con aceite limpio. Montar el nuevo cartucho
apretándolo fuertemente con la mano.
NOTA: Después de cambiar el cartucho del filtro, arrancar el motor
y controlar si existen fugas de aceite. Controlar el nivel del aceite
y si fuera necesario reponerlo.
6) Revisar el estado de la batería, si el nivel del electrolito está bajo,
añadir UNICAMENTE agua destilada.
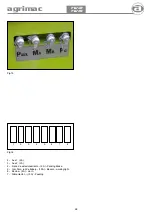
7) Engrasar todas las partes de lubricación de la máquina, indicados
en la siguiente relación de puntos de engrase.
CADA 1500 HORAS DE TRABAJO
1) Realizar el mantenimiento del motor, de acuerdo a su manual de
mantenimiento.
2) Limipiar el filtro del aire y sustituir los elementos filtrantes.
3) Sustituir el aceite del circuito hidráulico y los filtros. Para ello
operar de la siguiente manera:
a) Con la transmisión caliente, situar la máquina sobre una
superficie horizontal.
b) Soltar el tapón del vaciado del depósito y vaciar todo el
aceite recogiéndolo en un recipiente con la capacidad
adecuada (Fig. 13).
c) Soltar las bridas de aspiración y desmontar los filtros
(Fig. 13). Colocar nuevos filtros. Limpiar las superficies
de contacto de las bridas y aplicar pasta de juntas loctite 574
ó similar y amarrar las bridas.
4) Reponer aceite nuevo, de acuerdo a la tabla de lubricación hasta
alcanzar el nivel en el visor.
5) Controlar fugas de aceite en el circuíto hidráulico y si es necesario
sustituir las tuberías ó juntas que tengan fugas.
6) Limpiar y engrasar todas las partes indicadas como puntos de
engrase (Fig. 12).
AFTER THE FIRST 100 HOUR OF OPERATION
1) Perform engine maintenance tasks by following the indications
in the maintenance manual.
2) Clean air filter Fig. 8, press valve to take out accumulated dust.
Take out tap and release filters, clean them with air pressure Fig. 9.
Clean internal part of the filter and external part.
After 5 cleanings you need to CHANGE the filters after this you
need to close the tap properly.
3) Check brake liquid level.
4) Check hydraulic oil level in the visor.
5) TW16: Change hydraulic oil cartridge (fig. 11).
Release the cartridge, clean the filter and oil it with clean new oil.
Install the new cartridge tightening firmely with the hand.
NOTE: After changing the filter cartridge, start the engine and
chech if there are overflows of oil. Check the level of the oil
and, if it is necessary, replenish it.
6) Check the battery, if the electrolite level is low, add ONLY destiled
water.
7) Grease all machine and mast guide lubricating points.
EVERY 1500 WORKING HOURS
1) Perform engine maintenance tasks by following the indications
in the maintenance manual.
2) Clean air filter and change all cartridges.
3) Change oil in the hydraulic circuit and hydraulic filters, as follows:
a) With the transmission hot place the machine on a flat
surface.
b) Release the tap to exit the oil (Fig. 13).
c) Release the aspiration couplings and unrelease the filters
(Fig. 13). Fit new filters. Clean all contact surfaces and apply
loctite 574 or similar and tie up the clamps.
4) Replace new oil, according to the lubrication table until reaching
the level in the display.
5) Check oil leaks in the hydraulic circuit and if necessary replace the
leaking pipes or joints.
6) Clean and grease all the indicated parts as grasing points (Fig. 12).
MANTENIMIENTO
MAINTENANCE
Содержание Carretillas Elevadoras TW12
Страница 2: ...2 agrimac TW12 TW16 Mayo 2019 ...
Страница 12: ...12 agrimac TW12 TW16 INDICADORES INDICATORS 11 ADELANTE FRONT ATRAS REVERSE 1 2 3 4 5 6 7 10 8 9 Fig 0 Fig 0 ...
Страница 14: ...14 agrimac TW12 TW16 Fig 1 Fig 2 Fig 3 Fig 4 1 2 10 12 11 13 14 15 16 3 4 5 6 7 8 9 17 ...
Страница 16: ...16 agrimac TW12 TW16 ...
Страница 18: ...18 agrimac TW12 TW16 Fig 6 Fig 7 3 4 ...
Страница 31: ...31 agrimac TW12 TW16 Fig 17 N º Bastidor Chasis number Placa de fabricante Manufacturer s plate ...
Страница 33: ...33 agrimac TW12 TW16 ESQUEMA ELÉCTRICO ELECTRIC SCHEME ...
Страница 34: ...34 agrimac TW12 TW16 ESQUEMA HIDRÁULICO 4x2 2WD HYDRAULIC SCHEME ...
Страница 35: ...35 agrimac TW12 TW16 ESQUEMA HIDRÁULICO 4x4 4WD HYDRAULIC SCHEME ...
Страница 39: ...39 agrimac TW12 TW16 ...

