


24
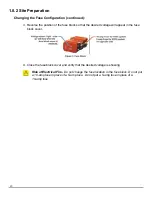
label frame is not 5” long, add copies until it is. On the Layout Screen, right click on the label image
→ select Add Copies → select number of copies you need to make your layout at least 5” long →
press OK.
Now that the copies are in the layout
screen, make the page length match the
length of the labels in the layout. If using
the sample label, there should be just
over 12”. To change these settings go to
the PRINT menu at the top of the screen
then select SETUP and a new menu
will appear. You may also use the blue
gear icon on the upper right of the main
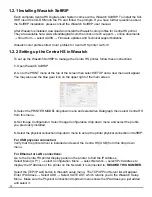
screen as a shortcut in the future. Now in
the Print Setup Menu → select EDIT →
PROPERTIES. Set the setting to match
the image below. If you are not using the
sample label then your page length will
be different.
Press OK until you are back in the Print
Setup Menu → press Set Maximum
Height → press Okay.
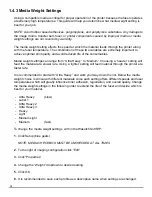
In the layout there are 3 labels in each frame (per SmartMark) and 3 frames in the layout. This
means there are 9 labels per layout. If you want to print a job of 100 labels, print the layout twelve
times (9 x 12 = 108). To do this change the Copies to Print to 12, see below.
To print the job click on the printer icon at the top of the screen to RIP & Print. The job will rasterize,
then spool, then print. The copy count on the front panel of the printer will count how many layouts
have printed.