background image

www.adeept.com

39

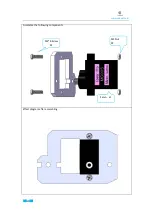
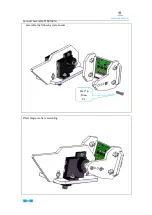
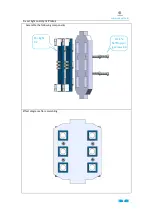
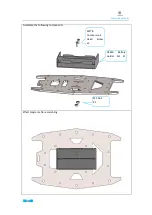
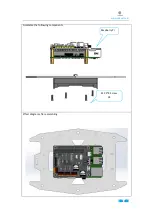
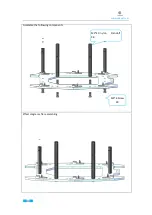
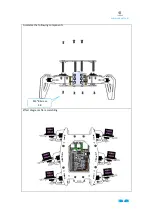
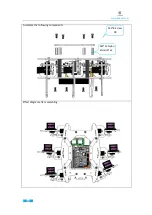
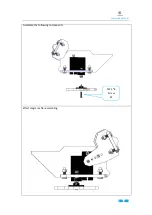
Assemble the following components

M3*8 Screw

X2

M3 Nut
x2

Effect diagram after assembling

Содержание RaspClaws

Страница 1: ...1...

Страница 2: ...rt which is just normal But misoperation may cause overheat Misoperation may cause damage to the product Please take care Do not connect the positive and negative poles of the power inversely or the d...

Страница 3: ...itting etc except for commercial purpose The Adeept Company owns all rights of contents in the manual including but not limited to texts images data etc Any distribution or printing should be implemen...

Страница 4: ...ll automatically return to the original position in a very short time Then you can install the rocker arm on the servo at a specified angle automatically return install rocker arm The type of servo an...

Страница 5: ...ylic Plates 2 1 2 Machinery Parts 3 1 3 Electronic Parts 4 1 4 Tools 5 2 Assembly 6 3 1 Preparations before Assembly 6 3 2 Servo debugging 9 3 3 Install and Remove Batteries 12 3 4 install the arm 15...

Страница 6: ...ates are fragile so please be careful when assembling them in case of breaking The acrylic plate is covered with a layer of protective film You need to remove it first Some holes in the acrylic may ha...

Страница 7: ...deept com M1 4 6 Self tapping Screw X12 www adeept com M1 7 6 6 Self tapping Screw X15 www adeept com M3 8 Countersunk Head Screw X2 www adeept com M2 5 14 Copper Stand off X4 www adeept com M2 5 11 C...

Страница 8: ...4 www adeept com 1 3 Electronic Parts Adeept robot HAT X1 Raspberry Pi Camera X1 mpu 6050 Car Light X4 3 Pin Wire X4 18650 Battery Holder Set X1 Servo x15 Raspberry P1 Camera Ribbon X1...

Страница 9: ...3A Using 18650 lithium battery with overcurrent protection function 18650 battery whose capacity is less than 1700mAh 18650 battery specially for strong light flashlight 18650 battery with power shor...

Страница 10: ...and the ribbon Assemble the following components Raspberry Pi Camera x1 Raspberry Pi Camera Ribbon x1 Effect diagram after assembling Note That in the next operation the Pi Camera of the Raspberry Pi...

Страница 11: ...www adeept com 7 2 Connect the Raspberry Pi Camera and the RaspberryPi Assemble the following components...

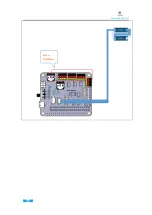
Страница 12: ...www adeept com 8 The two plugs of 3 Pin Wire are small plugs Wires are connected to the input of Car Light the end marked with a white strip pattern...

Страница 13: ...6 Copper Standoffs on Raspberry Pi insert the Adeept Motor HAT into Raspberry Pi Assemble the following components Raspberry Pi x1 M2 5x4 Screw x4 Adeept Motor HAT x1 M2 5x10 6 Copper Standoff x4 M2...

Страница 14: ...www adeept com 10 Connect the driver board to mpu 6050 MPU 6050 x1 M2 5 4 screw x2 M2 5x11 Copper Standoff x1 Effect diagram after assembling...

Страница 15: ...www adeept com 11 3 Connect the 18650 Battery Holder Set to the Adeept Motor HAT Note that the switch is OFF...

Страница 16: ...bbons and 2 batteries Roll one end of the ribbon to let through a battery and fix Insert the batteries into the rings ribbon closer to the anode Install the batteries into the holder based on the pole...

Страница 17: ...www adeept com 13 4 Connect servos to Adeept Motor HAT The color of the servo wire corresponds to the color of the port Connect the servo to pwm0 13 on the Motor HAT...

Страница 18: ...to be connected to the robot HAT And the Raspberry Pi will automatically adjust the servo to the correct angle Turn the switch here to ON power on the servo will automatically rotate to the initial p...

Страница 19: ...15 www adeept com 2 4 install the arm Fix a rocker arm to the acrylic plate Assemble the following components Single Rocker arm x6 M1 7 6 6 self tapping screw x6 Effect diagram after assembling...

Страница 20: ...the following components 4 foot M1 7 6 6 Rocker Self tapping arm x6 screw x2 Effect diagram after assembling Assemble the following components M1 7 6 6 Self tapping Single Rocker screw arm x1 x1 Effec...

Страница 21: ...www adeept com Assemble the following components 17 Car light X 2 M1 4 6 Self tapping screws X4 Effect diagram after assembling...

Страница 22: ...www adeept com 18 2 5 install the feet Fix a debugged servo to the acrylic plate Assemble the following components M2 Nut X2 M2 8 Screw X2 Servo x1 Effect diagram after assembling...

Страница 23: ...www adeept com Assemble the following components 19 M1 7 6 6 Self tapping screw x1 Single Rocker arm x1 Effect diagram after assembling...

Страница 24: ...www adeept com 20 Fix a debugged servo to the acrylic plate Assemble the following components M2 Nut X2 Servo x1 M2 8 Screw X2 Effect diagram after assembling...

Страница 25: ...21 www adeept com Assemble the following components M3 10 Screw X3 M3 Nut X3 Effect diagram after assembling...

Страница 26: ...Fix Robot feet Assemble the following components M2 5 8 Screw X1 The foot of the robot Effect diagram after assembling Install the servo and the acrylic plate on the right foot opposite from the ones...

Страница 27: ...23 www adeept com 2 3 install the Camera Fix Raspberry Pi Camera on Acrylic Plates Assemble the following components Raspberry Pi Camera M1 4 6 Self tapping screws X4 Effect diagram after assembling...

Страница 28: ...24 www adeept com Assemble Pi Camera Assemble the following components M3 Nut X4 M3 10 Screw X4 Effect diagram after assembling...

Страница 29: ...25 www adeept com Assemble the following components M2 8 Screw X2 M2 Nut X2 Servo x1 Effect diagram after assembling...

Страница 30: ...26 www adeept com Assemble the following components M2 Nut X1 M3 Nut X2 M2 8 Screw X1 M3 10 Screw X2 Effect diagram after assembling...

Страница 31: ...www adeept com 27 Effect diagram after assembling Connect Assemble Pi Camera Assemble the following components M2 5 8 Screw X1...

Страница 32: ...www adeept com 28 Fix car light on Acrylic Plates Assemble the following components Car light X 2 M1 4 6 Self tappin g screws X4 Effect diagram after assembling...

Страница 33: ...www adeept com 29 Assemble the following components M3 8 Countersunk Head Screw x2 18650 Battery Holder Set X1 M3 Nut X2 Effect diagram after assembling...

Страница 34: ...www adeept com 30 Assemble the following components Raspberry Pi M2 5 8 Screw X4 Effect diagram after assembling...

Страница 35: ...www adeept com 31 Assemble the following components M3 40 nylon Standoff X8 M3 8 Screw X8 Effect diagram after assembling...

Страница 36: ...www adeept com 32 Assemble the following components M2 5 8 Screw X6 Effect diagram after assembling...

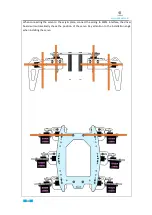
Страница 37: ...When connecting the servo to the acrylic plate connect the wiring to PWM interface the driver board will automatically check the position of the servo Pay attention to the installation angle when ins...

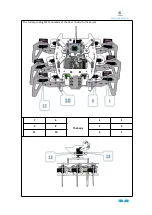
Страница 38: ...34 www adeept com The corresponding PWM numbers of the driver board to the servos 7 6 The body 4 5 9 8 2 3 11 10 0 1...

Страница 39: ...35 www adeept com Servo interfaces...

Страница 40: ...36 www adeept com Assemble the following components M3 8 Screw X 8 Effect diagram after assembling...

Страница 41: ...www adeept com 37 Assemble the following components M3 8 Screw X8 M3 15 Nylon Standoff x4 Effect diagram after assembling...

Страница 42: ...www adeept com 38 Assemble the following components M2 5 8 Screw X1 Effect diagram after assembling...

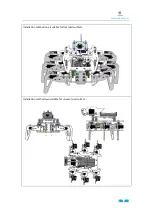
Страница 43: ...www adeept com 39 Assemble the following components M3 8 Screw X2 M3 Nut x2 Effect diagram after assembling...

Страница 44: ...www adeept com 40 Installation method one suitable for flat road surface Installation method two suitable for uneven road surface...

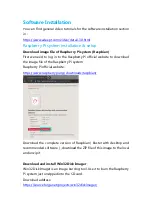
Страница 45: ...to download the image file of the Raspberry Pi system Raspberry Pi official website https www raspberrypi org downloads raspbian Download the complete version of Raspbian Buster with desktop and recom...

Страница 46: ...After selecting the SD card drive letter in Device click the folder icon to the left of the SD card drive letter to find the previously unzipped Raspberry Pi image file The image file name here will...

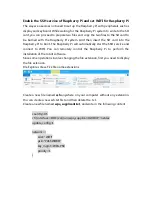
Страница 47: ...cally start the SSH service and connect to WIFI You can remotely control the Raspberry Pi to perform the installation of the robot software Since some operations involve changing the file extension fi...

Страница 48: ...extension of the wpa_supplicant txt file to conf wait for the SD card to be burned copy the prepared ssh file and wpa_supplicant conf to the SD card eject the SD card and insert the SD card into the...

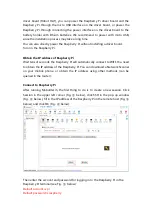
Страница 49: ...downloading Install robot programs in Raspberry Pi Insert the SD card that was previously burned into the Raspberry Pi system and copied with the ssh and wpa_supplicant conf files into the Raspberry P...

Страница 50: ...it tens of seconds the Raspberry Pi will automatically connect to WIFI You need to obtain the IP address of the Raspberry Pi You can download a Network Scanner on your mobile phone or obtain the IP ad...

Страница 51: ...If the IP address of Raspberry Pi changes you need to start a new session from scratch After the account and password are entered correctly a window will pop up asking if you want to save the account...

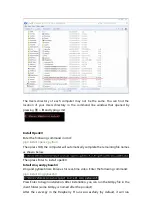
Страница 52: ...that python3 command must be used the same below sudo python3 adeept_raspclaws setup py This process may take several hours please wait patiently for the installation to finish the Raspberry Pi will a...

Страница 53: ...ibraries that have been installed before will be automatically skipped Sometimes the installation of the software or dependent libraries required by the product fails due to network reasons causing se...

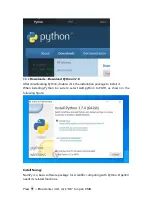
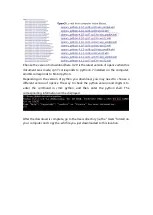
Страница 54: ...llation package to install it When installing Python be sure to select Add python to PATH as shown in the following figure Install Numpy NumPy is a basic software package for scientific computing with...

Страница 55: ...ress Enter to start downloading and installing Numpy Download opencv_python whl and install OpenCV Download address https www lfd uci edu gohlke pythonlibs opencv After getting to this page you may ne...

Страница 56: ...the version of python you download you may need to choose a different version of opencv The way to check the python version and digits is to enter the command in cmd python and then enter the python s...

Страница 57: ...the computer will automatically complete the remaining file names as shown below Then press Enter to install openCV Intsall zmq and pybase64 zmq and pybase64 are libraries for real time video Enter th...

Страница 58: ...the display and the mouse and keyboard set can easily operate the Raspberry Pi s file system the file transfer tool provided by MobaXterm gives us a more convenient choice Enable file transfer system...

Страница 59: ...The only thing to note is that when you save the file MobaXterm will prompt you if you want to synchronize the files in the Raspberry Pi Note Only after you click Yes or Yes to all or click Autosave w...

Страница 60: ...mposed of different modules and windows Below is a list of most of the GUI modules and windows You can compare the modules and windows of your GUI to understand their functions and usage Common GUI mo...

Страница 61: ...ome products can also interact with this window IP address input box Enter the IP address of Raspberry Pi here and click Connect to connect the GUI to the Raspberry Pi Raspberry Pi status and connecti...

Страница 62: ...dows will only appear on products with certain features Color space video streaming window The picture captured by the camera is converted to the HSV color space mode The difference between colors in...

Страница 63: ...moves If the value is set too small the robot car will not be moved or difficult to move PTZ Robotic arm control module Divided into two parts outlined by a red line The upper part is dedicated to th...

Страница 64: ...of an ultrasound scan Color setting module Used to set the color to look for in color tracking and the line color to be tracked in video tracking mode Clicking on Color Set will change the color of c...

Страница 65: ...anning The robot uses an ultrasonic module to scan the semicircle range in front of it and displays the obtained obstacle information on an ultrasonic radar Color tracking After enabling the robot wil...

Страница 66: ...der Switch video rendering LineColorSwitch Set the color of the line to be tracked based on the color on the color setting module Three sliders The upper and lower sliders respectively control the pos...

Страница 67: ...camera It is mainly used in conjunction with the visual line tracking mode You can adjust the exposure value to make the robot better recognize the line to be tracked You can turn on video rendering t...

Страница 68: ...omputer actively refuses and other similar problems A There is a server py file in the server directory of the package As mentioned in the installation tutorial most of the problems are caused by it n...

Страница 69: ...rror messages will be displayed on MobaXterm Q When I open the GUI it crashes Nothing happens when I open the GUI I want to see the error message of the GUI what should I do A The GUI crashes or doesn...

Страница 70: ...all projects in the guide you should have some knowledge of the Raspberry Pi and Robot thus you can try to change the robot into other projects by adding more Adeept modules or changing the code for e...

Страница 71: ...61 www adeept com...

Отзывы: