background image


20

Select Save to save your changes. To quit without saving changes, select another option from the 
left hand navigation and select No in the Save Changes dialog box.  To restore your original 
settings, click Refresh in the top right hand corner and select No in the Save Changes dialog box. 

P

P

a

a

y

y


P

P

e

e

r

r

i

i

o

o

d

d


The Pay Period Length specifies how often employees will get paid. 

To Change the Pay Period Length: 

From the main window of Attendance Rx, click the Setup icon or enter the View menu and choose 
Setup.  

Change the Pay Period Length to the desired setting.  

The available choices are

• 

Weekly   

- Employees are paid once per week 

• 

Bi-weekly 


- Employees are paid every two weeks 

• 

Semi-Monthly 


- Employees are paid twice per month 

• 

Monthly  

- Employees are paid once per month 


Select Save to save your changes. To quit without saving changes, select another option from the 
left hand navigation and select No in the Save Changes dialog box.  To restore your original 
settings, click Refresh in the top right hand corner and select No in the Save Changes dialog box. 


Setting the Next Pay Period Start Date 

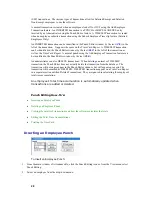
The Next Pay Period Start Date is the date on which the next pay period will start.  Set the Pay 
Period Length prior to setting the Next Pay Period Start Date.  The next pay period start date must 
be greater than the current time and date and less than the current time and date plus the length of 
the pay period. 

Changing the Next Pay Period Start Date Setting: 

• 

From the main window of Attendance Rx, click the Setup icon or enter the View menu and choose 
Setup 

• 

Change the Next Pay Period Start Date value to the desired future date. 

• 

Select Save to save your changes. To quit without saving changes, select another option from the 
left hand navigation and select No in the Save Changes dialog box.  To restore your original 
settings, click Refresh in the top right hand corner and select No in the Save Changes dialog box. 

P

P

a

a

y

y


I

I

n

n

t

t

e

e

r

r

v

v

a

a

l

l


R

R

o

o

u

u

n

n

d

d


The Pay Interval Round allows the time worked totals to be rounded and calculated to the nearest 
one, five, ten, or fifteen-minute interval.  

Example 1: 

Содержание Attendance Rx

Страница 1: ...ndance from a single Windows based PC Key Time and Attendance Features Easily review employees time totals past and present Edit Time Sheets Save and print reports Export data to various file formats and payroll programs Report on Archived Pay Periods Submit Single Punch or Multiple Punches Time Slips Submit Future Transactions using Time Slips Feature ...

Страница 2: ...h Rules 26 Punch Editing 27 Inserting an Employee Punch 28 Deleting an Employee Punch 29 Viewing Punch Calculation Details 29 Editing the Total Time Accumulations 30 Printing a Time Card 31 Submitting Employee Time Slip 31 Reports 32 Future Transactions Report 33 Payroll Exports 34 Exporting Data 35 Unapproved Timecards 35 Wells Fargo ExpressPay Premier QwikPay and Intuit PC Access 36 PayChex Payl...

Страница 3: ...a at te e w wi it th h Q Qu ui ic ck kB Bo oo ok ks s 52 E Ex xp po or rt ti in ng g A At tt te en nd da an nc ce e R Rx x e em mp pl lo oy ye ee e t ti im me ec ca ar rd d d da at ta a t to o Q Qu ui ic ck kB Bo oo ok ks s 52 G Ge en ne er ri ic c A AS SC CI II I f fi il le e E Ex xp po or rt t 53 A AD DP P E Ex xp po or rt t 54 Importing Attendance Rx data into Peachtree Complete Accounting 55 S...

Страница 4: ... the NEXT pay period in order to establish the two days of each month that mark the beginning of each Semi monthly pay period Overtime Thresholds Overtime thresholds specify how employee hours will be divided among Regular Overtime1 and Overtime2 during the course of each day and of each week For more information on overtime calculations in general see Overtime Thresholds Pay Interval Rounding The...

Страница 5: ...must be unique among employees and between 1 and 9999 This number is used to clock in and out at the PC Employee Number This is the number to be associated with an employee This is typically a Social Security or payroll number Employee Shift Assignment The shift number defines which set of shift and lunch rules are to be associated with a particular employee Export ID The Employee Alternate Export...

Страница 6: ...l 1 Once an employee s combined Regular hours have exceeded Weekly Overtime 1 Threshold AND the employee s combined Regular and Overtime 1 hours for the week have reached the Weekly Overtime Level 2 Threshold all subsequent hours worked for the week will accrue to Overtime Level 2 To disable either Weekly Overtime 1 or Weekly Overtime 2 set the Overtime Level 1 or Overtime Level 2 threshold to zer...

Страница 7: ...ng IN late or punching OUT early Lunch Start The earliest time of day at which an employee can punch out for lunch The system may adjust an employee s out to lunch punch to make sure that a full Lunch Duration is taken Lunch End This is the latest time of day at which an employee should punch back in from lunch The system may adjust an employee s IN from lunch punch to make sure that a full Lunch ...

Страница 8: ...urrent pay period previous pay period or any archived pay period The report may be for one employee employees on a specific shift or for all employees Who s In and Who s Out Report The Who s In and Who s Out Report lists all employees or a specific shift of names by who is punched IN or punched OUT Employee Profile Report The Employee Profile Report lists all of the employees who have been entered...

Страница 9: ...t shows you a two column list of employee names showing who has had their time card approved and who has not Approaching OT Daily Totals by Day This report shows the time totals for all employees broken out daily for the selected pay period Daily Totals by Employee The Daily Totals by Employee report shows the hours worked for each day of the selected pay period printed one employee per page ...

Страница 10: ...if you choose you can simply click through the initial Pay period setup add employees and start clocking IN and OUT However you might want to include or configure many of the other features to meet your particular needs Here is a suggested setup sequence you may wish to follow Notes Most settings can be changed at any time and will affect only the total time accumulations in the Previous and Curre...

Страница 11: ... for accuracy and making any desired changes you may begin entering transactions for all of your employees A At tt te en nd da an nc ce e R Rx x S Se et tu up p W Wi iz za ar rd d The first time Attendance Rx is executed the user will be presented with the Attendance Rx Pay Period Setup Wizard The Attendance Rx Pay Period Setup Wizard establishes the initial Pay Period settings for your Attendance...

Страница 12: ...user may use the BACK button to review or change previous settings When all information is entered the user must click on the FINISH button to complete the process and to start the Attendance Rx services Each of these settings can be changed at any time during normal operation using the Setup form of the Attendance Rx Administrator If the wizard is cancelled the Attendance Rx will automatically ru...

Страница 13: ...isting employee Employee How To s Adding a New Employee Editing an Employee Deleting an Employee Biometrics Enrolling an Employee Fingerprint Please note that biometrics must be installed and enabled to use this functionality A Ad dd di in ng g a a n ne ew w E Em mp pl lo oy ye ee e From the main window of Attendance Rx click the Employees icon or enter the View menu and select Employees ...

Страница 14: ...o erase changes made before adding a new employee click Delete if using manual entry or Cancel is using the Wizard Select another option from the left hand menu to exit this screen E Ed di it ti in ng g a an n E Em mp pl lo oy ye ee e To Edit an Employee From the main window of Attendance Rx click the Employees icon or enter the View menu and choose Employees Select the row containing the employee...

Страница 15: ...er has punches in the system before you can delete them Select Yes in the Delete Employee dialog box to confirm the deletion select No to cancel the deletion Select another option from the left hand menu to exit this screen E Em mp pl lo oy ye ee e O Op pt ti io on ns s The Employee Options selection allows you to modify the way employees will see the time and date when punching in or out You can ...

Страница 16: ...nges click Cancel E Em mp pl lo oy ye ee e B Bi io om me et tr ri ic cs s Attendance Rx supports various biometric devices which you can easily integrate into your Attendance Rx solution Biometrics refers to and employee s fingerprint or a template of their hand which is used to verify their identity before allowing that individual to clock IN or OUT Attendance Rx currently provides two solutions ...

Страница 17: ...age to employees when they clock in or out From the main window of Attendance Rx click the Messages icon or enter the View menu and choose Messages To edit the company message Enter your company wide message in the Enter a Company Message field This message will appear on screen after every employee punches in or out Click Save to save the message or click the X to delete the Company Message To ed...

Страница 18: ...in the Message field next to the employee s name This message will appear only on this employee s screen after he or she punches in or out Select another option from the left hand navigation menu to exit this screen Setup S Se et tu up p ...

Страница 19: ...o Change the Setup Options From the main window of Attendance Rx click on the Setup icon or select Setup from the View menu Adjust the following items as desired on the General Tab Pay Period Overtime Thresholds 7th Day Overtime California Overtime Pay Interval Round Max Time On Clock Day Change Offset Time Card Approvals Salaried Employee Settings Adjust the following items as desired on the Holi...

Страница 20: ...inal settings click Refresh in the top right hand corner and select No in the Save Changes dialog box Setting the Next Pay Period Start Date The Next Pay Period Start Date is the date on which the next pay period will start Set the Pay Period Length prior to setting the Next Pay Period Start Date The next pay period start date must be greater than the current time and date and less than the curren...

Страница 21: ...e Save Changes dialog box O Ov ve er rt ti im me e T Th hr re es sh ho ol ld ds s Overtime Thresholds specify the amount of time an employee must work before overtime will begin to accumulate The threshold amounts may be set on both a daily basis and weekly basis Both the daily and weekly overtime thresholds may be set at two different levels to reflect company policy If your employees are paid ov...

Страница 22: ...select No in the Save Changes dialog box To restore your original settings click Refresh in the top right hand corner and select No in the Save Changes dialog box Disable Overtime You can disable overtime by setting the values to zero hours 7 7t th h D Da ay y O Ov ve er rt ti im me e When enabled 7th Day Overtime will promote all hours worked on the seventh consecutive worked day to the next high...

Страница 23: ... ls s The Attendance Rx system allows you to prevent exporting time cards to payroll software that has not yet been approved Setting your Time Card Approval Preferences From the main window of Attendance Rx click the Setup icon or enter the View menu and choose Setup If you want to prevent exporting unapproved time cards for hourly employees check the box labeled Do not export unapproved Time Card...

Страница 24: ...restore your original settings click Refresh in the top right hand corner and select No in the Save Changes dialog box S Sa al la ar ri ie ed d E Em mp pl lo oy ye ee e S Se et tt ti in ng gs s The Salaried Employee Settings section allows you to set the parameters for which your salaried employees will be paid To Change Salaried Employee Settings From the main window of Attendance Rx click the Se...

Страница 25: ...y with its own set of rules These can be broken down into two groups as described below Editing Shift and Lunch Rules From the main window of Attendance Rx click the Shifts icon or from the View menu select Shifts Select one of the 12 shifts to edit from the pull down menu You may change the name of the Shift by selecting the existing shift and and modifying the text If the selected shift rule is ...

Страница 26: ...n which employees transactions will be treated as if they occurred exactly at the Start or Stop times Shift Grace The number of minutes after the Start time that an employee s late punch is still considered on time The number of minutes before the Stop time that an employee s early punch out is considered on time Shift Dock The number of minutes an employee will lose from their daily total for pun...

Страница 27: ...ons Adjust the total time accumulations View the details of transaction totals and how the software calculated the transactions Add miscellaneous transactions Vacation Holiday Sick Other Approve an employee s time card Print an employee s time card Transactions are easily inserted when an employee forgets to punch IN or OUT Attendance Rx can store several different types of transactions some examp...

Страница 28: ... Punch Editor window by the text CLK An administrator can also DELETE transactions When deleting a normal or TIMESLIP transaction the Punch Editor does not actually delete the transaction from the database The transaction will no longer appear in the Punch Editor window but will appear on reports The transaction will be marked as DELETED DELETED transactions appear on a Time Card Report in a separ...

Страница 29: ...lect either Punch Holiday Vacation Sick Reg FMLA or Other 7 Select Insert or press at the same time ALT and I The punch will immediately appear in the window it will look like the image shown above D De el le et ti in ng g a an n E Em mp pl lo oy ye ee e P Pu un nc ch h To Delete an Employee Punch From the main window of Attendance Rx click the Punch Editing icon or from the View menu select Punch...

Страница 30: ... um mu ul la at ti io on ns s To Edit Total Time Accumulations From the main window of Attendance Rx click the Punch Editing icon or from the View menu select Punch Editing Select an employee from the drop down list box Select Edit Totals or press at the same time ALT and E The Edit Time Totals dialog screen appears Time can be added to or subtracted from an employee s total time for either the cu...

Страница 31: ...pl lo oy ye ee e T Ti im me eS Sl li ip p This feature is for use by Employees entered as Salaried Employees in the Attendance Rx Employee Profiles feature Users may enter a batch of transactions as a single Time Slip This can be useful for employees who wish to submit vacation or holiday hours in advance or employees who track their own hours and submit their time at the end of each pay period Em...

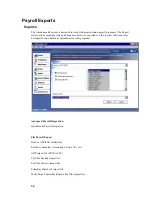
Страница 32: ...r Preview it on the PC screen Export or print it to the default Windows printer The available reports include Hours Summary Time Cards Who s In Who s Out Time Card Approval Employee Profiles Rules Setup Report Shifts Holidays Raw Transactions Approaching OT Daily Totals By Day Daily Totals by Employee ...

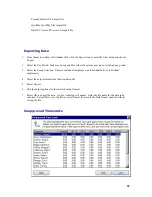
Страница 33: ...thods available include First name Last name badge number employee number or shift 8 Select the Print button if you wish to print a hard copy of the report 9 Select the Preview button to view the report on the PC screen 10 Select the Export button to create a ASCII report file or send the data to a Payroll program The default extension for the created file will be RPT The created file can be viewe...

Страница 34: ...in order that it can later be imported into a database spreadsheet or other programs Advanced Payroll Integration QuickBooks Payroll Integration File Payroll Export Generic ASCII file delimited Peachtree Complete Accounting Version 7 0 csv ADP import file EPIP or CSV PayChex Paylink import file PayChex Preview import file PrimePay PrimeLink import file Wells Fargo ExpressPay Express Pay Plus impor...

Страница 35: ...vious or archived pay period 3 Select the Group Selection Choices include all employees an individual shift or individual employee s 4 Select the output format from the drop down list 5 Select Export 6 Edit the output options for the selected output format 7 Select OK to export the data A Save As dialog will appear Enter the file name for the data to be exported Select OK to save the file or selec...

Страница 36: ... exporting using this format Company Name Payroll application company name Determined by the payroll application being used Regular Pay Code Payroll application pay code assigned to Regular Worked Hours PLUS only ignored in applications that use PC Access JR format Overtime Level 1 Pay Code Payroll application pay code assigned to Overtime Level 1 Worked Hours PLUS only ignored in applications tha...

Страница 37: ...ient ID Your PayChex Paylink Client ID Site Number The PayChex Paylink Site number for the employees entered in the Time and Attendance Software Sequence Number The PayChex Paylink Import Sequence Number Vacation Pay Code A valid PayChex Paylink pay code for Vacation Pay Holiday Pay Code A valid PayChex Paylink pay code for Holiday Pay Sick Pay Code A valid PayChex Paylink pay code for Sick Pay Ot...

Страница 38: ...Hourly Wages Vacation Pay Code PayChex Preview Pay Code for Vacation Hourly Wages Holiday Pay Code PayChex Preview Pay Code for Holiday Hourly Wages Sick Pay Code PayChex Preview Pay Code for Sick Hourly Wages Other Pay Code PayChex Preview Pay Code forIOther Hourly Wages Vacation Export as Deduction If checked export Vacation as a deduction otherwise as earning Holiday Export as Deduction If chec...

Страница 39: ... PrimePay PrimeLink import Coded Hours field for Sick Hours Other Pay Code The value to use in the PrimePay PrimeLink import Coded Hours field for Other Hours Q Qu ui ic ck kB Bo oo ok ks s P Pa ay yr ro ol ll l I In nt te eg gr ra at ti io on n The Attendance Rx Software easily exports employee Time Card data to QuickBooks including Regular Hours and Adjustments Overtime Level 1Hours and Adjustme...

Страница 40: ...eachtree Pay Item Code associated with Overtime Level 1 Pay Overtime 2 Pay Level The Peachtree Pay Level 1 20 associated with Overtime Level 2 Pay Overtime 2 Pay Item Code The Peachtree Pay Item Code associated with Overtime Level 2 Pay Vacation Pay Level The Peachtree Pay Level 1 20 associated with Vacation Pay Vacation Pay Item Code The Peachtree Pay Item Code associated with Vacation Pay Holida...

Страница 41: ...endance Rx has already been used to export employee time cards to Peachtree Any arbitrary changes to this field can cause imports to Peachtree to fail 3 After all fields have been entered correctly click on the OK button The software will then prompt you for the name of the Peachtree Complete export file csv Specify a file name and click on Save Save the location and the file name that you selecte...

Страница 42: ...ram using a correct User Login and Password The user who gains access using an Admin User Login Password entry may add new Admin Users to the Attendance Rx New user logins are automatically assigned a password which is identical to the login Upon the first successful login the Attendance Rx will prompt new users to change their password A user may change his or her password at any time by clicking...

Страница 43: ...isors icon or enter the View menu and choose Supervisors Select the login of a supervisor you would like to delete and select Delete Select an option from the left hand menu to move from this screen R Re es se et tt ti in ng g a a S Su up pe er rv vi is so or r s s p pa as ss sw wo or rd d To Reset a Supervisor s Password From the main window of Attendance Rx click the Supervisors icon or enter th...

Страница 44: ...s will only apply for your login they will not affect the way employees see their time when punching in or out To Change User Preferences Select File from the main window then Preferences Set your preference for Time Totals Format Select your preference for Date Format from the drop down list Set your preference for Time of Day Format To save your preferences click Save To cancel without saving yo...

Страница 45: ...rieve your IN OUT Status o Click Punch to Clock IN OUT o Click Punch and Close to Clock IN OUT closing the window when completed Biometrics Employee FIU Verification If you have Biometrics Functionality enabled your employees will be required to verify their fingerprint before Attendance Rx will allow them to clock IN or OUT Read more about Employee FIU verification Read more about Employee FIU En...

Страница 46: ...UT and enter your Employee PIN number Click OK to save your settings NOTE The next time you log off your computer you will automatically be clocked OUT S Su ub bm mi it t E Em mp pl lo oy ye ee e T Ti im me e S Sl li ip p The Time Slip allows an employee to submit a batch of transactions and hour totals Access to this feature requires a PIN number assigned by the supervisor ...

Страница 47: ...s Choose the Pay Period for the Time Slip you would like to submit To Edit Your Time Slip Once your Time Slip has been accessed you can edit the totals for any day listed on the left side of the screen Select the row cooresponding to the date you want to edit Select the column under the category you want to edit Simply type over the existing value with your new total Your New totals will be displa...

Страница 48: ...right pane C Cl li ie en nt t C Co on nn ne ec ct ti io on n S Se et tt ti in ng gs s The Connection Settings allow you to change the network settings for your Attendance Rx Network Each client must have a unique IP Address Internet Protocol which is used to talk to other Attendance Rx computers The Connection Settings require you specify two IP Addresses Your local IP address that the client appl...

Страница 49: ...t tu up p Holiday Dates Enter the dates of paid holidays These dates should be entered in advance From the main window of Attendance Rx click the Setup icon or enter the View menu and choose Setup Click on the Holiday Tab to adjust Holiday Settings Enter the date of the Holiday in the Date field Enter the description of the Holiday in the Holiday field Select Save to save your changes To quit with...

Страница 50: ...mit Time Slips by using Submit Employee Timeslip menu item from the Attendance Rx Services System Tray Icon popup menu You may access this feature by right clicking on the Attendance Rx Services System Tray Icon and selecting Submit Employee TimeSlip The icon is located in the bottom right hand corner of your computer desktop by the Windows System Clock The icon is an employee seated behind and of...

Страница 51: ...s checked and if not check this option G Click OK to close the Employee Defaults window then click OK again to close the Preferences window 2 Create QuickBooks Hourly Wage Pay Items for Regular Overtime Level 1 and Overtime Level 2 The Attendance Rx Software exports employee time card data as Regular Overtime 1 Overtime 2 Vacation Holiday Sick and Other hours QuickBooks must be setup with a unique...

Страница 52: ...the entries for each employee Export ID in the Attendance Rx software E Ex xp po or rt ti in ng g A At tt te en nd da an nc ce e R Rx x e em mp pl lo oy ye ee e t ti im me ec ca ar rd d d da at ta a t to o Q Qu ui ic ck kB Bo oo ok ks s Step 1 Select the output format QuickBooks Integration v1 0 Step 2 Click Export If you have never mapped your pay codes or chosen a QuickBooks company file QBW you...

Страница 53: ...ration will be abandoned NOTE The spelling of the Pay Codes and corresponding Payroll Items must be identical G Ge en ne er ri ic c A AS SC CI II I f fi il le e E Ex xp po or rt t The Attendance Rx software exports employee profile and time card data to a Generic ASCII delimited file based on values entered for the following fields Insert Quotes Around Non Numeric Name Fields Output Field Titles R...

Страница 54: ...mber The numeric ADP Pay Number Overtime Level 2 Pay Code The value to use in the ADP import Coded Hours field for Overtime Level 2 Hours Overtime Level 2 Pay Code Name The name of the value to use in the ADP import Coded Hours field for Overtime Level 2 Hours Vacation Pay Code The value to use in the ADP import Coded Hours field for Vacation Hours Vacation Pay Code Name The name of the value to u...

Страница 55: ...tree Compatible file from Attendance Rx data go to the Import Export form in your Peachtree Complete Accounting software and create a new export format including all fields and with Field Headers in first Record selected Then selected the file and execute the import Setting up Peachtree Complete Accounting Version 7 0 Inventory Items You must set up inventory item s that are associated with REG OT...

Страница 56: ...ies provides data and software maintenance functions for Attendance Rx Only users with a Login and Password are allowed to access these functions The System Utilities window provides two tabs 1 Data Tools Provides interface to manage your company s database including import export data initialization and maximum employee count upgrade More Information on Data Tools NOTE Most functions on this scre...

Страница 57: ...re Import from Acroprint TimeStationPC Import employees setup rules and shifts from an existing TimeStationPC or TimeStationPC Network database Setup Punch Export Configure settings to export punch transactions to a text file after each successful clock IN or OUT from an employee Upgrade Maximum Number of Employees Upgrade ability to add additional employees to Attendance Rx Requires a purchased u...

Страница 58: ...ce Rx Biometrics Functionality Installed Biometrics Device Once Biometrics Functionality is enabled you will need to install an FIU device on each workstation where your employees clock IN or OUT To install a new Biometrics Device 1 Attach the FIU device to an available USB port On most workstations the operating system will find and automatically install the new device 2 Click the Biometrics tab ...

Страница 59: ...l Employee Biosense Setting If an employee s Biosense setting is set to zero they will not be required to verify their fingerprint The system will proceed as though Biometrics were not enabled More about Employee FIU Enroll and Biosense Employee FIU Enroll When Biometrics Functionality is enabled you will need to enroll each employee s fingerprint on those workstations where that employee will clo...

Страница 60: ...mployee Sensitivity Setting to zero 0 Employee HandPunch Enroll When Biometrics Functionality is enabled you will need to enroll each employee s hand template on those workstations where that employee will clock IN or OUT NOTE The Enroll Hand button will only be visible when Biometrics Functionality is enabled To enroll and employee s FIU 1 Go to the Employee screen in the Administrator by clickin...

Страница 61: ...rt please have your product CD and registration information available Mailing Address Acroprint Time Recorder Company Inc Attendance Rx Support 5640 Departure Drive Raleigh North Carolina 27616 Phone Toll Free 800 334 7190 Web Internet Email support acroprint com Website http www acroprint com ...

Отзывы: