


49
To install the easy-swap SATA HDD cage
The easy-swap SATA HDD cage is an optional four-bay internal HDD
enclosure without a SATA backplane board.
1
Observe the ESD precautions and pre-installation procedures
described on page 35.
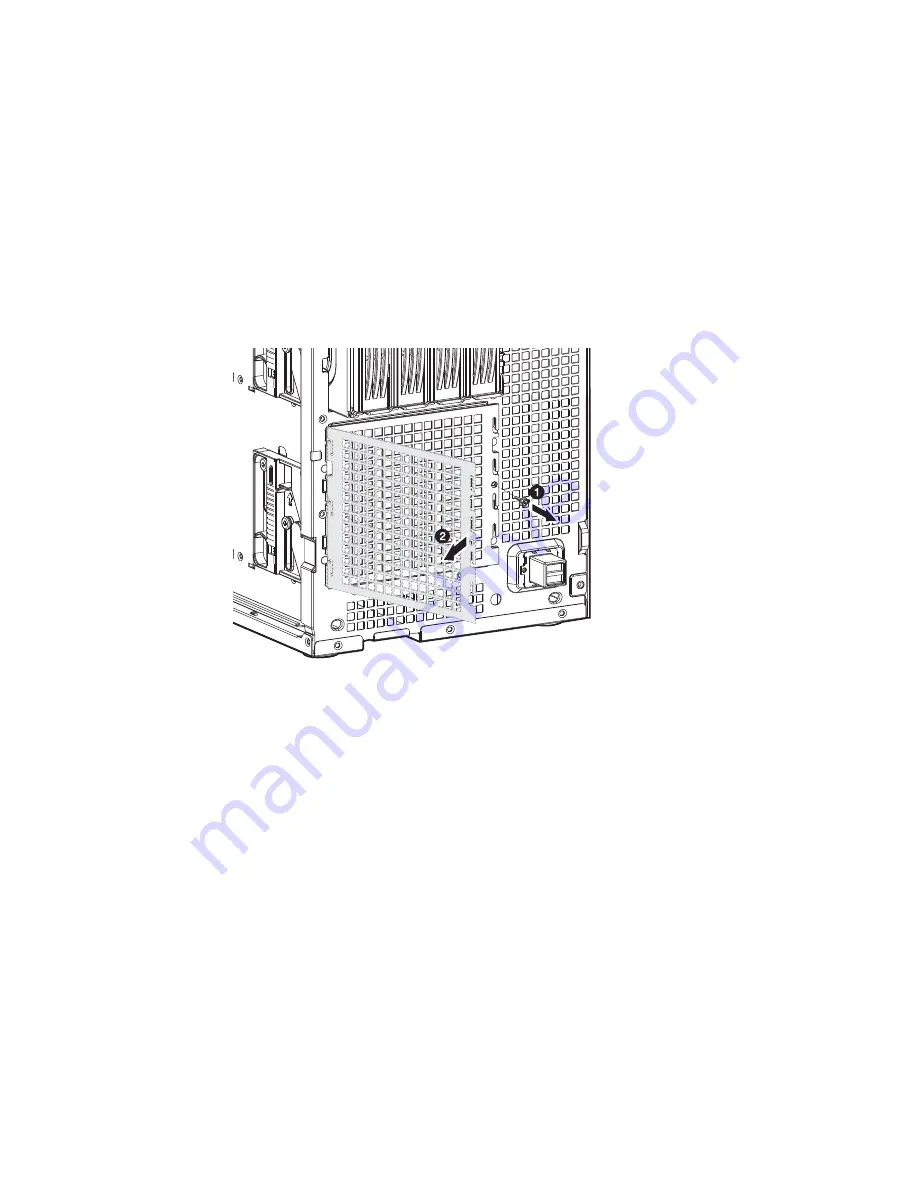
2
Remove the HDD cage bay cover. See page 39.
3
Remove the screw that secures the cover to the empty HDD bay,
then detach the cover.
4
Install the easy-swap cage.
Содержание Altos G5350
Страница 1: ...Acer Altos G5350 Series User s Guide ...
Страница 10: ...x ...
Страница 11: ...1 System tour ...
Страница 31: ...21 5 4 pin power cable connector 6 I2 C bus interface connector No Code Description ...
Страница 32: ...1 System tour 22 ...
Страница 33: ...2 System setup ...
Страница 43: ...3 System upgrade ...
Страница 88: ...3 System upgrade 78 ...
Страница 89: ...4 BIOS setup ...
Страница 123: ...113 Save Changes Saves changes made in the BIOS setup Parameter Description ...
Страница 124: ...4 BIOS setup 114 ...
Страница 125: ...5 Troubleshooting ...
Страница 136: ...5 Troubleshooting 126 ...
Страница 137: ...Appendix A System management utility ...
Страница 144: ...Appendix A System management utility 134 ...
Страница 145: ...Appendix B Acer Altos G5350 rack installation guide ...
Страница 146: ...This appendix shows you how to set up the Altos G5350 server in a rack mount configuration ...
Страница 161: ...Appendix C SCSI RAID configuration ...
Страница 162: ...This appendix shows you how to create a RAID volume in your SCSI drives ...