


Appendix B: Acer Altos G5350 rack installation guide
144
3
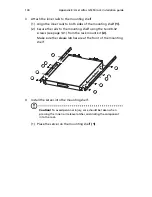
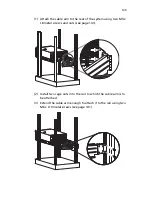
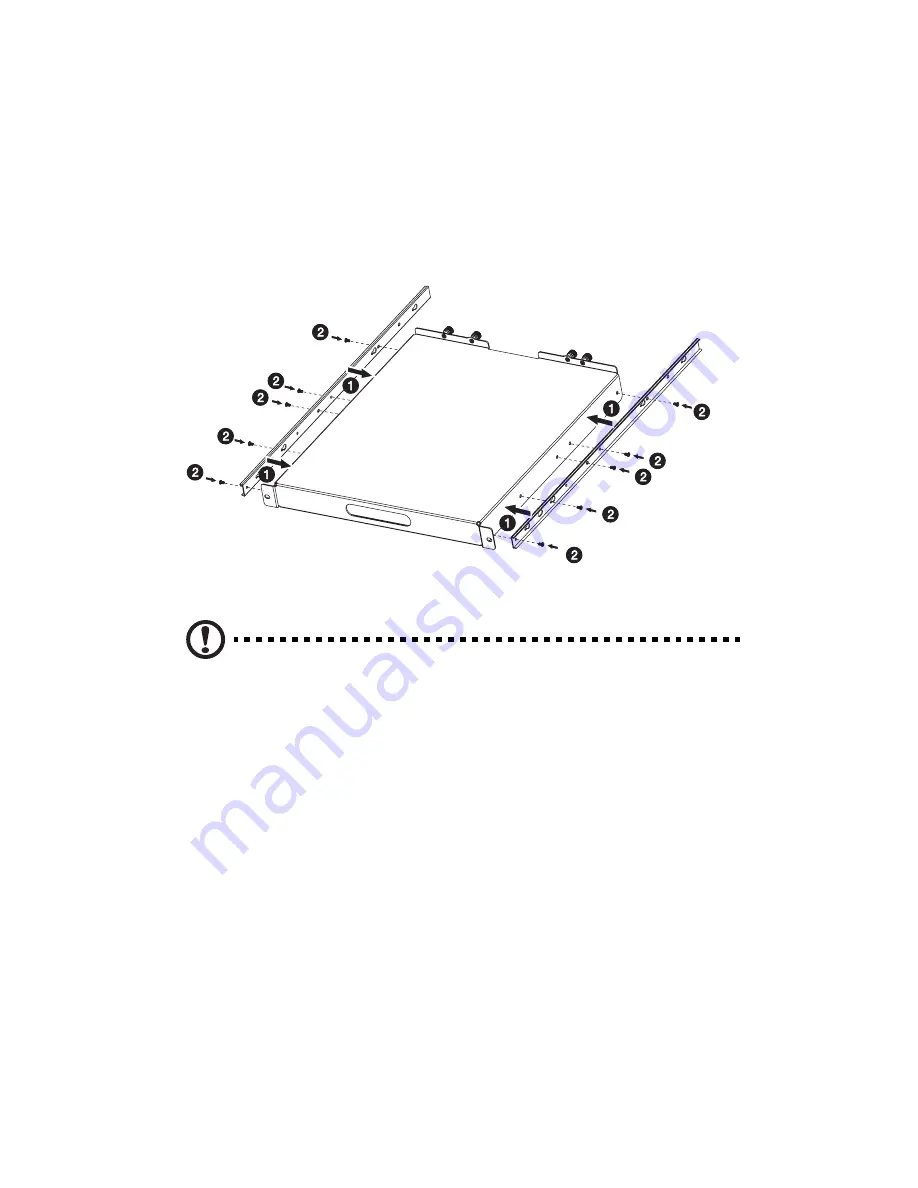
Attach the inner rails to the mounting shelf.
(1) Align the inner rails to both sides of the mounting shelf
(1)
.
(2) Secure the rails to the mounting shelf using the ten #8-32
screws (see page 141) from the rack mount kit
(2)
.
Make sure the release latches are at the front of the mounting
shelf.
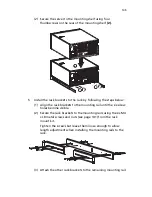
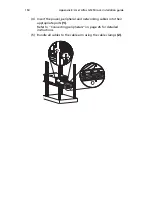
4
Install the server into the mounting shelf.
Caution!
To avoid personal injury, care should be taken when
pressing the inner rail release latches and sliding the component
into the rack.
(1) Place the server on the mounting shelf
(1)
.
Содержание Altos G5350
Страница 1: ...Acer Altos G5350 Series User s Guide ...
Страница 10: ...x ...
Страница 11: ...1 System tour ...
Страница 31: ...21 5 4 pin power cable connector 6 I2 C bus interface connector No Code Description ...
Страница 32: ...1 System tour 22 ...
Страница 33: ...2 System setup ...
Страница 43: ...3 System upgrade ...
Страница 88: ...3 System upgrade 78 ...
Страница 89: ...4 BIOS setup ...
Страница 123: ...113 Save Changes Saves changes made in the BIOS setup Parameter Description ...
Страница 124: ...4 BIOS setup 114 ...
Страница 125: ...5 Troubleshooting ...
Страница 136: ...5 Troubleshooting 126 ...
Страница 137: ...Appendix A System management utility ...
Страница 144: ...Appendix A System management utility 134 ...
Страница 145: ...Appendix B Acer Altos G5350 rack installation guide ...
Страница 146: ...This appendix shows you how to set up the Altos G5350 server in a rack mount configuration ...
Страница 161: ...Appendix C SCSI RAID configuration ...
Страница 162: ...This appendix shows you how to create a RAID volume in your SCSI drives ...