3 System upgrade
54
2
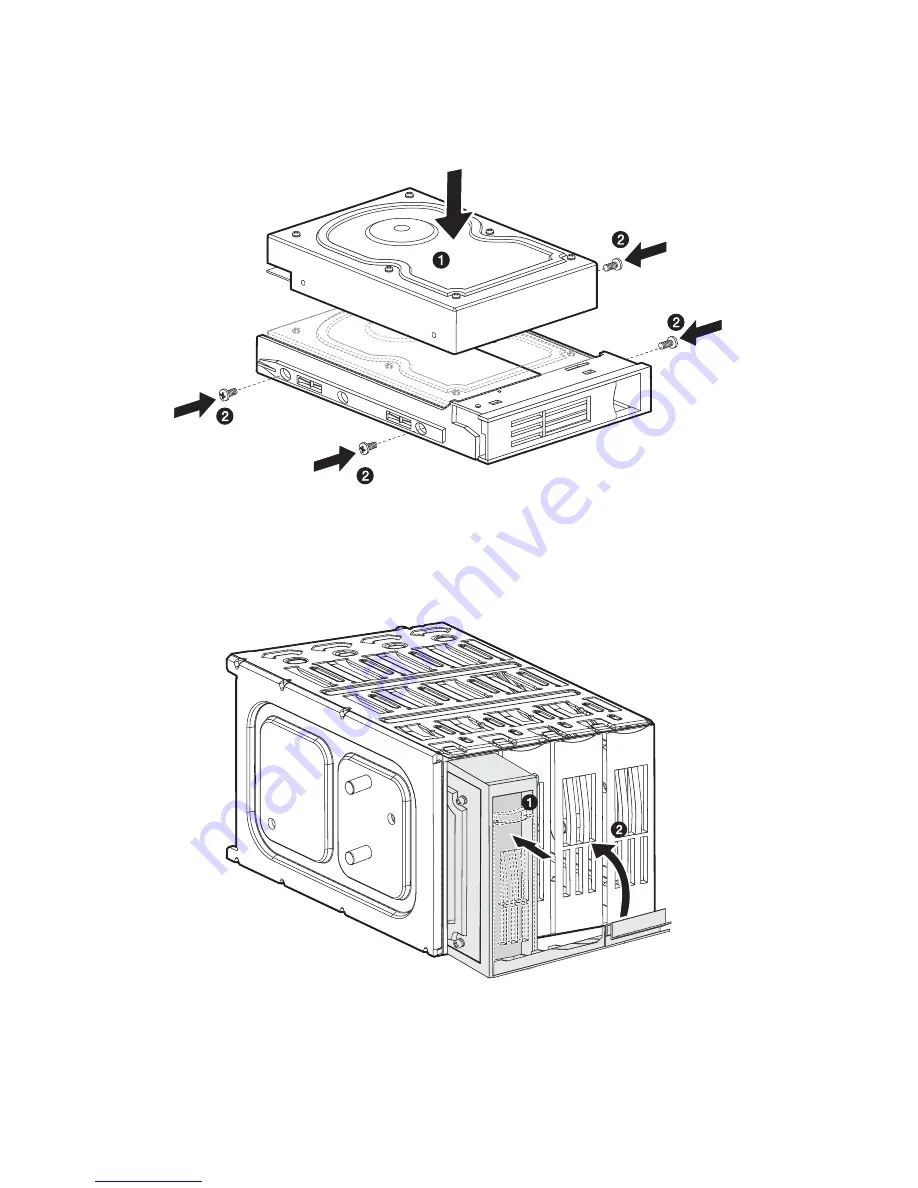
Install a hard disk on the hard disk carrier
(1)
, then secure it with
the four screws that came with the hard disk carrier
(2)
.
3
Insert the new hard disk carrier into the cage with the lever still
extended
(1)
.
4
Make sure that the drive is properly inserted before closing the
lever, then push the lever back until it clicks into place
(2)
. .
Содержание Altos G530 Series
Страница 1: ...Acer Altos G530 Series User s Guide ...
Страница 10: ...x Index 179 ...
Страница 11: ...1 System tour ...
Страница 33: ...2 System setup ...
Страница 43: ...3 System upgrade ...
Страница 87: ...4 BIOS setup ...
Страница 119: ...109 CD DVD Drives The CD DVD Drives submenu displays the type of ATAPI CD ROM installed in the system ...
Страница 131: ...5 Troubleshooting ...
Страница 153: ...Appendix A System management utility ...
Страница 160: ...Appendix A System management utility 150 ...
Страница 161: ...Appendix B Acer Altos G530 rack installation guide ...
Страница 162: ...This appendix shows you how to set up the Altos G5350 server in a rack mount configuration ...
Страница 177: ...Appendix C SATA RAID configuration ...
Страница 178: ...This appendix shows you how to create a RAID volume in your SATA drives ...
Страница 181: ...171 c Press Ctrl Alt Del to reboot the server 8 Install an Operating System to the RAID array ...
Страница 182: ...Appendix C SATA RAID configuration 172 ...
Страница 183: ...Appendix D SCSI RAID configuration ...
Страница 184: ...This appendix shows you how to create a RAID volume in your SCSI drives ...


