Web interface setup wizard
Setting up the system
The setup wizard guides you through the required basic
settings for the system. The network video recorder will
then be ready for recording and monitoring.
Note
All the advanced settings can be found in the de-
vice menu, see the overview on page25.
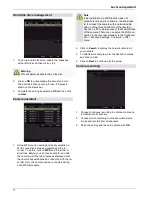
•
Click on
OK
to start the setup wizard.
Note
If you activate the checkbox, the setup wizard will
not automatically pop up the next time you log in.
This will be saved on the relevant browser. If you
use another PC to access the recorder via the
web interface, this notification will pop up there
again.
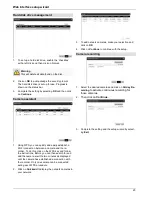
•
A short breakdown shows you the included points.
Click on
Continue
.
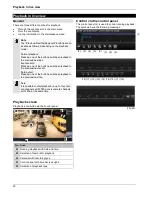
Administrator set up
1. Click on the input field and enter the admin pass-
word.
If you have already changed the password, enter the
password you selected here.
2. Enter the new password and confirm the entry in the
field below.
3. Click on
Save
.
4. Click on
Continue
.
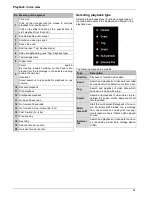
Access point settings
1. The SSID is the name of the Wi-Fi network created
by the recorder. Change the name to one of your
choice
2. Set the security mode.
(Recommended: WPA2-PSK)
3. Set the encryption type.
(Recommended: AES)
4. The key is the password necessary for connection to
the recorder’s Wi-Fi network. Change the password
to one of your choice. It must contain at least eight
characters.
5. Click on
Save
.
6. Click on
Continue
.
Note
Changing the SSID settings can take up to two
minutes.
19


