Introducing the BIOS
User’s Manual
4-5
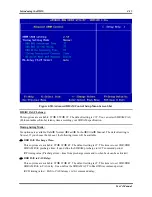
Estimated new CPU Clock:
This item will show you the frequency that according settings from the item “
CPU Front Side Bus
Frequency
” and “
CPU Multiplier factor
”.
CPU FSB/DRAM/AGP/PCI Ratio:
Seven options are available: 3:3:2:1 3:4:2:1 3:5:2:1 3:6:2:1 4:3:2:1 4:4:2:1 4:5:2:1.
The default setting is
3:3:2:1
or
4:3:2:1
. This item lets you set the processor
F
ront
S
ide
B
us, DRAM,
AGP and PCI clock ratio. It correlates with the processor FSB clock you set. Many of options are
available, you can choose the divider ratio you want. In this case (4:3:2:1), the DRAM clock will be the
processor FSB clock divided by 4 and times 3. AGP clock will be the processor FSB clock divided by 4
and times 2. The PCI clock will be the processor FSB clock divided by 4 and times 1.
Fixed AGP/PCI Frequency:
Two options are available: Disabled Enabled. The default setting is
Disabled
. This item can set the
fixed DRAM/AGP/PCI frequency ratio. You can decide which settings are proper for you.
Selected AGP Frequency:
You can increase the AGP clock speed here. This means that you can independently increase the AGP
clock speed. The frequencies from 66 MHz to 100 MHz are available and one step is 1 MHz. You can
change this setting to increase AGP clock speed. You can enter the frequency number by numeric key,
and press the <
Enter
> key to confirm and input the frequency. AGP speed above the standard AGP
bus speed is supported, but not guaranteed due to the AGP specs.
New FSB/DRAM/AGP/PCI clock:
This item will show you the new FSB/DRAM/AGP/PCI clock frequency that according settings from
the item “
Fixed DRAM/AGP/PCI frequency
”
Enhance Chipset Mode:
Four options are available: Normal Fast Fixed in 83MHz Fixed in 144 MHz. The default setting
is
Fast
. This item can set the data transfer speed between the northbridge and southbridge, the faster item
you choose will enchance the chipset transfer rate. When the item “
Fixed AGP/PCI Frequency
” set to
Enabled
, this item will only left two items to select: Fixed in 83MHz and Fixed in 144 MHz.
Normally, we do not recommend that you use the “
User Define
” option to setup processor speed and PCI
clock. This option is for setup of future processors whose specifications are still unknown. The
specifications of all present processors are included in the default settings. Unless you are very familiar
with all processor parameters, it is very easy to make mistakes when you define the external clock and the
multiplier factor by yourself.
Solution in case of booting problem due to invalid clock setup:
Normally, if the processor clock setup is wrong, you will not be able to boot. In this case, turn the system
off then on again. The processor will automatically use its standard parameters to boot. You can then
enter the BIOS Setup again and set up the processor clock. If you can’t enter the BIOS setup, you must
try turning the system on a few times (3 ~ 4 times) or press “
INSERT
” key when turning on and the
system will automatically use its standard parameters to boot. You can then enter BIOS SETUP again and
set up the new parameters.
Содержание SR7-8X
Страница 2: ......
Страница 32: ...Chapter 2 SR7 8X 2 4 2 4 Layout Diagram for SR7 8X Figure 1 1 SR7 8X motherboard component location ...
Страница 82: ...Chapter 4 SR7 8X 4 34 ...
Страница 92: ...Appendix C SR7 8X C 4 ...
Страница 102: ...Appendix F SR7 8X F 6 ...
Страница 114: ...Appendix I SR7 8X I 4 ...


