Installing the Motherboard
2-5
User’s Manual
Unlike installing SIMMs, RIMMs
may be "snapped" directly into the
socket. Note: Certain RIMM sockets
have minor physical differences. If
your module doesn't seem to fit, please
do not force it into the socket as you
may damage your memory module or
RIMM socket.
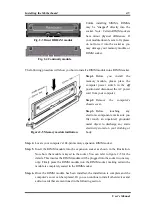
The following procedure will show you how to install a RIMM module into a RIMM socket.
Step 1.
Before you install the
memory module, please place the
computer power switch in the
off
position and disconnect the AC power
cord from your computer.
Step 2.
Remove the computer’s
chassis cover.
Step 3.
Before touching any
electronic components, make sure you
first touch an unpainted, grounded
metal object to discharge any static
electricity stored on your clothing or
body.
Step 4.
Locate your computer’s 184-pin memory expansion RIMM socket.
Step 5.
Insert the RIMM module into the expansion socket as shown in the illustration.
Note how the module is keyed to the socket. You can refer to figure 2-5 for the
details. This insures the RIMM module will be plugged into the socket in one way
onl
y
. Firmly press the RIMM module into the RIMM socket, making certain the
module is completely seated in the RIMM socket.
Step 6.
Once the RIMM module has been installed, the installation is complete and the
computer’s cover can be replaced. Or you can continue to install other devices and
add-on cards that are mentioned in the following section.
Figure 2-5 Memory module instllation
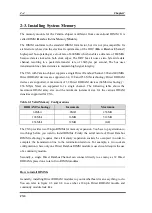
Fig. 2-3 Direct RDRAM module
Fig. 2-4 Continuity module
Содержание AB-CX6
Страница 2: ......
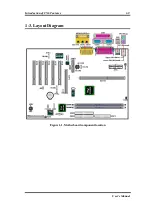
Страница 13: ...Introduction of CX6 Features 1 9 User s Manual 1 3 Layout Diagram Figure 1 1 Motherboard component location ...
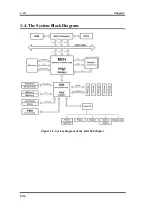
Страница 14: ...1 10 Chapter1 CX6 1 4 The System Block Diagram Figure 1 2 System diagram of the Intel 820 chipset ...
Страница 78: ...3 44 Chapter3 CX6 ...
Страница 84: ...B 4 Appendix B CX6 ...
Страница 90: ...D 4 Appendix D CX6 ...
Страница 96: ...E 6 Appendix E CX6 ...
Страница 104: ...G 4 Appendix G CX6 ...
Страница 110: ...H 6 Appendix H CX6 ...

