


UAV- M I CROPORTA B LE A N A LY ZE R S |
G L A 1 3 3 SER I E S | U M/G L A 1 3 3 - EN R E V. B
25
. . .7 User Interface Operation
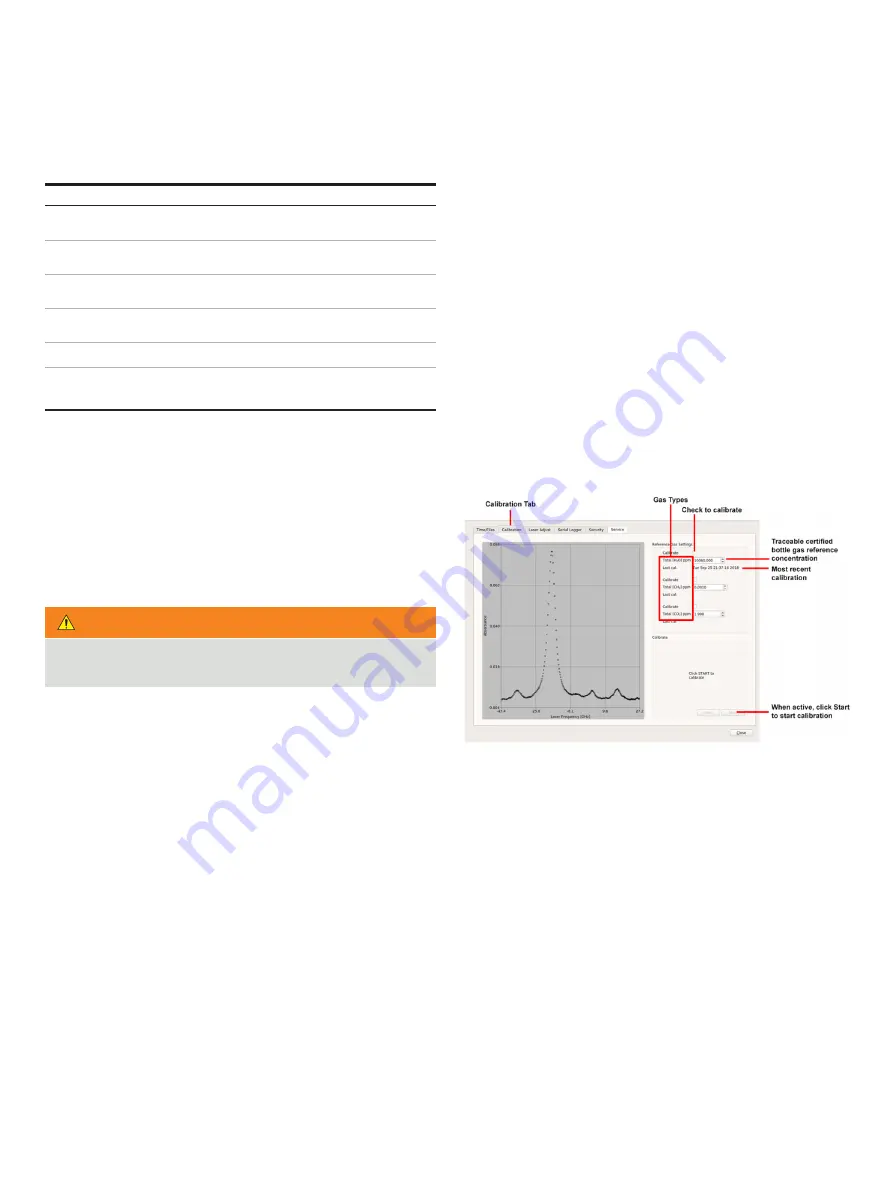
Figure 35 Calibration Tab
Timestamp Name
Format
Absolute Local American
mm/dd/yyyy,
hh:mm:ss .sss
Absolute Local European
dd/mm/yyyy,
hh:mm:ss .sss
Absolute GMT American
mm/dd/yyyy,
hh:mm:ss .sss
Absolute GMT European
dd/mm/yyyy,
hh:mm:ss .sss
Relative Seconds After Power On
ssssss .sss
Relative Seconds in Hours, Minutes,
Seconds
hh:mm:ss .sss
Table 12: Timestamp Formats
About
The
About section displays analyzer-specific information, such
as the:
• Current software build date
• Code version
• IP address
• Analyzer serial number
Calibration
Click the
Calibration
tab to access the
Calibration screen . This
screen provides the tools to calibrate the analyzer without
shipping it back to the factory . Before performing a calibration
on the analyzer, have the following information available:
• Traceable regulated gas type
• Traceable regulated gas type concentration
WARNING!
It is not recommended for inexperienced users to perform a
calibration without first contacting Technical Support .
To perform a gas calibration, connect the traceable, regulated
bottle gas to the analyzer gas-inlet (see Figure 6) .
1
Click
Setup
, then the
Calibration
tab (Figure 35) .
2
Check the
Calibrate
box in the
Reference Gas Settings pane .
3
Enter the gas concentration for the gas type using the arrow
keys in the traceable certified bottle gas menu (below the
Calibrate
box) .
4
Click
Start
to start the calibration .
5
Repeat Step 2 through 4 for all gases measured by the
analyzer .
6
After the calibration is complete, click
OK
. The analyzer then
resumes its normal measurement mode .
7
Click
Close
to exit the
Calibration screen .


