37
User Manual ENGLISH
WHG-Series Wireless WLAN Controller
Copyright © 2017, 4ipnet, Inc. All rights reserved. All other trademarks mentioned are the property of their respective owners.
The settings of SDS200W are separated into seven categories, which are
System – to setup the system name and device control.
Uplink – to determine wired / wireless relevant parameters. Any change on this page will take effect after
rebooting the system.
Console – to change console related settings for POS printers.
Utility – to upgrade the firmware version or backup/ restore SDS200W’s configuration settings.
Password – to change administrator’s password.
Reboot – to reboot (restart) the system.
Status – to overview device, system, uplink, and radio status if available.
Setting Up SDS200W with the POS Printer
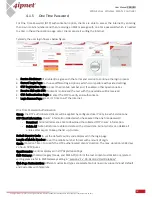
Serial Settings
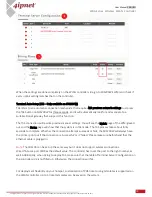
To make a POS printer properly functions with SDS200W, set up serial settings in advance in Console on
SDS200W’s WMI.
Printing On-Demand Tickets for Your Customers
Operators have two ways of printing On-Demand account tickets for their customers. One is to go onto
the WMI of 4ipnet Gateway/Controller and create one (or more). See the manual of the 4ipnet
Gateway/Controller you use; the other is to use SDS200W by the following two shortcut keys.
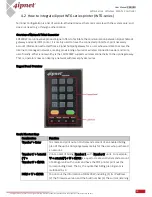
(1) ‘Number’ + ENTER or
(2) ‘Number 1’ + asterisk (*) + ‘Number 2’ + ENTER
For example,
‘3’ + ENTER is to have POS printer print out a billing 3 ticket;
‘4’ + asterisk (*) + ‘2’ + ENTER allows operator to print a single ticket of billing plan 4 with two units of the
quota. That is, the given quota is multiplied by two. Note that the keys can only print out tickets one at a

