


VISIX S-Series Network Camera
|
USER MANUAL v6.0
10385 Westmoor Drive, Suite 210, Westminster, CO 80021 | www.3xlogic.com | (877) 3XLOGIC
47
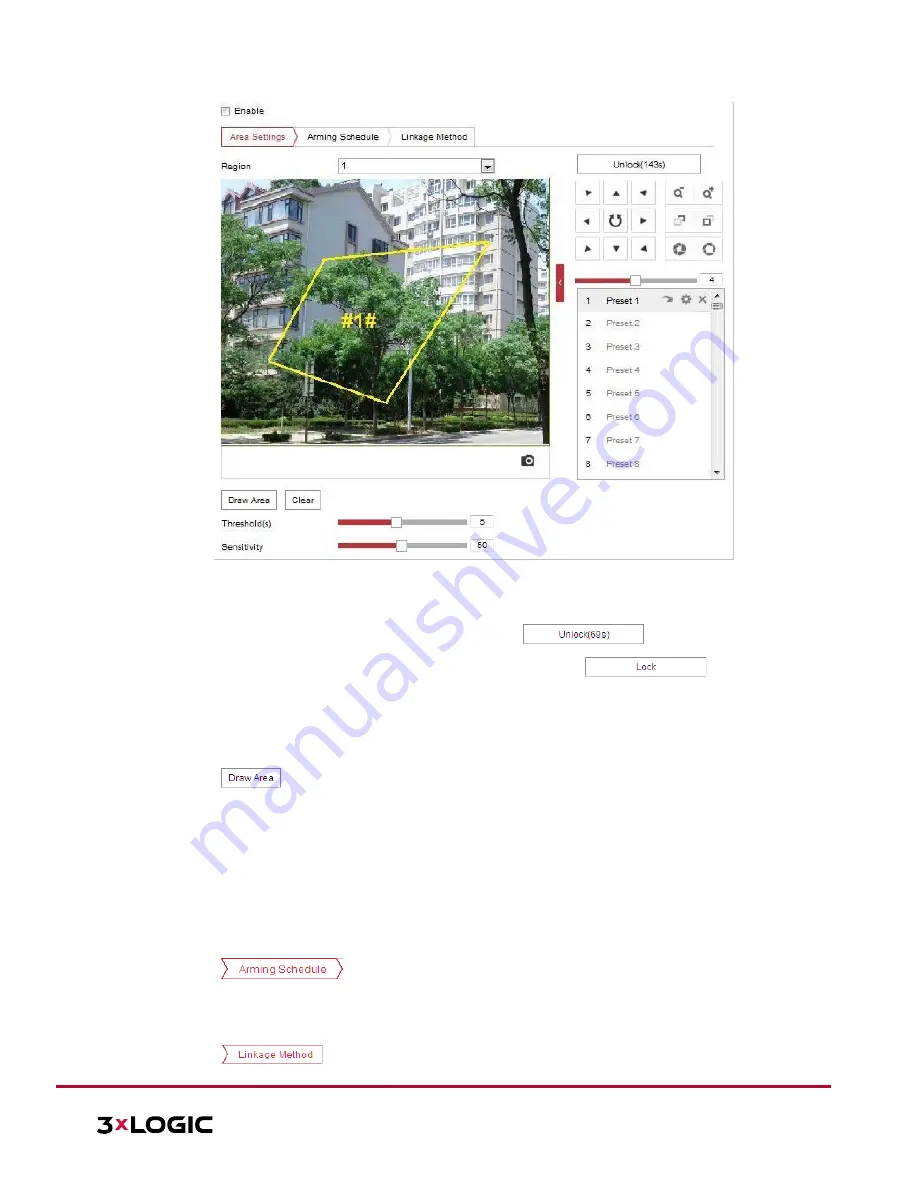
Figure 5-22
Configuring Intrusion Area
3.
Any event triggered and park action related PTZ movement will be locked for 180 seconds after you enter
the intrusion detection interface. Optionally, you can click the
button to manually
activate the movement, or lock the movement when the button turns to
by clicking
it.
4.
Draw area.
1)
Select the Region No.in dropdown list.
2)
Click
to draw a rectangle on the image as a detection region.
3)
Click on the image to specify a corner of the rectangle, and right-click the mouse after four corners are
configured.
5.
Configure the parameters for each region separately.
Threshold:
Range [0-10s], the threshold for the time of the object loitering in the region. If you set the
value as 0, alarm is triggered immediately after the object enters the region.
Sensitivity:
Range [1-100]. The value of the sensitivity defines the size of the object which can trigger
the alarm. When the sensitivity is high, a very small object can trigger the alarm.
6.
Click the
tab to enter the arming schedule setting interface. The time schedule
configuration is identical to configuring an arming schedule for motion detection. Refer to
Section
5.2.1
Configuring Motion Detection
for more details.
7.
Click the
tab to select the linkage method taken for intrusion detection. Available