


Installation Manual
|
VISIX Network Camera
10225 Westmoor Drive, Suite 300, Westminster, CO 80021 | www.3xlogic.com | (877) 3XLOGIC
29
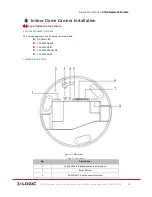
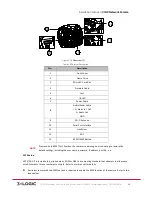
Name/Label
Description
LAN
(
PoE
)
10M/100M Self-‐adaptive Ethernet Port(PoE Supported)
AUDIO OUT/IN
Audio Out/In
CVBS
,
GND
Auxiliary video output
1A
,
1B
Alarm Out
D+
,
D-‐
RS-‐485 Interface
IN
,
GND
ALARM IN
DC12V
Power Supply Interface
(
12 VDC
)
NOTE:
Press and hold RESET for 10s when the camera is powering on or rebooting to restore the default
settings, including the user name, password, IP address, port No., etc.
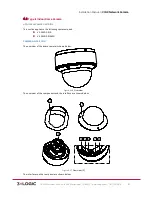
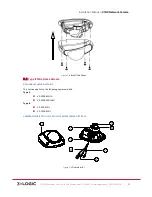
AVAILABLE MOUNTS
!
D2 Ceiling Flush Mount (3xLOGIC Product #:
VX-‐FM-‐D2
)
!
D2 Wall Mount (3xLOGIC Product #:
VX-‐WM-‐D2
)
!
D2 Wall Mount w/ Junction Box (3xLOGIC Product #:
VX-‐WMJ-‐D2
)
!
Universal Corner Mount (3xLOGIC Product #:
VX-‐CM
)
!
Universal Pole Mount ( 3xLOGIC Product #:
VX-‐POLE
)
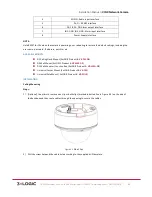
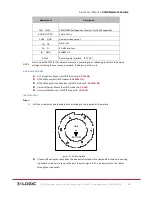
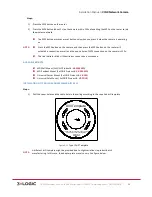
INSTALLATION
Steps:
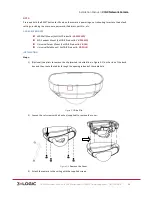
1)
Drill the screw holes and the cable hole according to the supplied drill template.
Figure 4-‐20
Drill Template
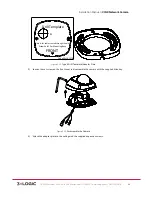
!
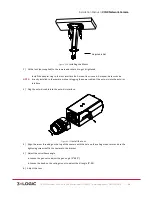
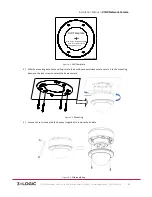
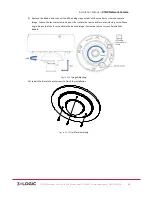
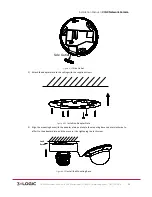
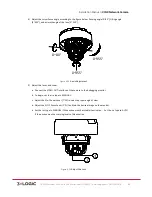
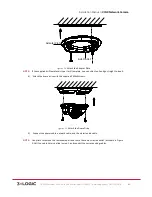
(Optional) Routing the cable from the side outlet instead of the cable hole drilled on the ceiling
is possible. Use pliers to remove the part shown in Figure 4-‐21, and simply route the cables
through the side outlet.
BOTTOM
Hole
2
2
1
1
1
1