


Using Telnet
47
■
Subnet address mask (optional)
The switch MAC address is found on the rear label of the switch.
Once this is done, the IP address and subnetwork mask for the switch will
be downloaded automatically. You can then start managing the switch
without further configuration.
You can enable BOOTP on a per-VLAN basis by using the following
command:
enable bootp vlan [<name> | all]
By default, BOOTP is enabled on the
default
VLAN.
If you configure the switch to use BOOTP, the switch IP address is not
retained through a power cycle, even if the configuration has been saved.
To retain the IP address through a power cycle, you must configure the IP
address of the VLAN using the command-line interface, Telnet, or Web
interface.
All VLANs within a switch that are configured to use BOOTP to get their IP
address use the same MAC address. Therefore, if you are using BOOTP
relay through a router, the BOOTP server must be capable of
differentiating its relay based on the gateway portion of the BOOTP
packet.
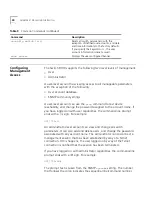
Manually Configuring the IP Settings
If you are using IP without a BOOTP server, you must enter the IP
parameters for the switch in order for the SNMP Network Manager,
Telnet software, or Web interface to communicate with the device. To
assign IP parameters to the switch, you must do the following:
■
Log in to the switch with administrator privileges.
■
Assign an IP address and subnetwork mask to a VLAN.
The switch comes configured with a default VLAN named
default
. To
use Telnet or an SNMP Network Manager, you must have at least one
VLAN on the switch, and it must be assigned an IP address and
subnetwork mask. IP addresses are always assigned to a VLAN. The
switch can be assigned multiple IP addresses.
For information on creating and configuring VLANs, refer to
Chapter 4
.
Содержание 3C17705
Страница 1: ... http www 3com com SuperStack II Switch 9100 User Guide Part No DUA1770 5AAA01 Published January 2000 ...
Страница 10: ...GLOSSARY INDEX INDEX OF COMMANDS 3COM CORPORATION LIMITED WARRANTY EMC STATEMENTS ...
Страница 14: ...14 ABOUT THIS GUIDE ...
Страница 32: ...32 CHAPTER 2 INSTALLATION AND SETUP ...
Страница 62: ...62 CHAPTER 3 ACCESSING THE SWITCH ...
Страница 80: ...80 CHAPTER 4 VIRTUAL LANS VLANS ...
Страница 86: ...86 CHAPTER 5 FORWARDING DATABASE FDB ...
Страница 98: ...98 CHAPTER 6 SPANNING TREE PROTOCOL STP ...
Страница 110: ...110 CHAPTER 7 QUALITY OF SERVICE QOS ...
Страница 124: ...124 CHAPTER 8 STATUS MONITORING AND STATISTICS ...
Страница 130: ...130 CHAPTER 9 USING THE WEB INTERFACE ...
Страница 136: ...136 CHAPTER 10 SOFTWARE UPGRADE AND BOOT OPTIONS ...
Страница 156: ...156 APPENDIX C TROUBLESHOOTING ...
Страница 162: ......
Страница 176: ...176 INDEX ...
Страница 180: ...180 INDEX OF COMMANDS ...