


42
Installer Testing
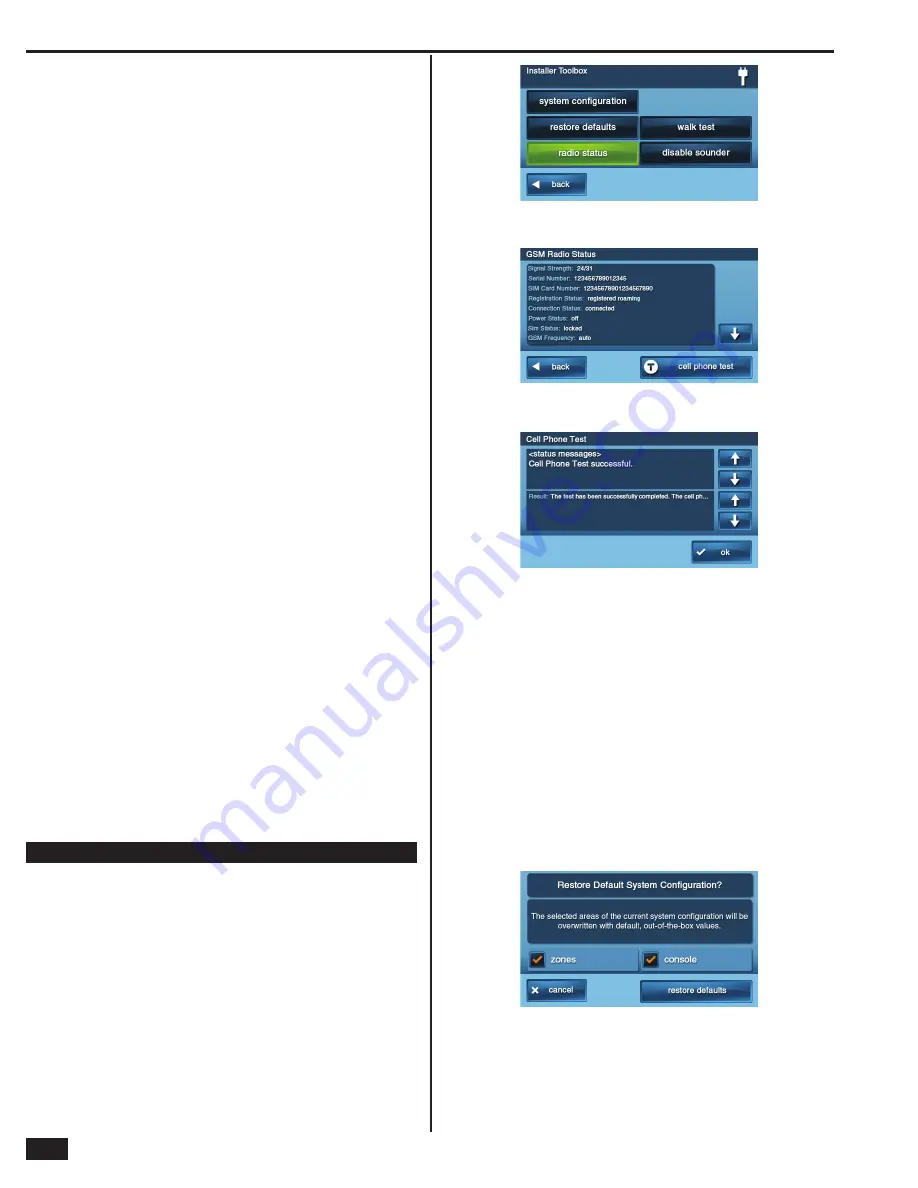
Radio Status Mode
✓
NOTE:
GSM Module must be installed to use this function.
The GSM Radio Status screen displays data for the GSM radio (if
installed). The screen displays signal strength, serial number, registration
status, and other information about the GSM radio module status. The
information may be helpful for radio installation troubleshooting.
Follow these steps to check the radio status:
1.
From the Installer Toolbox screen, press the
RADIO STATUS
button.
2.
The system will display the GSM Radio Info screen. Each
test item is displayed, followed with its current condition.
Scroll through the info screen with the
↓
and
↑
arrows.
• Text is displayed in red if the tested signal strength is zero
or too low, or the GSM module is not registered.
• Text is displayed in orange if the connection is
idle and the GSM module is registered.
• Text is displayed in green if the signal strength is
good and the GSM module is registered.
GSM Radio Test
A
RUN RADIO TEST
button is provided on the GSM Radio Status
screen. Pressing this button will test the GSM cell phone connection
to the Central Station.
The same test can also be run using the
CELL PHONE TEST
button
on the User Toolbox screen #3.
Follow these steps to test the GSM radio:
1.
From the Radio Status screen, press the
RUN RADIO TEST
button
.
2.
The system will display the Cell Phone Test screen. The top portion
of the screen shows the actions that the Control Panel is taking.
The bottom portion of the screen shows the results of the actions.
Scroll through the status screen with the
↓
and
↑
arrows.
3.
When the test is complete, press
OK
to return to the Installer Toolbox.
Telephone Test
The telephone test checks the land-line connection to the Central
Station through the Control Panel’s built-in digital communicator.
The test is accessed through the User Toolbox screen #3.
Follow these steps to test the digital communicator:
1.
On toolbox screen #3, press the
TELEPHONE TEST
button
.
2.
Enter the Master User Code, and the system will display the
Telephone Test screen. The top portion of the screen shows
the actions that the Control Panel is taking. The bottom
portion of the screen shows the results of the actions. Scroll
through the status screen with the
↓
and
↑
arrows.
3.
When the test is complete, press
OK
to return to the User Toolbox.
Restoring Programming Defaults
To soft reset the Control Panel back to the factory defaults, use the
Restore Default option in the Installer toolbox.
✓
NOTE: The Control Panel may also be “hard” reset to out-of-the-box factory
defaults by pressing and holding the emergency and home buttons while
applying power (if not disabled through programming questions Q-44 & Q-45).
Restore Defaults
The Restore Defaults screen provides a method to selectively reset the Control
Panel to its default programming values instead of using a full “hard” reset.
Two check box options are available; one or both must be checked:
• If the
ZONES
box is checked, all data for the 48 sensors will be erased and
replaced with the default values.
• If the
CONSOLE
box is checked, all the Control Panel programming
questions (except Z-Wave questions Q79-Q83) will be erased and replaced
with the default values. The User Codes will be erased, the backlight timeout
is reset to fi ve minutes, and the brightness/volume settings are reset.
Figure 72. Installer Toolbox Screen
Figure 73. GSM Radio Info Screen
Figure 74. GSM Radio Test Screen
Figure 75. Restore Defaults Screen
Содержание GO!control 2GIG-CNTRL2
Страница 1: ...Wireless Security System Installation Programming Instructions 2GIG CNTRL2 2GIG CP2...
Страница 48: ...46 Notes...
Страница 49: ...47 Notes...
Страница 52: ...v1 9 233497 E Copyright 2012...


