


Chapter 13 Certificates
P-660HWP-D1 User’s Guide
191
13.6 My Certificates > Details
Click
Security > Certificates > My Certificates
to open the
My Certificates
screen (see
). Click the edit icon
to open the
My Certificate Details
screen. You
can use this screen to view in-depth certificate information and change the certificate’s name.
If it is a self-signed certificate, you can also set the P-660HWP-D1 to use the certificate to sign
the imported trusted remote host certificates.
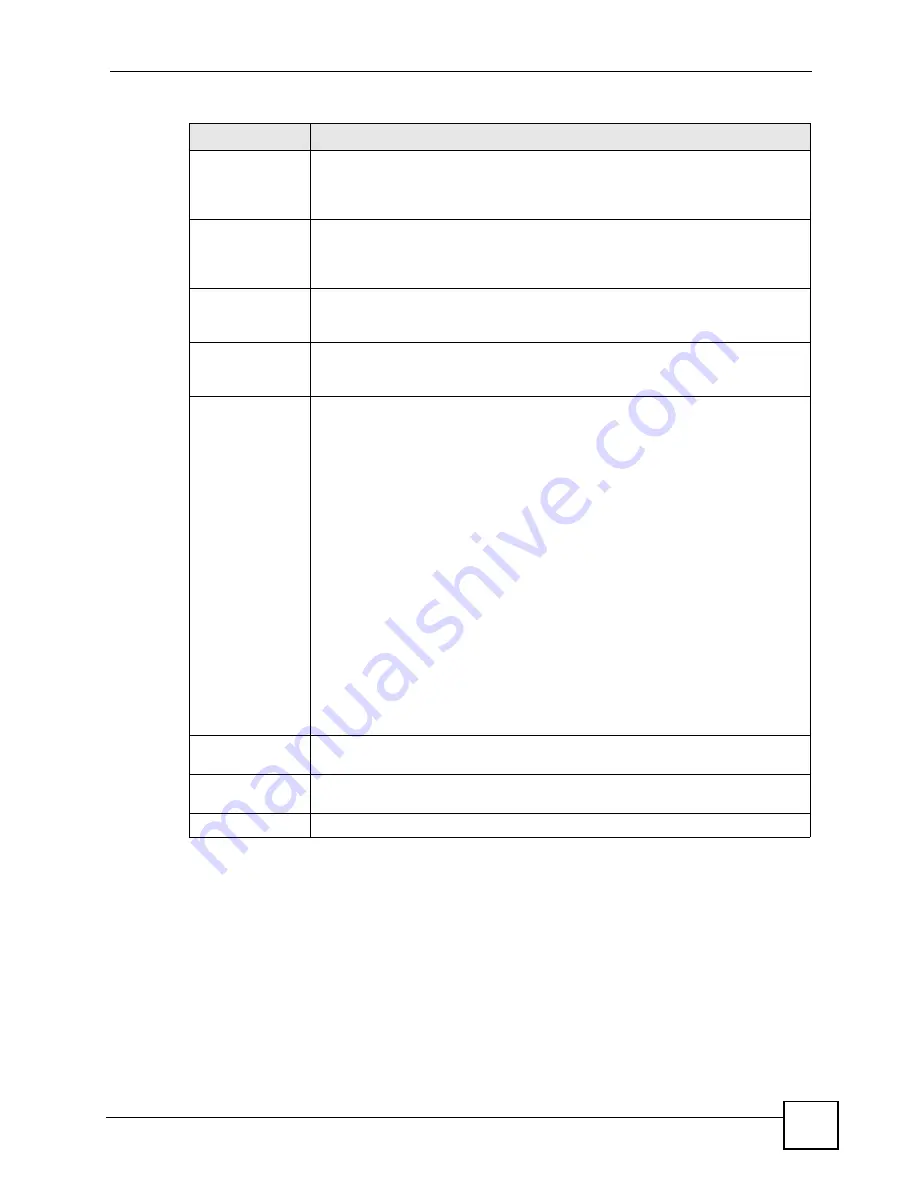
Subject
This field displays identifying information about the certificate’s owner, such as CN
(Common Name), OU (Organizational Unit or department), O (Organization or
company) and C (Country). It is recommended that each certificate have unique
subject information.
Issuer
This field displays identifying information about the certificate’s issuing certification
authority, such as a common name, organizational unit or department,
organization or company and country. With self-signed certificates, this is the
same information as in the
Subject
field.
Valid From
This field displays the date that the certificate becomes applicable. The text
displays in red and includes a Not Yet Valid! message if the certificate has not yet
become applicable.
Valid To
This field displays the date that the certificate expires. The text displays in red and
includes an Expiring! or Expired! message if the certificate is about to expire or
has already expired.
Modify
Click the details icon to open a screen with an in-depth list of information about the
certificate (or certification request).
Click the export icon to save the certificate to a computer. For a certification
request, click the export icon and then
Save
in the
File Download
screen. The
Save As
screen opens, browse to the location that you want to use and click
Save
.
Click the delete icon to remove the certificate (or certification request). A window
displays asking you to confirm that you want to delete the certificate.
You cannot delete a certificate that one or more features is configured to use.
Do the following to delete a certificate that shows
*SELF
in the
Type
field.
1. Make sure that no other features, such as HTTPS, VPN, SSH are configured to
use the
*SELF
certificate.
2. Click the details icon next to another self-signed certificate (see the description
on the
Create
button if you need to create a self-signed certificate).
3. Select the
Default self-signed certificate which signs the imported remote
host certificates
check box.
4. Click
Apply
to save the changes and return to the
My Certificates
screen.
5. The certificate that originally showed
*SELF
displays
SELF
and you can delete
it now.
Note that subsequent certificates move up by one when you take this action
Create
Click
Create
to go to the screen where you can have the P-660HWP-D1 generate
a certificate or a certification request.
Import
Click
Import
to open a screen where you can save the certificate that you have
enrolled from a certification authority from your computer to the P-660HWP-D1.
Refresh
Click
Refresh
to display the current validity status of the certificates.
Table 70
Security > Certificates > My Certificates (continued)
LABEL
DESCRIPTION
Summary of Contents for P-660HWP-D1
Page 2: ......
Page 7: ...Safety Warnings P 660HWP D1 User s Guide 7...
Page 8: ...Safety Warnings P 660HWP D1 User s Guide 8...
Page 10: ...Contents Overview P 660HWP D1 User s Guide 10...
Page 20: ...Table of Contents P 660HWP D1 User s Guide 20...
Page 26: ...List of Figures P 660HWP D1 User s Guide 26...
Page 31: ...31 PART I Introduction Introducing the P 660HWP D1 33 Introducing the Web Configurator 41...
Page 32: ...32...
Page 40: ...Chapter 1 Introducing the P 660HWP D1 P 660HWP D1 User s Guide 40...
Page 55: ...55 PART II Wizards Wizard Setup for Internet Wireless Access 57 Bandwidth Management Wizard 69...
Page 56: ...56...
Page 72: ...72...
Page 90: ...Chapter 5 WAN Setup P 660HWP D1 User s Guide 90...
Page 148: ...148...
Page 168: ...Chapter 11 Firewall Configuration P 660HWP D1 User s Guide 168 Figure 93 Firewall Edit Rule...
Page 182: ...Chapter 11 Firewall Configuration P 660HWP D1 User s Guide 182...
Page 186: ...Chapter 12 Content Filtering P 660HWP D1 User s Guide 186...
Page 210: ...210...
Page 214: ...Chapter 14 Static Route P 660HWP D1 User s Guide 214...
Page 230: ...Chapter 16 Dynamic DNS Setup P 660HWP D1 User s Guide 230...
Page 242: ...Chapter 17 Remote Management Configuration P 660HWP D1 User s Guide 242...
Page 254: ...Chapter 18 Universal Plug and Play UPnP P 660HWP D1 User s Guide 254...
Page 256: ...256...
Page 262: ...Chapter 19 System P 660HWP D1 User s Guide 262...
Page 280: ...Chapter 20 Logs P 660HWP D1 User s Guide 280...
Page 286: ...Chapter 21 Tools P 660HWP D1 User s Guide 286...
Page 296: ...296...
Page 340: ...Appendix D IP Subnetting P 660HWP D1 User s Guide 340...
Page 344: ...Appendix E Command Interpreter P 660HWP D1 User s Guide 344...
Page 360: ...Appendix H Legal Information P 660HWP D1 User s Guide 360...
Page 366: ...Appendix I Customer Support P 660HWP D1 User s Guide 366...
Page 374: ...Index P 660HWP D1 User s Guide 374...


