Chapter 8 Wireless LAN
NVG2053 User’s Guide
109
8.8 WPS Station Screen
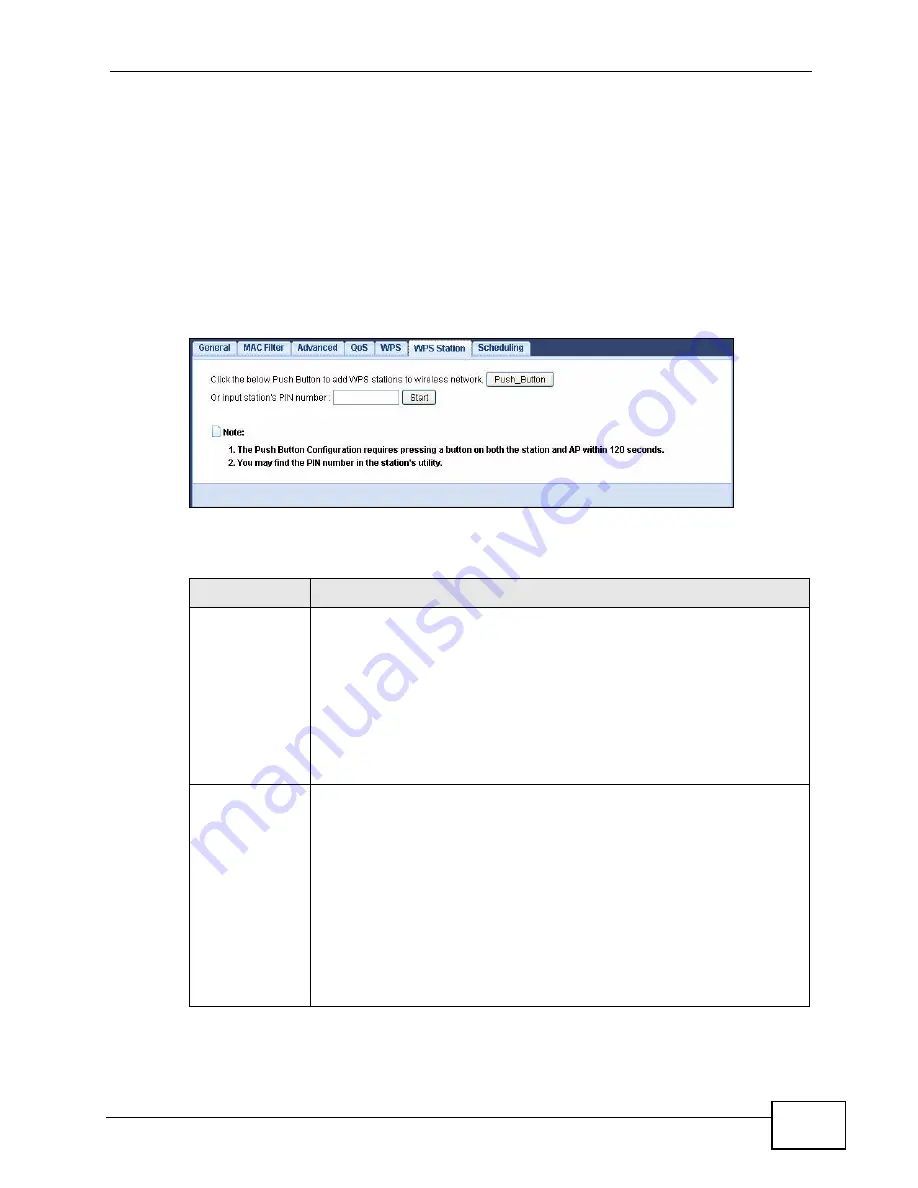
Use this screen when you want to add a wireless station using WPS. To open this
screen, click Network > Wireless LAN > WPS Station tab.
Note: After you click
Push Button
on this screen, you have to press a similar button
in the wireless station utility within 2 minutes. To add the second wireless
station, you have to press these buttons on both device and the wireless station
again after the first 2 minutes.
Figure 42
Network > Wireless LAN > WPS Station
The following table describes the labels in this screen.
Table 31
Network > Wireless LAN > WPS Station
LABEL
DESCRIPTION
Push Button
Use this button when you use the PBC (Push Button Configuration)
method to add another WPS-enabled wireless device (within wireless
range of the NVG2053) to your wireless network. See
Section 8.10.3.1
on page 114
.
Click this to start WPS-aware wireless station scanning and the wireless
security information synchronization.
Note: You must press the other wireless device’s WPS button
within two minutes of pressing this button.
Or input
station's PIN
number
Use this button when you use the PIN Configuration method to
configure wireless station’s wireless settings. See
Section 8.10.3.2 on
page 115
.
Enter the PIN of the device that you are setting up a WPS connection
with and click Start to authenticate and add the wireless device to your
wireless network.
You can find the PIN either on the outside of the device, or by checking
the device’s settings.
Note: You must also activate WPS on that device within two
minutes to have it present its PIN to the NVG2053.
Summary of Contents for NVG2053
Page 2: ......
Page 8: ...Safety Warnings NVG2053 User s Guide 8...
Page 10: ...Contents Overview NVG2053 User s Guide 10...
Page 18: ...Table of Contents NVG2053 User s Guide 18...
Page 19: ...19 PART I User s Guide...
Page 20: ...20...
Page 26: ...Chapter 1 Getting to Know Your NVG2053 NVG2053 User s Guide 26...
Page 67: ...67 PART II Technical Reference...
Page 68: ...68...
Page 74: ...Chapter 5 Status Screens NVG2053 User s Guide 74...
Page 80: ...Chapter 6 Monitor NVG2053 User s Guide 80...
Page 130: ...Chapter 10 DHCP Server NVG2053 User s Guide 130...
Page 144: ...Chapter 12 Network Address Translation NAT NVG2053 User s Guide 144...
Page 150: ...Chapter 14 Static Route NVG2053 User s Guide 150...
Page 166: ...Chapter 16 Firewall NVG2053 User s Guide 166...
Page 200: ...Chapter 18 USB Service NVG2053 User s Guide 200...


