Chapter 15 Link Aggregation
GS-2750 User’s Guide
132
15.6 Static Trunking Example
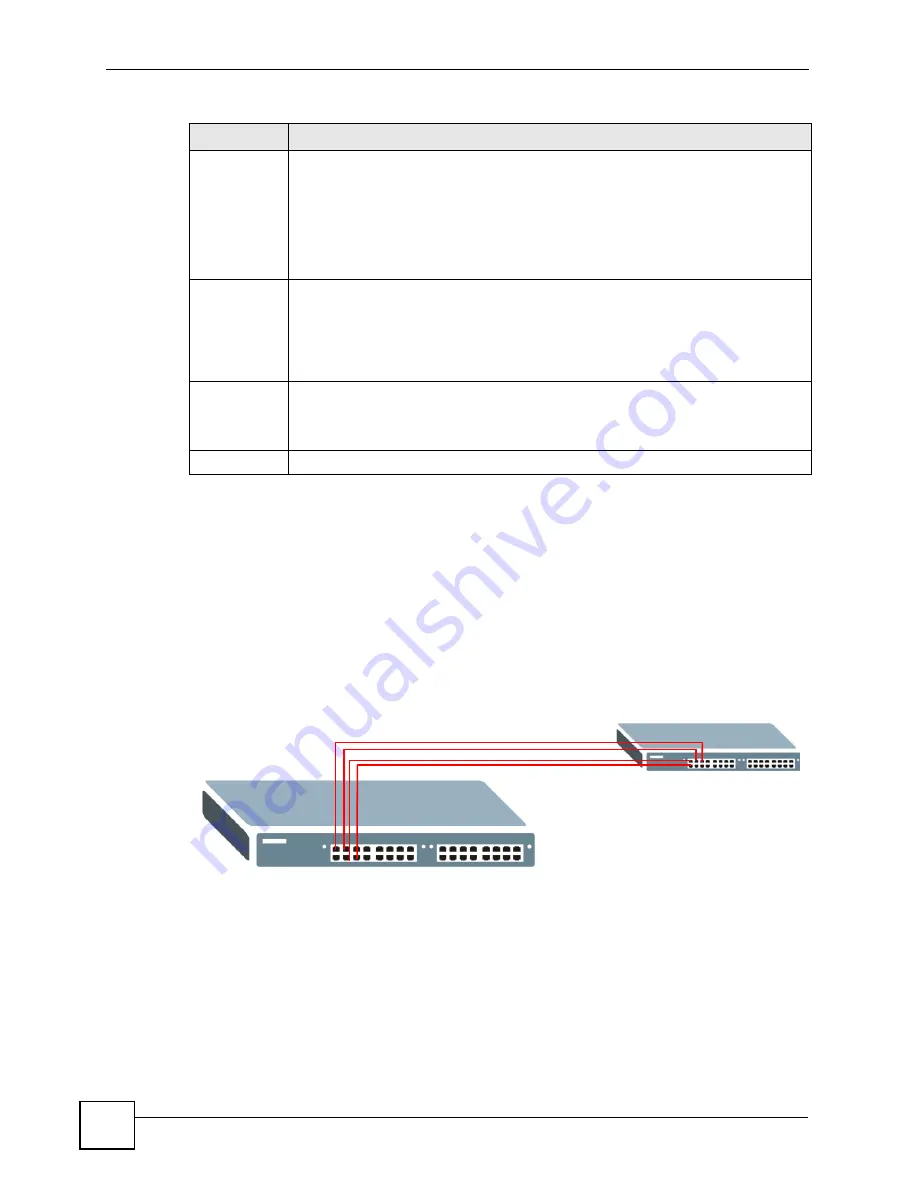
This example shows you how to create a static port trunk group for ports 2-5.
1
Make your physical connections
- make sure that the ports that you want to belong to
the trunk group are connected to the same destination. The following figure shows ports
2-5 on switch
A
connected to switch
B
.
Figure 60
Trunking Example - Physical Connections
2
Configure static trunking
- Click
Advanced Application
>
Link Aggregation
>
Link
Aggregation Setting
. In this screen activate trunking group
T1
and select the ports that
should belong to this group as shown in the figure below. Click
Apply
when you are
done.
*
Settings in this row apply to all ports.
Use this row only if you want to make some settings the same for all ports. Use this
row first to set the common settings and then make adjustments on a port-by-port
basis.
Note: Changes in this row are copied to all the ports as soon as you
make them.
LACP
Timeout
Timeout is the time interval between the individual port exchanges of LACP packets in
order to check that the peer port in the trunk group is still up. If a port does not respond
after three tries, then it is deemed to be “down” and is removed from the trunk. Set a
short timeout (one second) for busy trunked links to ensure that disabled ports are
removed from the trunk group as soon as possible.
Select either 1 second or 30 seconds.
Apply
Click
Apply
to save your changes to the Switch’s run-time memory. The Switch loses
these changes if it is turned off or loses power, so use the
Save
link on the top
navigation panel to save your changes to the non-volatile memory when you are done
configuring.
Cancel
Click
Cancel
to begin configuring this screen afresh.
Table 38
Advanced Application > Link Aggregation > Link Aggregation Setting > LACP
LABEL
DESCRIPTION
A
B
Summary of Contents for GS-2750
Page 2: ......
Page 7: ...Safety Warnings GS 2750 User s Guide 7 This product is recyclable Dispose of it properly ...
Page 8: ...Safety Warnings GS 2750 User s Guide 8 ...
Page 26: ...List of Figures GS 2750 User s Guide 26 ...
Page 32: ...32 ...
Page 40: ...Chapter 2 Hardware Installation and Connection GS 2750 User s Guide 40 ...
Page 48: ...48 ...
Page 58: ...Chapter 4 The Web Configurator GS 2750 User s Guide 58 ...
Page 64: ...Chapter 5 Initial Setup Example GS 2750 User s Guide 64 ...
Page 70: ...Chapter 6 System Status and Port Statistics GS 2750 User s Guide 70 ...
Page 82: ...Chapter 7 Basic Setting GS 2750 User s Guide 82 ...
Page 84: ...84 ...
Page 120: ...Chapter 11 Spanning Tree Protocol GS 2750 User s Guide 120 ...
Page 134: ...Chapter 15 Link Aggregation GS 2750 User s Guide 134 ...
Page 144: ...Chapter 17 Port Security GS 2750 User s Guide 144 ...
Page 155: ...Chapter 19 Policy Rule GS 2750 User s Guide 155 Figure 73 Policy Example example ...
Page 156: ...Chapter 19 Policy Rule GS 2750 User s Guide 156 ...
Page 160: ...Chapter 20 Queuing Method GS 2750 User s Guide 160 ...
Page 166: ...Chapter 21 VLAN Stacking GS 2750 User s Guide 166 ...
Page 194: ...Chapter 23 Authentication Accounting GS 2750 User s Guide 194 ...
Page 220: ...220 ...
Page 232: ...Chapter 28 Differentiated Services GS 2750 User s Guide 232 ...
Page 242: ...Chapter 29 DHCP GS 2750 User s Guide 242 ...
Page 252: ...Chapter 30 VRRP GS 2750 User s Guide 252 ...
Page 254: ...254 ...
Page 278: ...Chapter 32 Access Control GS 2750 User s Guide 278 ...
Page 280: ...Chapter 33 Diagnostic GS 2750 User s Guide 280 ...
Page 284: ...Chapter 34 Syslog GS 2750 User s Guide 284 ...
Page 298: ...Chapter 39 Routing Table GS 2750 User s Guide 298 ...
Page 301: ...301 PART VI Product Specifications Product Specifications 303 ...
Page 302: ...302 ...
Page 310: ...310 ...
Page 322: ...Appendix B Legal Information GS 2750 User s Guide 322 ...
Page 328: ...Appendix C Customer Support GS 2750 User s Guide 328 ...


