


3
In the
SSID
textbox, type in the name you would like to
assign to your network.
4
In the
Max Number of Peers
textbox, the maximum
number of clients that are allowed access is 20. You can
choose any number below 20 if you prefer.
5
The
Authentication
is set by default to WPA2-PSK and
cannot be changed.
6
The
Encryption
is set by default as AES and cannot be
changed.
7
In the
Key Material
textbox, enter the Preshared Key
you would like to assign to the network.
8
The IP Address is automatically generated.
9
Click
Apply
.
Note: Clients that need to connect to this network should use
the same SSID and Preshared Key assigned here.
For Windows Vista, XP, and 2000:
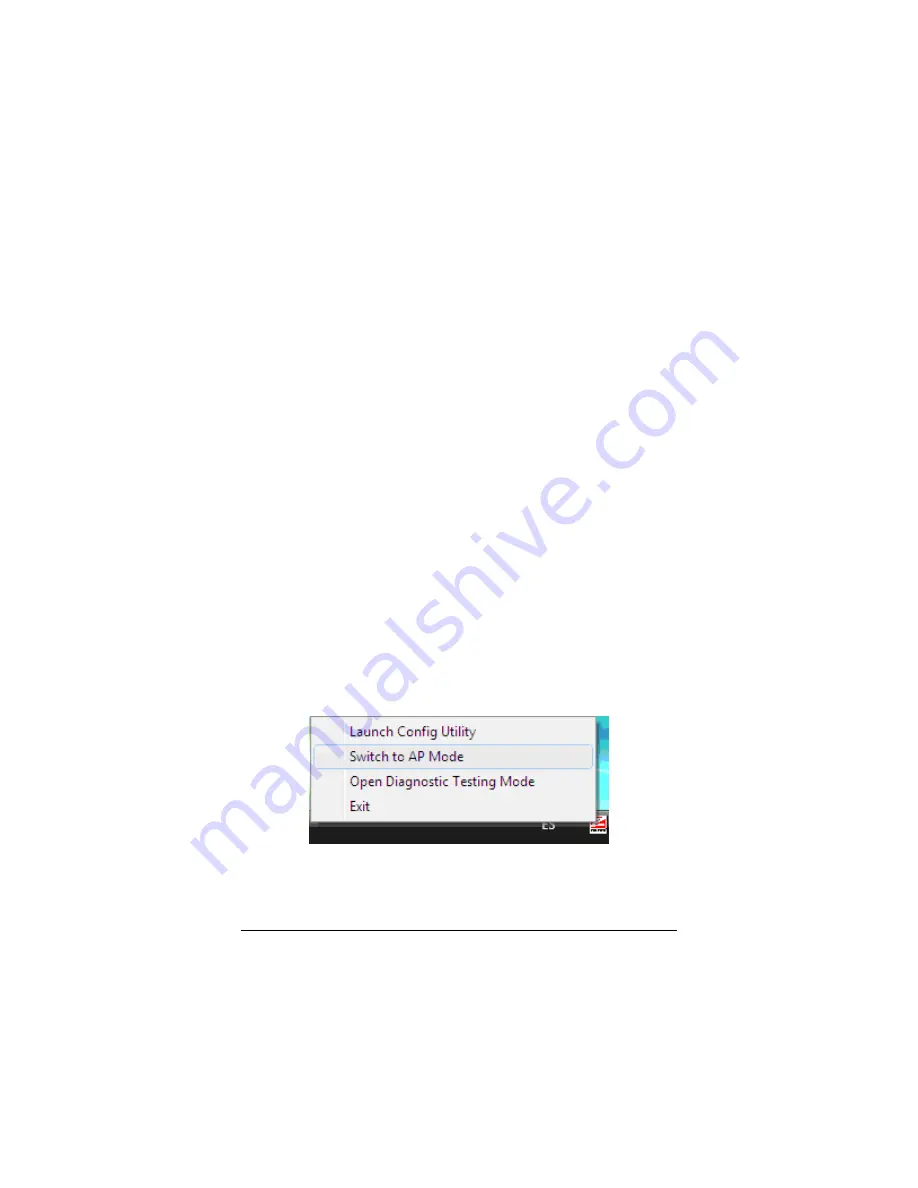
Right-click the
Zoom icon
on the taskbar and select “
Switch to
AP Mode
” to make your wireless USB adapter act as a wireless
AP.
For example if you had a cable or ADSL modem directly
attached to your PC, you can use your wireless USB adapter as
an AP to allow other wireless devices to access the cable or
ADSL modem.
1
Click
OK.
2
The
Zoom Utility
software opens up.
Chapter 3: Advanced Options
27


