Carl Zeiss
LSM710
/
780 ZEN
-
9
-
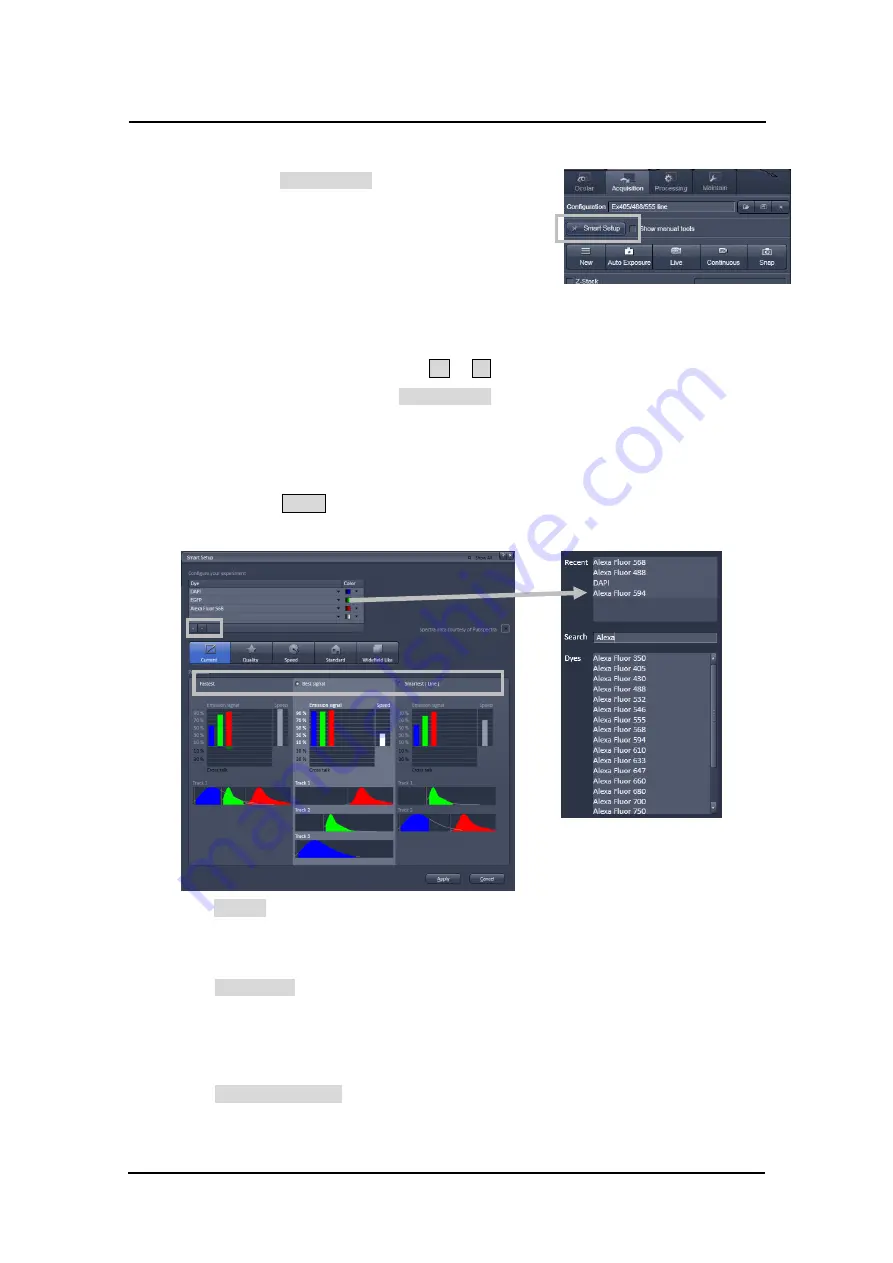
4-2. Smart Setup
①
Click on the
Smart Setup
button to open the
smart setup window.
②
Click on the arrow in the dye list and simply
choose the dye(s) you use in your experiment
from the list dialogue. In this dialogue, the
candidate dyes can be also searched by typing
the name in the search field.
③
Add or delete dye name by click on
+
or
–
.
④
Once finished with the input,
Smart Setup
suggests four alternative considerations
(see below): One for
fastest
imaging, one for the
best signal
,
best compromise
between both speed and best signal and the optimal setup for later
linear unmixing
of the dyes.
⑤
Click on the
Apply
, automatically sets the ideal hardware parameters for the dyes
chosen.
Fastest (Simultaneous)
− Advantage: faster image acquisition
− Disadvantage: potential cross-talk between channels
Best Signal (Sequential)
− Advantage: Only one detector and one laser are switched on at any one
time. This reduces cross-talk.
− Disadvantage: slower image acquisition
Best Compromise (Semi-Sequential)
− Best compromise between Fastest and Best signal.
②
③
④
Fig13. Smart setup tool
①
Fig.12 Smart setup
Summary of Contents for LSM 710
Page 1: ......
Page 2: ......
Page 32: ...Carl Zeiss LSM710 780 ZEN 30 10 Operation of Light Microscope Axio Observer Z1...