Gaining remote access using PPTP
(Continued from the previous page)
Accessing the product
1
Configure broadband connections and
connect the product to the Internet.
2
Double-click “VPN_PPTP” icon to bring up the
“Connections” window.
3
Click “Properties”.
4
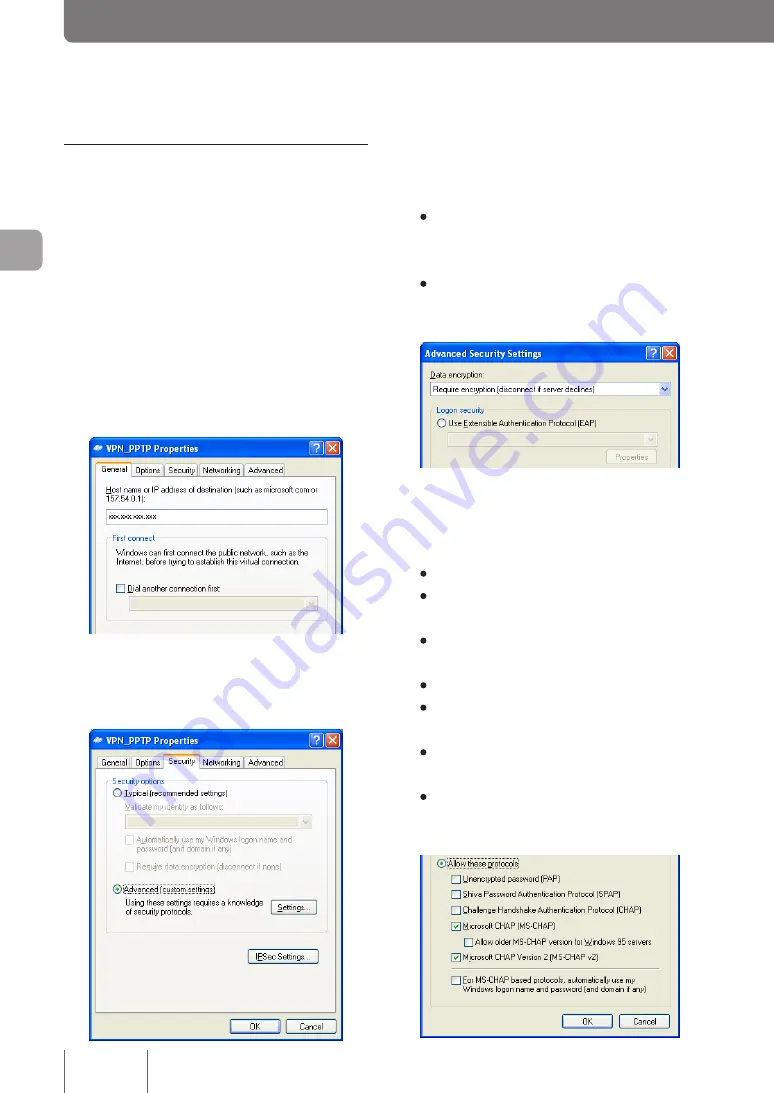
Click “General” tab and check that the host
address obtained with the netvolante DNS
service or the WAN IP address of the product
has been entered in “Host name or IP address
of destination”.
5
Click “Security” tab, select “Advanced (custom
settings)” under Security options, and then
click “Settings”.
6
Select the encryption mode according to the
setting you made in Step 4 on page 73.
•
If “Non-encrypted access denied” is selected
with the product:
Select “Require encryption
(disconnect if server declines)”.
•
If “Non-encrypted access allowed” is selected
with the product:
Select your desired encryption
level.
7
Under “Logon security”, select “Allow these
protocols”, select the check boxes as shown
below and then click “OK”.
• Unencrypted password (PAP): Unchecked
• Shiva Password Authentication Protocol (SPAP):
Unchecked
• Challenge Handshake Authentication Protocol
(CHAP): Unchecked
• Microsoft CHAP (MS-CHAP): Checked
• Allow older MS-CHAP version for Windows 95
servers: Unchecked
• Microsoft CHAP Version 2 (MS-CHAP v2):
Checked
• For MS-CHAP based protocols, automatically
use my Windows logon name and password (and
domain, if any): Unchecked
82
Im
ple
m
en
tin
g s
ite
-to
-s
ite
V
P
N
c
on
ne
cti
on
s
4


