11
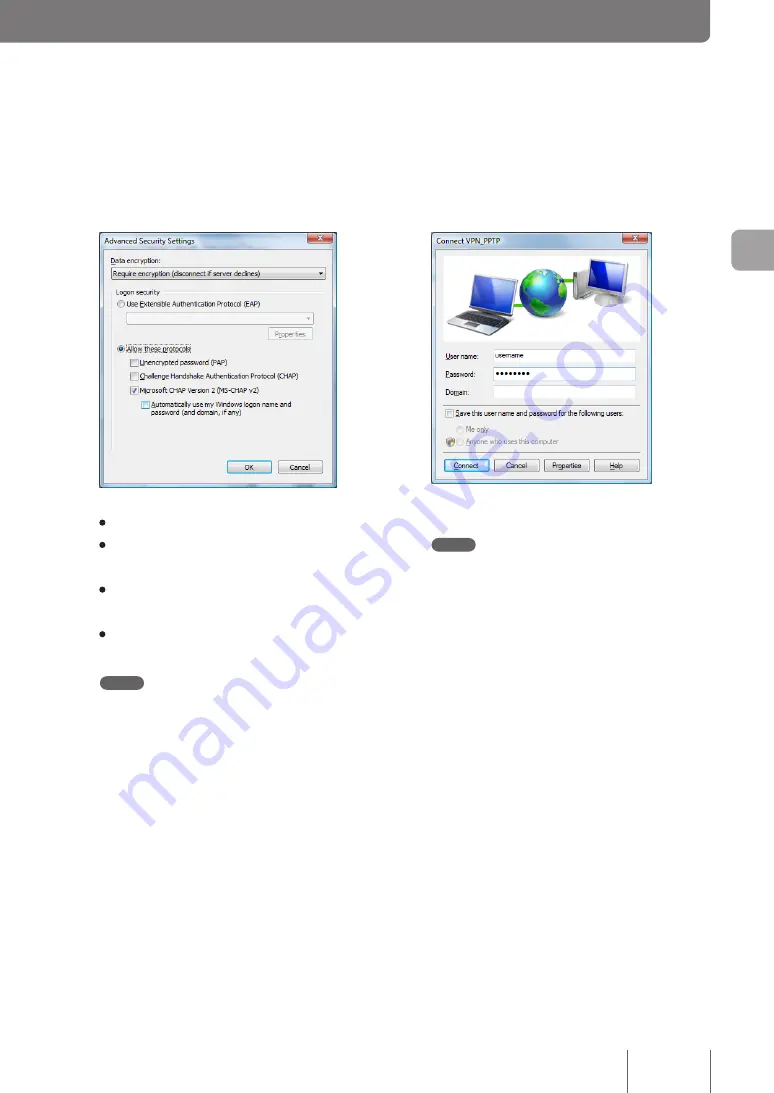
Under “Logon security”, select “Allow these
protocols”, select the check box as shown
below and then click “OK”.
•
Unencrypted password (PAP)
: Unchecked
•
Challenge Handshake Authentication Protocol
(CHAP)
: Unchecked
•
Microsoft CHAP Version 2 (MS-CHAP v2)
:
Checked
•
Automatically use my Windows logon name
and password (and domain, if any)
: Unchecked
Note
Windows Vista does not support Microsoft CHAP Version
1 (MS-CHAP). Note the settings you configured in Step
4 on page 73.
12
Click “Networking” tab and then select
“Automatic” for “Type of VPN”.
13
Click “OK” in “VPN_PPTP Properties” window
and close the window.
14
Enter the authentication user ID in “User
name” and password in “Password” you set
in Step 4 on page 73 and click “Connect”.
VPN connection to the product now begins.
Note
If you select “Save this user name and password for the
following users:” check box, you no longer need to enter
the password. If you do not select it, you need to enter the
password each time you connect to the VPN.
15
To disconnect from a VPN connection, click
“Disconnect”.
This breaks a connection to the product.
79
Im
ple
m
en
tin
g s
ite
-to
-s
ite
V
P
N
c
on
ne
cti
on
s
4


