103
Maximizing use of the pr
oduct
6
To open the “Register/modify provider” screen
From “Basic configuration page”, click the buttons on the
setup screen in the following order:
▶
“Advanced settings” in the top page
▶
“Configure” of “Detailed basic connection setting”
▶
“Configure” of the destination of which settings you
want to change
1. Set the IP addresses of PCs.
Assign a fixed private IP address to the PC for which you
want to permit external access.
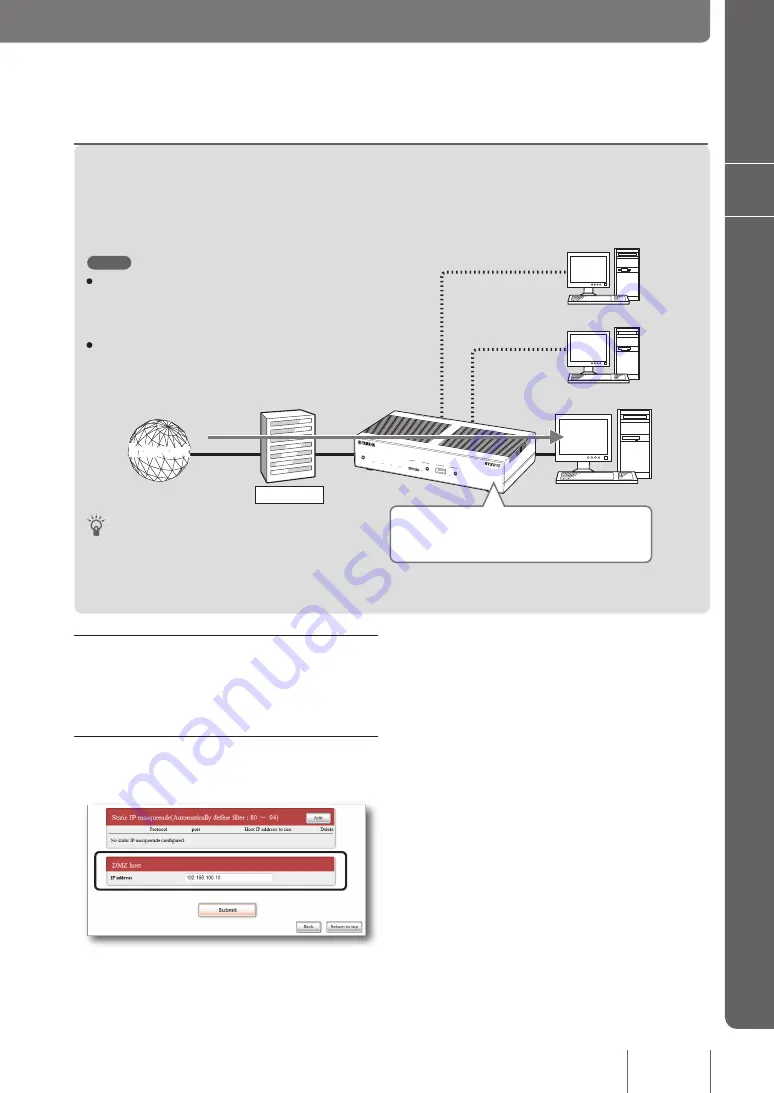
2. Specify the address of the DMZ host.
On the “Register/Modify provider” screen, set the DMZ
host IP address.
For more details on the settings, click “Help” on the setup
screen and refer to the description displayed.
2. Using the DMZ host function to solve the problem
When the product receives a packet sent to an address that is not registered in the NAT/IP masquerade table, the
packet will be transferred to a host with a specific IP address. This setting is possible owing to the DMZ host function.
192.168.100.10
192.168.100.190
192.168.100.191
Provider
Internet
Internet
DOWN
LOAD
POWER
STATUS
LAN
WAN
micro8D
USB
WAN
4
3
2
1
ON
STAND
BY
CONSO
LE
LAN
Tip
By separating the IP address of a public server from internal
addresses, you can prevent damage to other hosts with an
internal address even if the public server should be attacked
externally.
Note
• DMZ is the acronym of DeMilitarized Zone. While using
the DMZ host function, packets can pass through the
router because of the DeMilitarized Zone, and you may
be affected by an unintended intrusion or external attack.
• The DMZ host function cannot be used for multiple PCs
at the same time.
If the incoming packet is for an address unregistered
in NAT/IP masquerade table, transfer the packet to a
host having IP address “192.168.100.10”.


