10
,,,,,,,,,,,,,,,,
,,,,,,,,,,,,,,,,
QQQQQQQQQQQQQQQQ
QQQQQQQQQQQQQQQQ
¢¢¢¢¢¢¢¢¢¢¢¢¢¢¢¢
¢¢¢¢¢¢¢¢¢¢¢¢¢¢¢¢
GROOVE&DYNAMICS
VOICE
STYLE
SONG
ACCOMPANIMENT TRACK
SONG TRACK
L
R2
R1
MENU
DISK
MULTI PAD
REGIST MEMORY
MIDI
DIGITAL EFFECT
OVERALL
REPEAT
ACMP
VOICE
VOICE
VOICE
RHYTHM
1
BASS
CHORD
1
CHORD
2
PAD
PHRASE
1
PHRASE
2
FINGERING
m M
7
aug sus
4
dim
RHYTHM
2
L
R1
R2
REVERB
HARMONY
CHORUS
DSP
SYNC STOP
ONE TOUCH
SETTING
4
MELODY
3
MELODY
2
MELODY
1
MELODY
REGISTRATION
MULTI PAD
BEAT
GROOVE & DYNAMICS
TEMPO
TRANSPOSE
MEASURE
MEMORY
A
B
1
2
3
4
5
6
7
8
9
10
11
12
13
14
15
16
2
1
3
4
1
2
3
4
FREEZE
VOICE
DUAL
SPLIT
DISK
STYLE
SONG
ACMP/SONG
VOLUME
MULTI
EFFECT
DIGITAL EQ
001
00
1
100
116
00
0
001
001
001
001
001
001
001
001
001
001
001
001
001
001
001
001
n d
P i a n o
p 1
G r a
8 B e a t
P o
001
6
119
513
VARIATION
VOICE
STYLE
SONG
MENU
SUB MENU
1
2
3
4
5
6
7
8
9
– / NO
0
+
/ YES
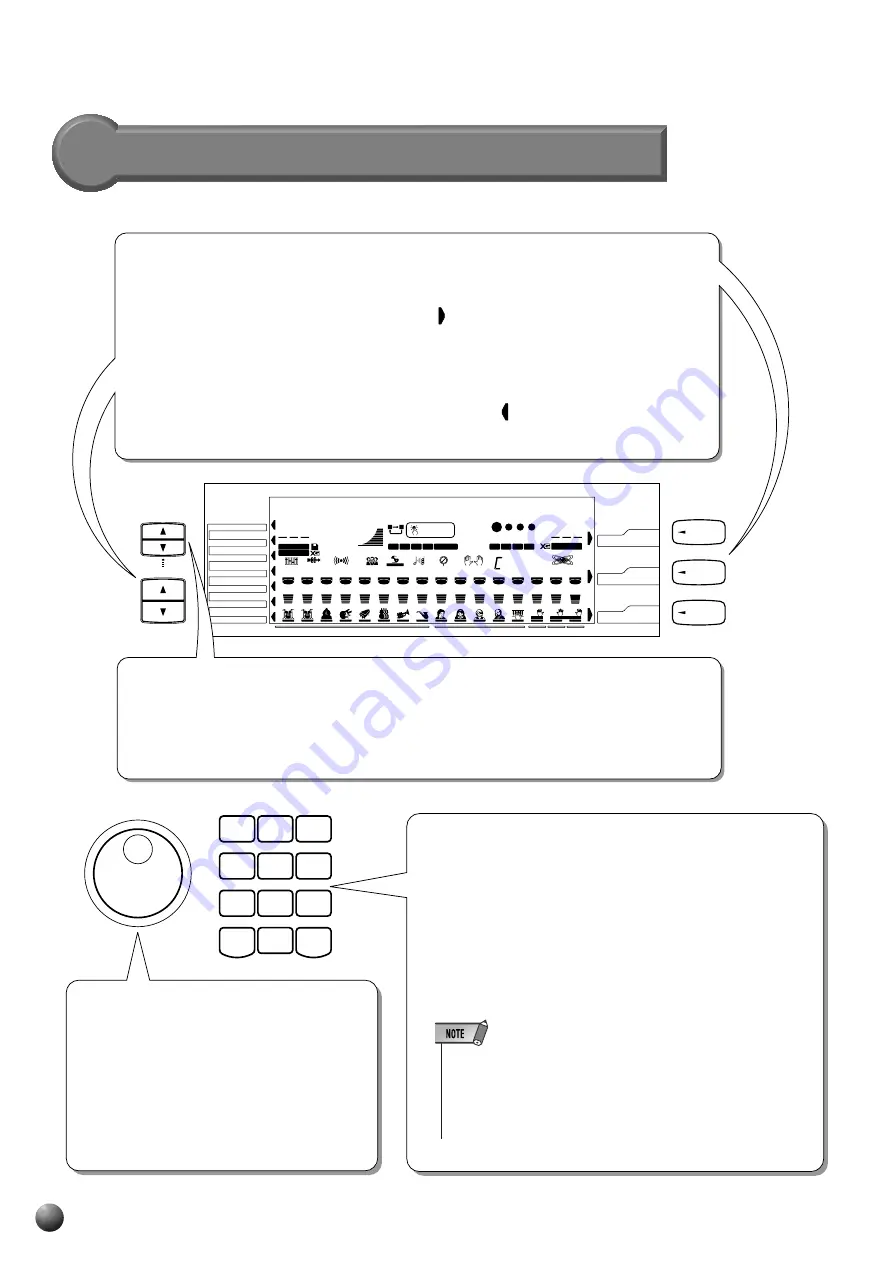
Basic Display Operation
The Menus
MENU
Main Menu Selection (VOICE/STYLE/SONG Buttons)
You can select one of the three main VOICE/STYLE/SONG menus by pressing the appropriate
button to the right of the display. The menu icon will move to indicate the menu you have
selected.
Selecting Other Menus (MENU [
▲
], [
▼
] Buttons)
You can select one of the seven “DISK” “MULTI PAD” “REGIST MEMORY” “MIDI” “DIGITAL
EFFECT” “OVERALL” “GROOVE & DYNAMICS” menus on the left of the display by pressing
the [
▲
], [
▼
] MENU buttons at the lower left. The menu icon will move to indicate the menu
you have selected.
SUB MENU Selection (SUB MENU [
▲
], [
▼
] Buttons)
You can select one of the sub menus within the selected menu by pressing the [
▲
], [
▼
] SUB
MENU buttons at the upper left of the display. At the top of the display, the MENU/SUB MENU
you selected will displayed on the left and the current setting or value for that item on the right.
Number Buttons [1]-[0], [+] (YES), [–] (NO) Buttons
The number buttons [1] – [0], [+],[–], are used to change
settings (values). Pressing the [+] button increases the dis-
played value by 1. Pressing the [–] button decreases it by 1.
Pressing and holding either button causes a continuous in-
crease or decrease. Pressing the [+] (YES) or [–] (NO) buttons
also switches between on and off settings. For items that have
initial default values, pressing the [+] and [–] buttons together
at the same time will return the setting to the initial value.
• When the value displayed is a number like a style number, press-
ing and holding either the [+] or [–] button will cause the number to
continue to the lowest value after the highest is reached or vice-
versa (...99
m
100
m
1
m
2..., ...2
m
1
m
100
m
99...). If the number dis-
played is a value like a transpose value, it will stop changing when
the maximum or minimum value is reached.
Dial
Like the number buttons [1]-[0], [+],[–], the
dial is used to change settings and values.
Rotating it to the right (clockwise) increases
the value, while rotating it to the left (counter-
clockwise) decreases it. The dial can also be
used to toggle on/off settings.


