3. Drain the fuel from the tank into a clean, sealable
container.
4. Position the tank so residual fuel will not spill
from the tank when the fuel valve is removed.
5. Remove each fuel valve screw and washer (B,
Figure 3
), and remove the valve and O-ring.
6. The packing and fuel valve seal are the only re-
placeable parts in the fuel valve. Replace the seals
as follows:
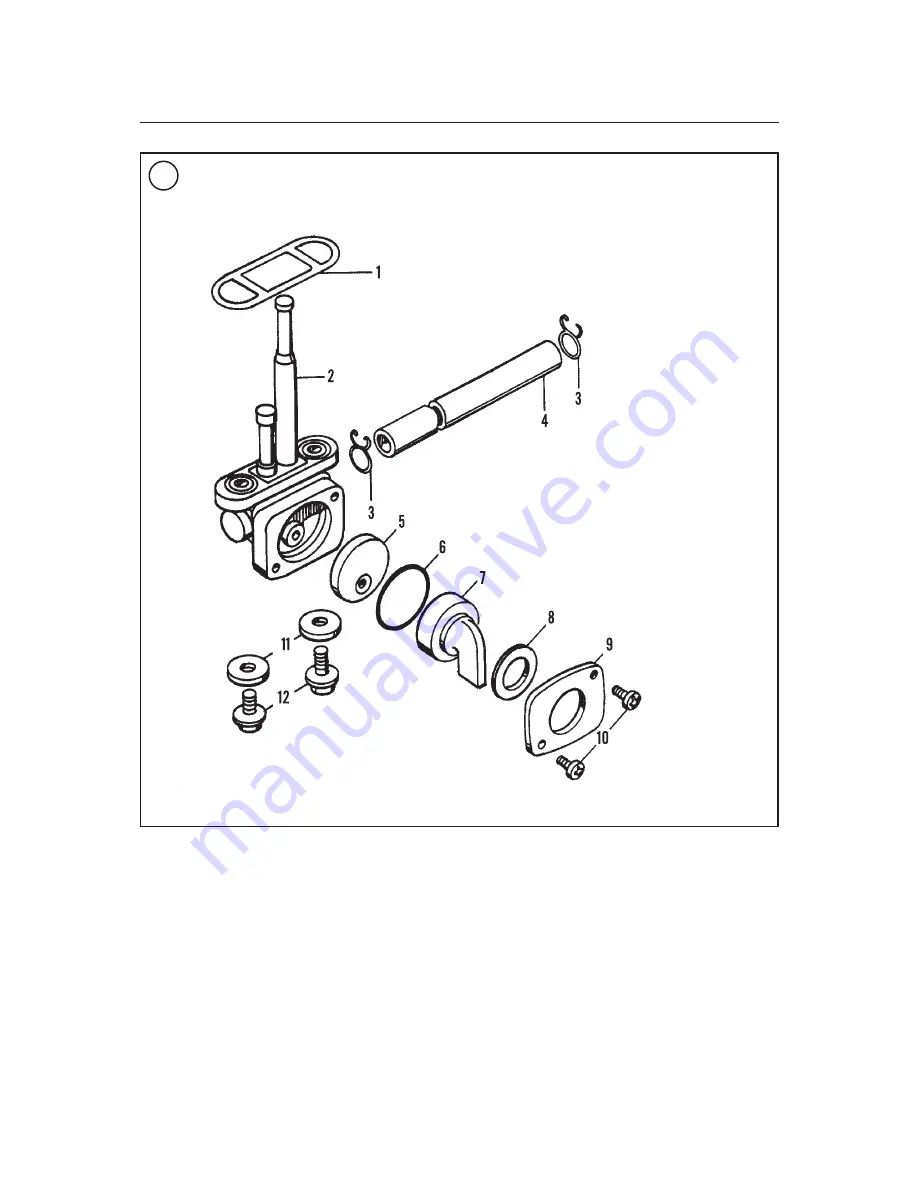
a. Remove the two pan head screws and disas-
semble the valve as shown in
Figure 8
.
b. Replace the packing or fuel valve seal.
c. Assemble the fuel valve by reversing these
disassembly steps.
7. Install the fuel valve by reversing these removal
steps. Note the following:
a. Install a new O-ring (1,
Figure 8
) during in-
stallation.
b. Tighten the fuel valve bolts (B,
Figure 3
) to 7
N•m (62 in.-lb.).
c. After installing the fuel valve, pour a small
amount of fuel into the tank and check for
206
CHAPTER EIGHT
8
FUEL VALVE
1. O-ring
2. Fuel valve body
3. Clamp
4. Fuel hose
5. Valve packing
6. Valve seal
7. Lever
8. Wave washer
9. Plate
10. Pan head screw
11. Washer
12. Screw


