45
CHAPTER
4
Recording
A song that you play on the Disklavier can be recorded in
the [User Library] and the recorded song can be easily
played back. Furthermore, you can select and exclusively
record the desired part.
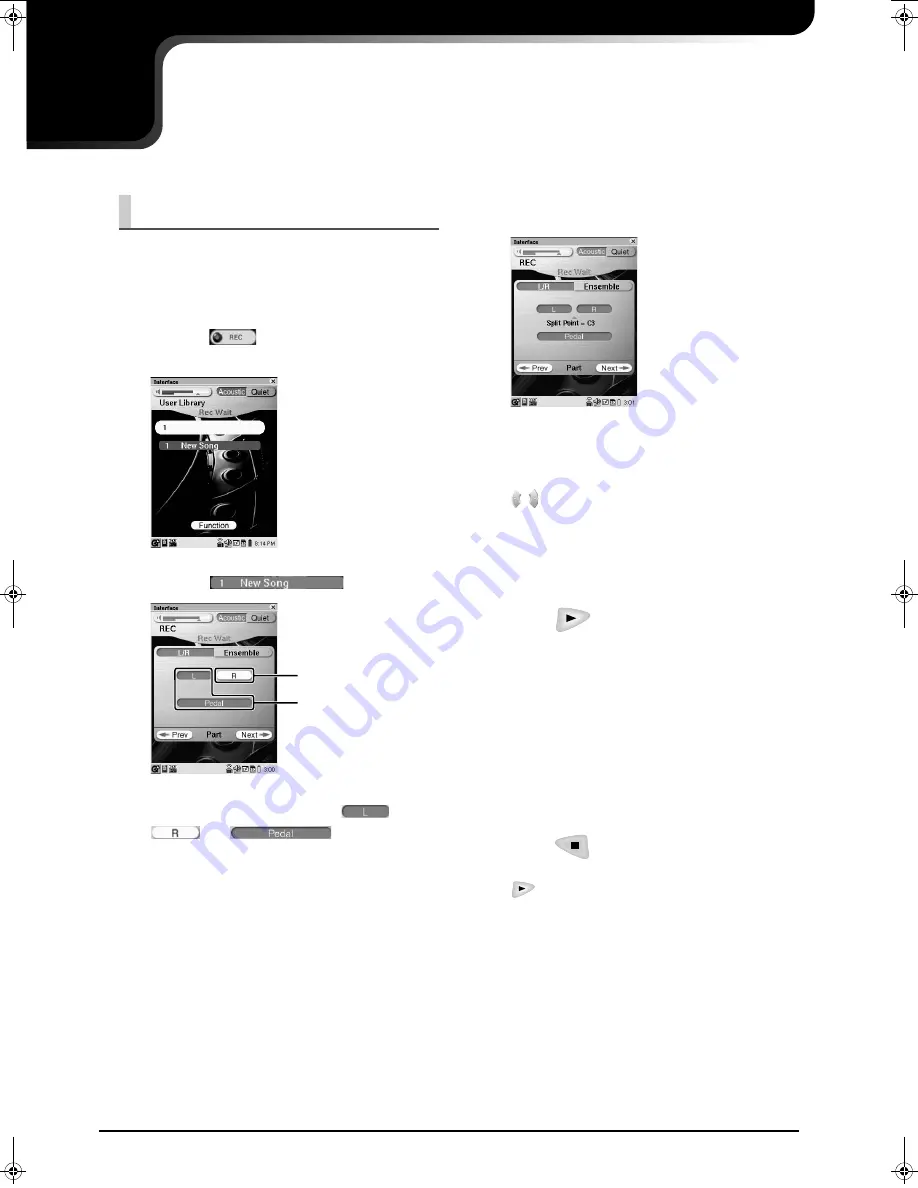
Recording a New Song
1
Tap on
in the [Main] screen.
A new song will be created automatically.
2
Tap on
.
3
Tap on the desired part (
,
, or
) to change its
setting (record or not).
Each time you tap on the part, its setting changes
alternately.
The red part will be
recorded.
The white part won’t
be recorded.
When you record both left- and right-
hand part,
go to step
4
.
When you record either left- or right-
hand part,
go to step
5
.
4
Tap on [Split Point], and then press
to select the desired note as the
split point.
The selected note and notes lower than that note are
assigned to the left-hand part, and the notes higher
than that are assigned to the right-hand part.
5
Press
to start, and then
immediately pause recording.
Note:
When the video synchronization is on
(
→
pg. 47 “Video Synchronized Recording”),
recording does not pause in this step.
6
Confirm that [Recording] appears in
the Information area, and then start
playing the Disklavier.
The Disklavier starts recording.
7
Press
to stop recording.
To play back the recorded song,
press
.
AdvancedManual.book Page 45 Friday, May 23, 2008 11:45 AM
Summary of Contents for disklavier Mark IV Series
Page 1: ......
Page 10: ...English ...


