


18
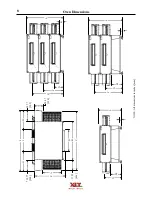
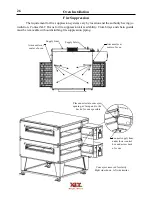
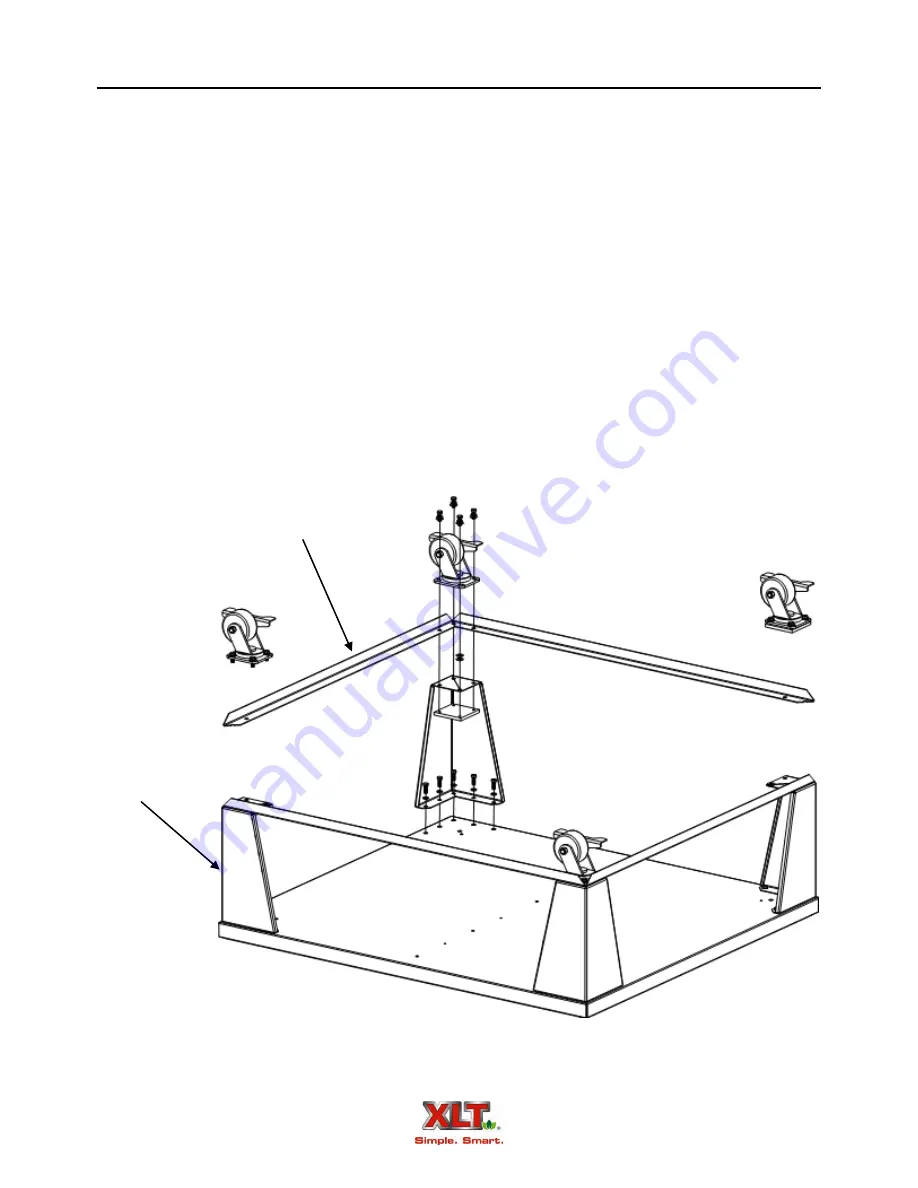
Oven Assembly
Leg Angle
Leg
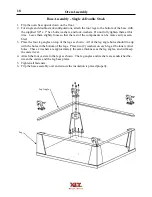
1. Flip the oven base upside down on the floor.
2. For single and double-stack configurations, attach the four legs to the bottom of the base with
the supplied 3/8" x 1" hex bolts, washers, and lock-washers. Do not fully tighten them at this
time. Leave them slightly loose so that the rest of the components can be more easily assem-
bled.
3. Place the four leg angles on top of the legs as shown. All of the leg angle holes should line up
with the holes in the bottom of the legs. Place two (2) washers on each leg at the inner corner
holes. These 2 washers are approximately the same thickness as the leg angles, and will keep
the caster level.
4. Attach the four casters to the legs as shown. The leg angles and washers are sandwiched be-
tween the casters and the leg base plates.
5. Tighten all fasteners.
6. Flip the base assembly over and ensure the insulation is placed properly.
Base Assembly - Single & Double Stack
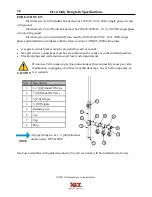
Summary of Contents for 1832-AE-B
Page 43: ...43 This page intentionally left blank ...
Page 88: ...This page intentionally left blank ...
Page 95: ...95 Oven Schematic 1832 2440 3240 3255 3855 Square Burner Standard ...
Page 96: ...96 Oven Schematic 1832 2440 3240 3255 3855 Square Burner World ...
Page 97: ...97 Oven Schematic 1832 2440 3240 3255 3855 Round Burner Australia ...
Page 98: ...98 Oven Schematic 3270 3870 Square Burner Standard RH Control Box ...
Page 99: ...99 3270 3870 Square Burner Standard LH Control Box Oven Schematic ...
Page 100: ...100 Oven Schematic 3270 3870 Square Burner World RH Control Box ...
Page 101: ...101 Oven Schematic 3270 3870 Square Burner World LH Control Box ...
Page 102: ...102 3270 3870 Round Burner Australia LH Control Box Oven Schematic ...
Page 103: ...103 Oven Schematic 3270 3870 Round Burner Australia RH Control Box ...
Page 104: ...104 Hood Schematic Standard ...
Page 105: ...105 Hood Schematic World ...


