


75
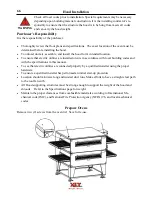
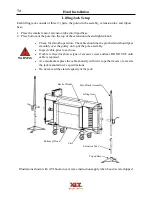
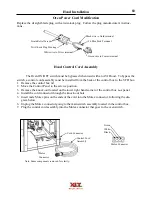
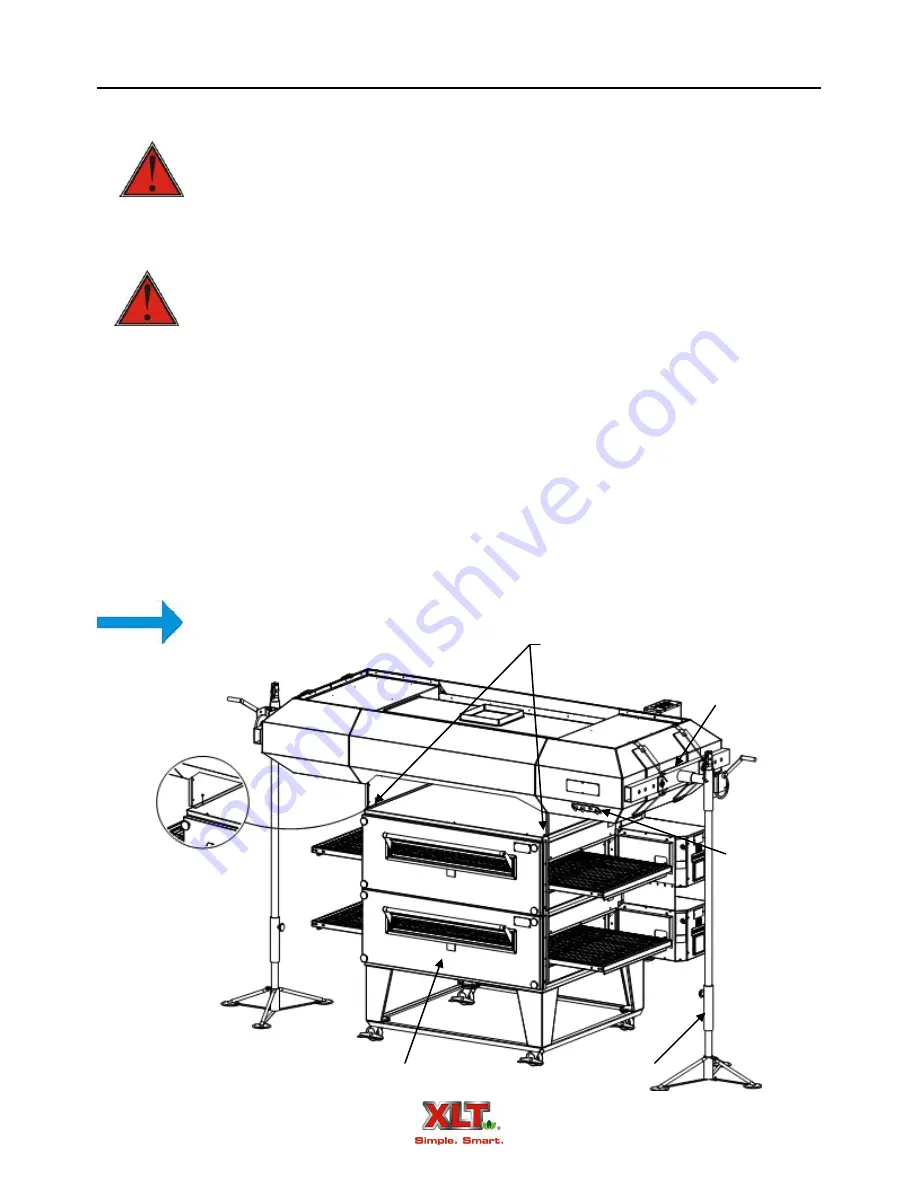
1. Fully insert the lifting jacks into the lifting gear assemblies attached to each end of the hood.
2. Raise the hood high enough to clear the cart or skid.
Failure to engage properly can result in damage, injury, or death from a falling
Hood.
WARNING
Both jacks should be raised in unison, otherwise they may bind and a dangerous
situation may develop.
Do not put any part of yourself under the hood at any time.
The hood is top heavy. Be careful!
WARNING
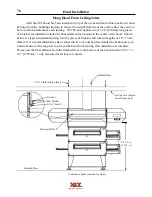
3. Remove the cart or skid.
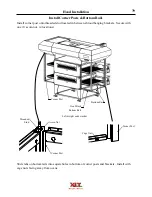
4. Rotate the hood as shown.
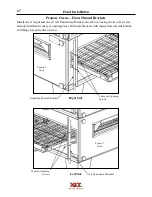
5. Raise the hood high enough to clear top oven.
6. Roll the oven stack underneath the hood.
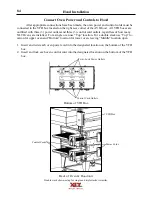
7. Lower the hood onto the ovens lining up the two (2) front screw holes in the inside filler panels
with the screw holes on oven lid.
8. Reinsert screws saved from previous step.
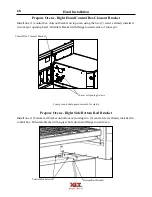
9. Remove lifting jacks and lifting gear from ends of hood
10. Move oven/hood stack into position.
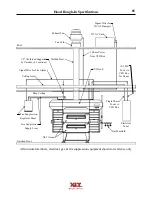
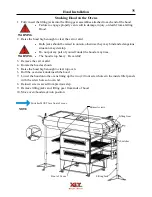
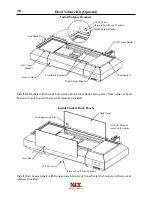
Stacking Hood on the Ovens
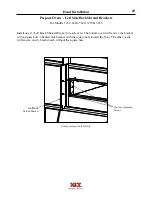
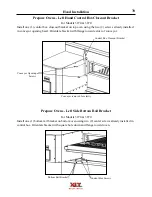
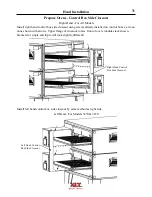
Hood Installation
Lifting Gear
Reinsert screws
Lifting Jack
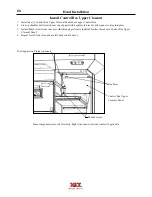
NOTE
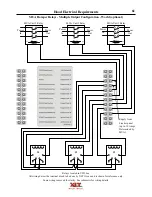
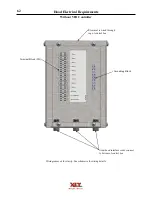
Switches MUST face front of ovens.
Front of Ovens
Switches
Summary of Contents for 1832-AE-B
Page 43: ...43 This page intentionally left blank ...
Page 88: ...This page intentionally left blank ...
Page 95: ...95 Oven Schematic 1832 2440 3240 3255 3855 Square Burner Standard ...
Page 96: ...96 Oven Schematic 1832 2440 3240 3255 3855 Square Burner World ...
Page 97: ...97 Oven Schematic 1832 2440 3240 3255 3855 Round Burner Australia ...
Page 98: ...98 Oven Schematic 3270 3870 Square Burner Standard RH Control Box ...
Page 99: ...99 3270 3870 Square Burner Standard LH Control Box Oven Schematic ...
Page 100: ...100 Oven Schematic 3270 3870 Square Burner World RH Control Box ...
Page 101: ...101 Oven Schematic 3270 3870 Square Burner World LH Control Box ...
Page 102: ...102 3270 3870 Round Burner Australia LH Control Box Oven Schematic ...
Page 103: ...103 Oven Schematic 3270 3870 Round Burner Australia RH Control Box ...
Page 104: ...104 Hood Schematic Standard ...
Page 105: ...105 Hood Schematic World ...


