


81
Front
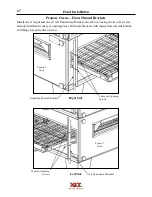
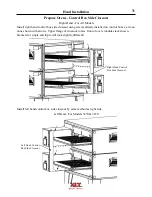
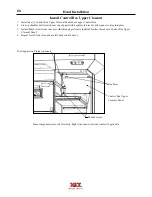
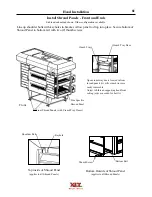
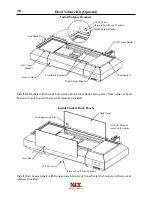
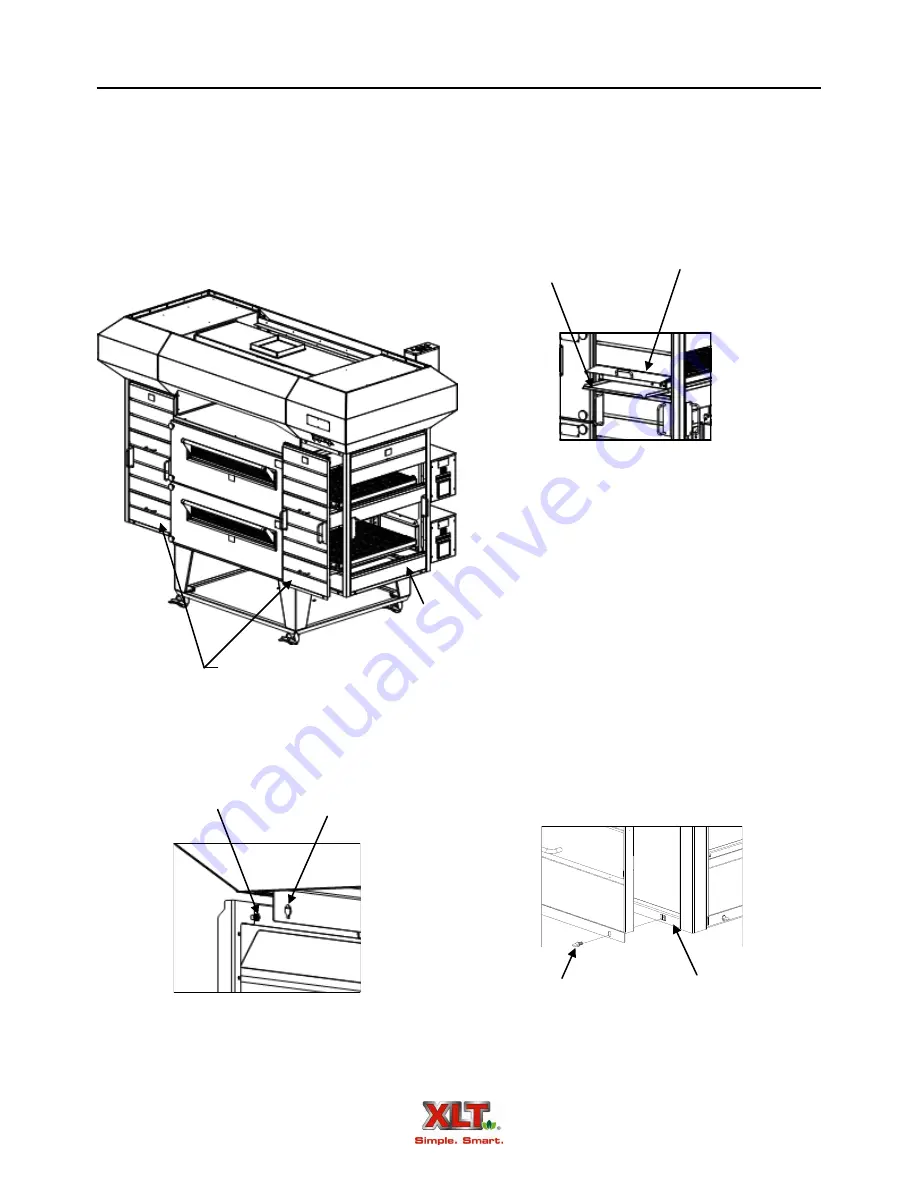
Front Shroud Panels (with Crumb Tray Doors)
Size Specific
Shroud Panel
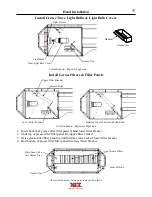
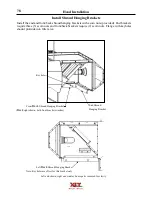
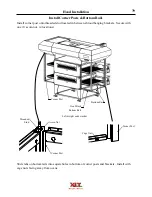
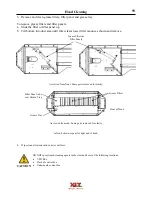
Hood Installation
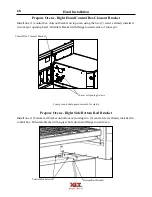
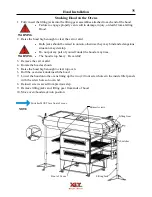
Line up shoulder bolts with keyholes in bracket. Allow panel to drop into place. Secure bottom of
Shroud Panel to bottom rail with two (2) thumb screws.
Keyhole
Shoulder Bolt
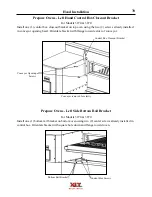
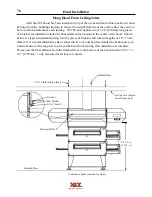
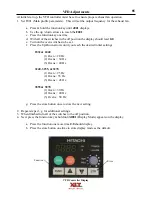
Open crumb tray doors located in front
shroud panels & verify crumb trays are
easily removable.
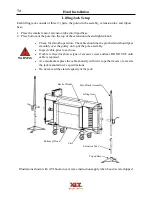
Adjust All-thread supporting hood from
ceiling joists as needed for best fit.
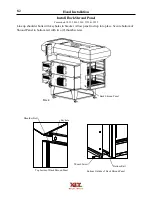
Install Shroud Panels - Front and Ends
End load/end unload shown. Other configurations available.
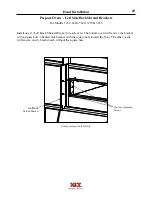
Top inside of Shroud Panel
(applies to all Shroud Panels)
Bottom Outside of Shroud Panel
(applies to all Shroud Panels)
Thumb Screw
Bottom Rail
Crumb Tray Door
Crumb Tray
Summary of Contents for 1832-AE-B
Page 43: ...43 This page intentionally left blank ...
Page 88: ...This page intentionally left blank ...
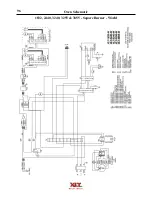
Page 95: ...95 Oven Schematic 1832 2440 3240 3255 3855 Square Burner Standard ...
Page 96: ...96 Oven Schematic 1832 2440 3240 3255 3855 Square Burner World ...
Page 97: ...97 Oven Schematic 1832 2440 3240 3255 3855 Round Burner Australia ...
Page 98: ...98 Oven Schematic 3270 3870 Square Burner Standard RH Control Box ...
Page 99: ...99 3270 3870 Square Burner Standard LH Control Box Oven Schematic ...
Page 100: ...100 Oven Schematic 3270 3870 Square Burner World RH Control Box ...
Page 101: ...101 Oven Schematic 3270 3870 Square Burner World LH Control Box ...
Page 102: ...102 3270 3870 Round Burner Australia LH Control Box Oven Schematic ...
Page 103: ...103 Oven Schematic 3270 3870 Round Burner Australia RH Control Box ...
Page 104: ...104 Hood Schematic Standard ...
Page 105: ...105 Hood Schematic World ...


