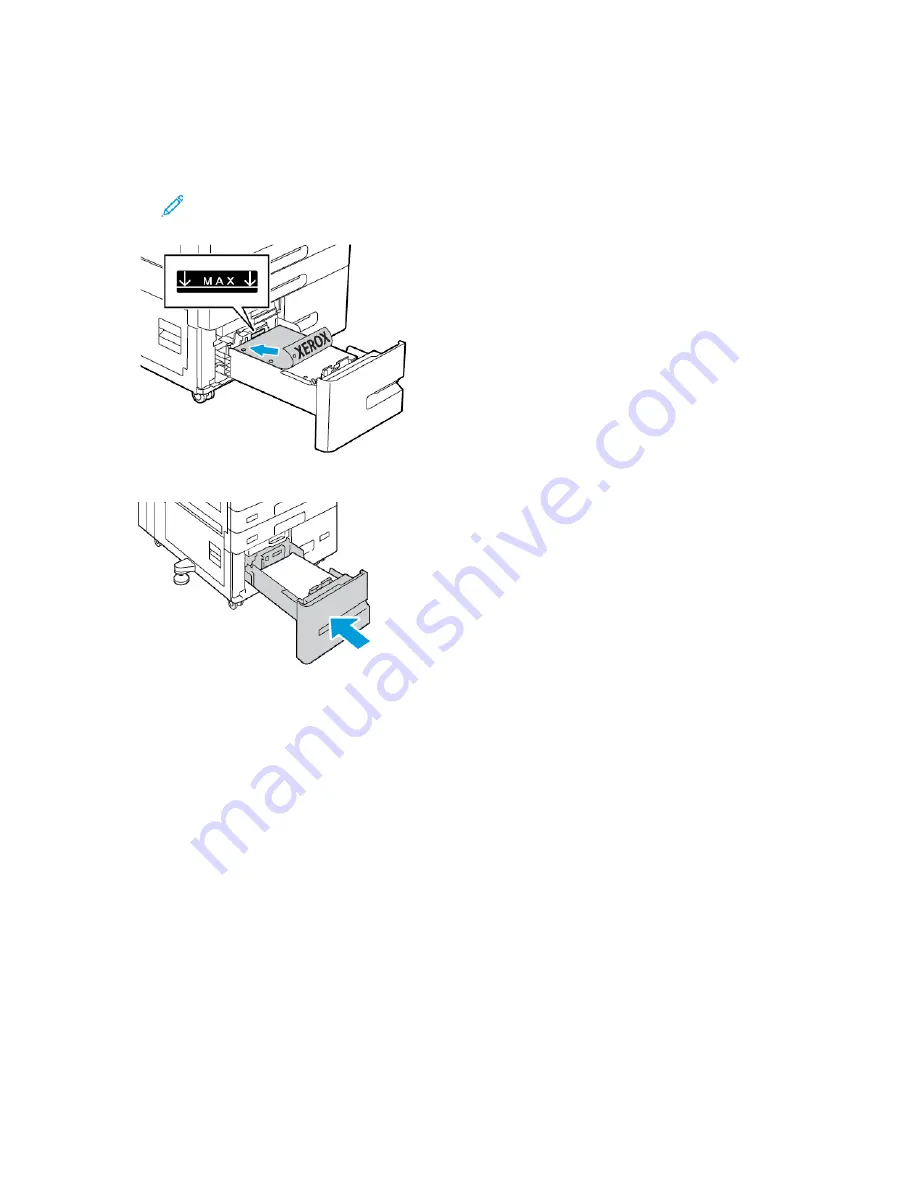
3. Stack the paper against the left-rear corner of the tray.
• Insert letterhead and pre-printed paper face down with the top edge toward the front of the
tray.
• Load hole-punched paper with the holes to the left.
Note:
Do not load the paper above the maximum fill line. Overfilling the tray can cause
paper jams.
4. Slide the tray back into the printer.
5. At the control panel, select the correct paper type and color.
• If letterhead paper is loaded in the printer, for type, select
Letterhead
.
• If pre-printed paper is loaded in the printer, for type, select
Pre-printed
.
6. To confirm the settings, touch
Confirm
.
196
Xerox
®
AltaLink
®
B81XX Series Multifunction Printer
User Guide
Summary of Contents for AltaLink B81 Series
Page 1: ...Version 1 0 May 2020 702P08206 Xerox AltaLink B81XX Series Multifunction Printer User Guide...
Page 20: ...20 Xerox AltaLink B81XX Series Multifunction Printer User Guide Safety...
Page 74: ...74 Xerox AltaLink B81XX Series Multifunction Printer User Guide Personalize...
Page 266: ...266 Xerox AltaLink B81XX Series Multifunction Printer User Guide Maintenance...
Page 362: ...362 Xerox AltaLink B81XX Series Multifunction Printer User Guide Specifications...
Page 388: ...388 Xerox AltaLink B81XX Series Multifunction Printer User Guide Product Symbols...
Page 390: ...Apps Features 390 Xerox AltaLink B81XX Series Multifunction Printer User Guide Apps Features...
Page 403: ......
Page 404: ......


