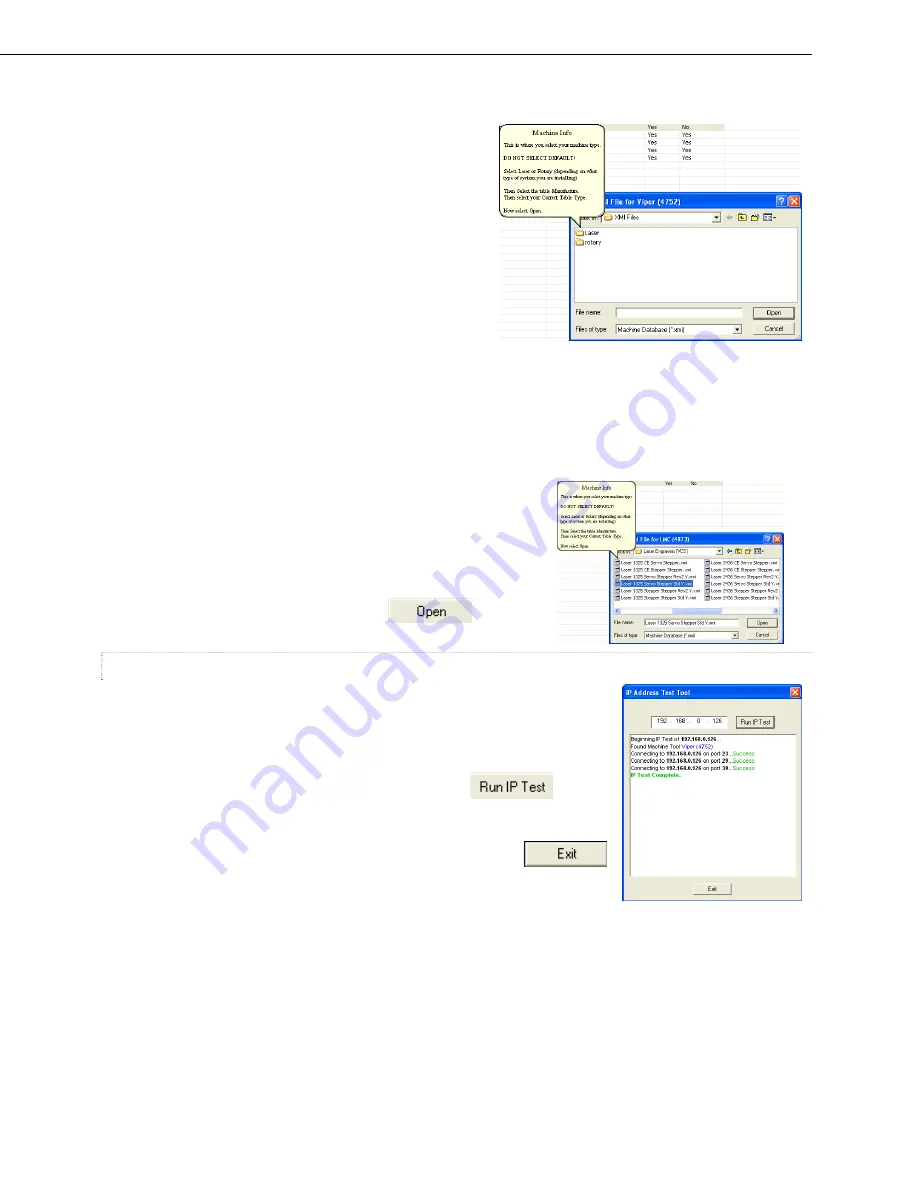
Now we need to set our machine type. Select the folder for
your type of system. In my case, I have a laser system so I
will open the laser folder.
On the next screen you will need to choose either the Color
Screen folder or the Monochrome Screen folder.
Do not
guess at which screen you have
. Loading the wrong
firmware can cause damage to the controller! Here is how to
determine which screen you currently have.
There are two types of monochrome screens. One is a green screen with dark blue/black lettering and the other is
blue screen with white lettering. If either of these matches the type of screen you have then you should choose
the monochrome screen folder.
If your screen is multicoloured (black background with blue menus and yellow text), then you have a color
touchscreen. If this is the case then you will choose the color screen folder.
Now select the file for your system. Each file is named after the
individual systems. For example, if you have a Xenetech 9x12 then you
would select the 912.xmi file. If you have a Xenetech 25x50, then you
would select the2550.xmi file. For me, I have an XLT 13x25 so I will
select the laser 1325 file.
Once you have selected the proper file, select
.
TESTING YOUR IP CONNECTION
Next, let’s check our connection and make sure that we are communicating with
the engraving system before we continue. To do this, right click on your
connection in the Connection Manager window and select Test IP.
This is the IP Address Test Tool. To begin, simply press the
button.
You will see that VCS attempts to establish a connection on each of the three
ports. It looks like everything is working fine thus far. Let’s click on
to move on.
Back at the Connection Manager window, the bubble says to close the Connection Manager window. So do that
now.


