Xenetech Duo 1218 Installation & Table Manual
19
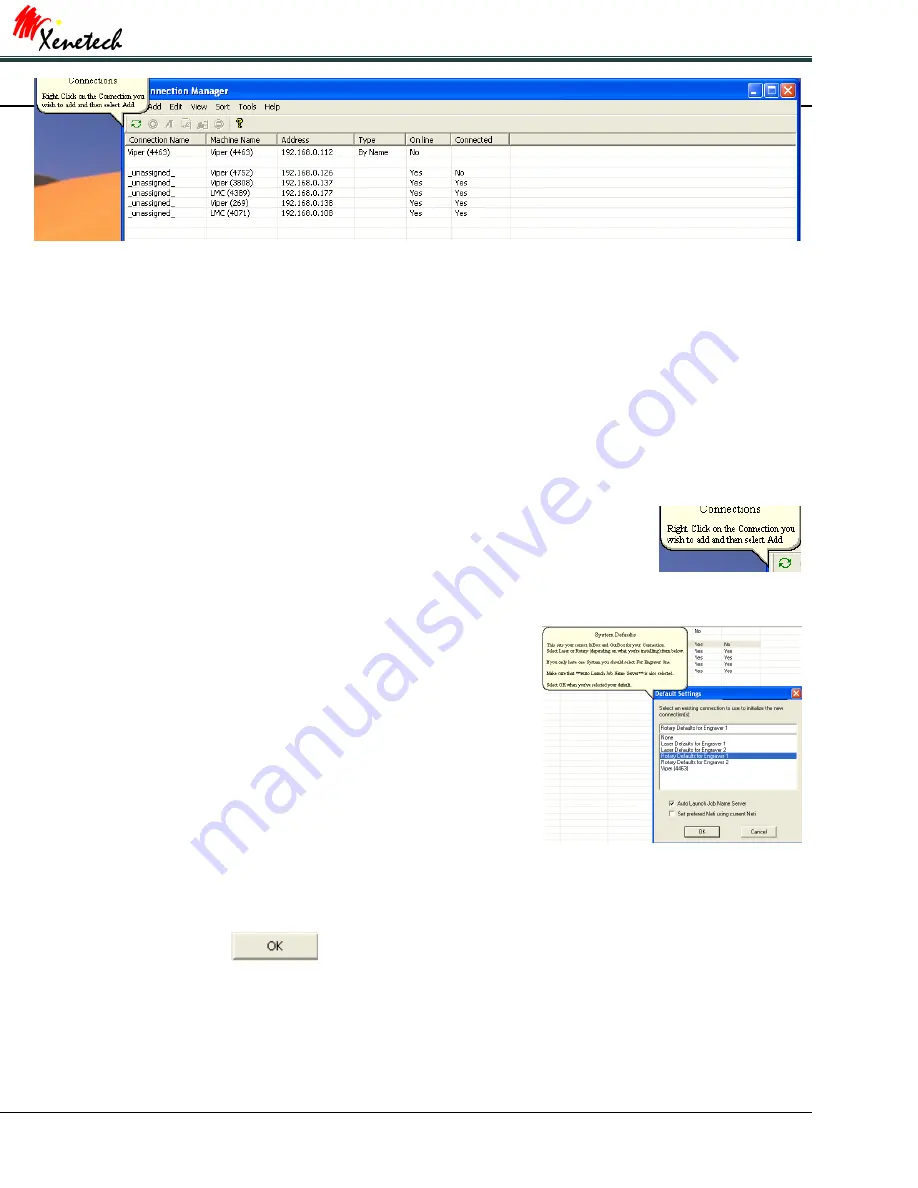
This is the Connection Manager screen. If your system is turned on and connected properly, you will see it here in
this window. If you have only one engraver then you will only see one connection on the screen. If you have
several Xenetech engraving systems then you might see something like what is shown above.
If you look at the
Machine Name
column, you will see two types of machine types, each followed by numbers.
Viper means a Xenetech Rotary systems and LMC represents a Xenetech Laser system. The four digit number after
represents the controller board serial number. So which connection is mine? If you look at your pendant for a
moment you will see tabs along the top of the screen. Touch the INFO tab. Now look about halfway down to the
line that reads:
CTRL: LC520R2 SN# (your specific controller board serial number will be displayed here)
Direct your attention to the top of the screen. The bubble will also instruct you on
what to do for each step as well.
Now I know that my controller board number is 4752, so I will set up a connection with
Viper (4752). So as the bubble says, right click on the connection and select
Add
.
The first thing we need to do is let VCS know if we are installing a
Laser System or a Rotary System. We also need to let VCS know if
this is the only engraver or not. So let’s determine it this way.
If this is your only system running VCS then you will select for
engraver 1.
If you have another system running VCS already, then you will select
engraver 2.
For this installation, I am setting up for XLT 13x25. This is a Laser
System and it is my only engraver using VCS, so I will select “Laser
Defaults for engraver 1”.
Also be sure to check the box that says “Auto Launch Job Name Server”.
When finished click


