COOKTOP REMOVAL
WARNING
Disconnect the product from the power source
before starting this procedure.
Remove the Cooktop
1
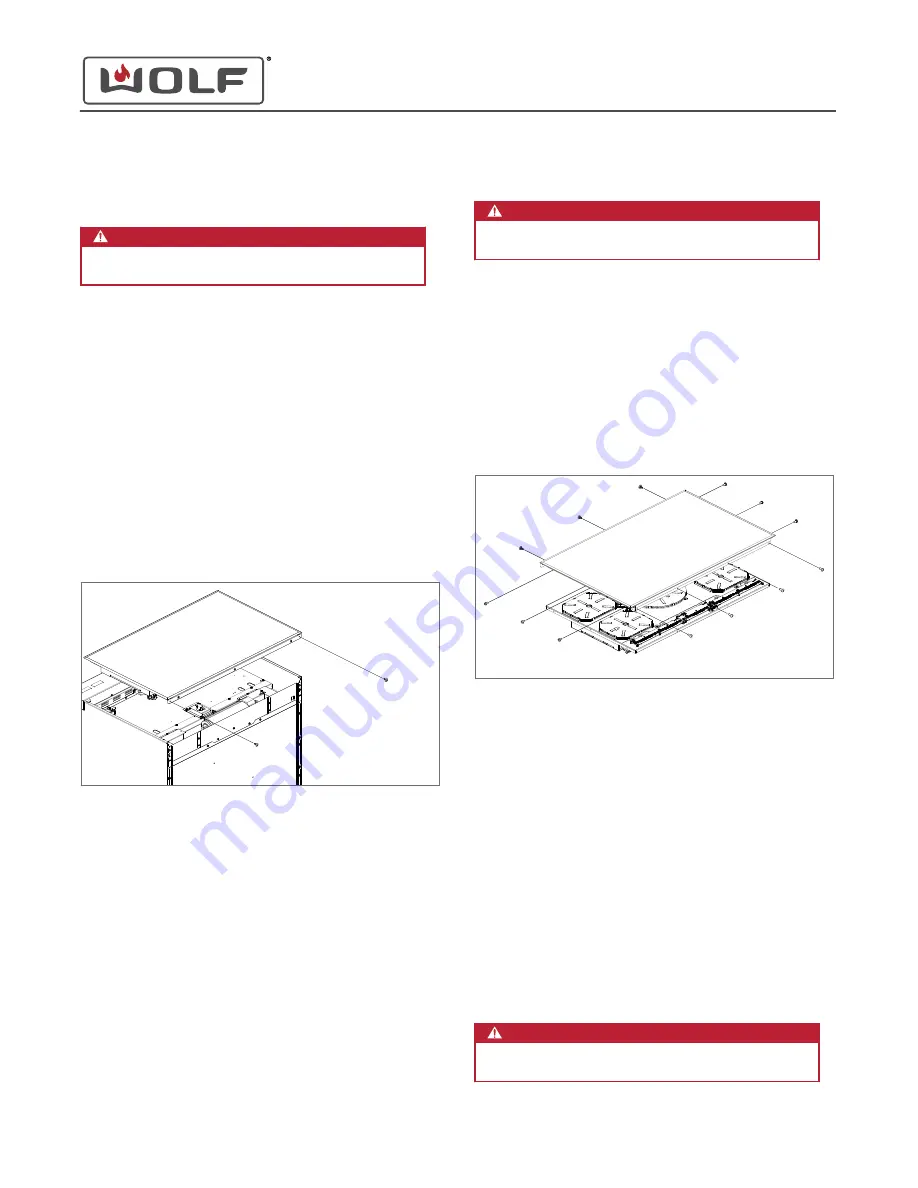
Use a T-20 Torx bit to remove the screws from the unit.
TIP: Suction cups on the glass are the best way to lift the
cooktop.
2
Lift the cooktop up and toward the rear of the unit. The front
of the cooktop has shoulder screws that are inserted into
keyholes on the back of the bullnose.
3
Set the cooktop on the unit.
4
Disconnect the wire harnesses from the cooktop.
5
Remove the cooktop from the unit and place it on a padded
surface.
COOKTOP INSTALLATION
Install the Cooktop
1
Place the cooktop on to the unit.
2
Connect the wire harnesses to the cooktop.
3
Insert the cooktop shoulder screws into the keyhole slots on
the back of the bullnose.
4
Set the cooktop into the unit frame.
5
Use a T-20 Torx bit to install the screws into the unit.
GLASS ASSEMBLY REMOVAL
WARNING
Disconnect the product from the power source
before starting this procedure.
To remove the glass assembly, first
. Then
remove:
1
Remove the Glass Assembly
1
Use a T-20 Torx bit to remove the screws from the glass
assembly.
2
Lift the glass assembly from the cooktop.
3
Remove the glass assembly from the cooktop.
GLASS ASSEMBLY INSTALLATION
After installing the glass assembly, install:
1
.
Install the Glass Assembly
1
Place the glass assembly onto the cooktop.
2
Use a T-20 Torx bit to install the screws into the glass
assembly.
PRIMARY OR SECONDARY CONTROL BOARD REMOVAL
WARNING
Disconnect the product from the power source
before starting this procedure.
30" and 36" Induction Range
Cooktop Component Removal and Installation
COOKTOP COMPONENT REMOVAL AND INSTALLATION
service.subzero.com
829191 REVA
46


